

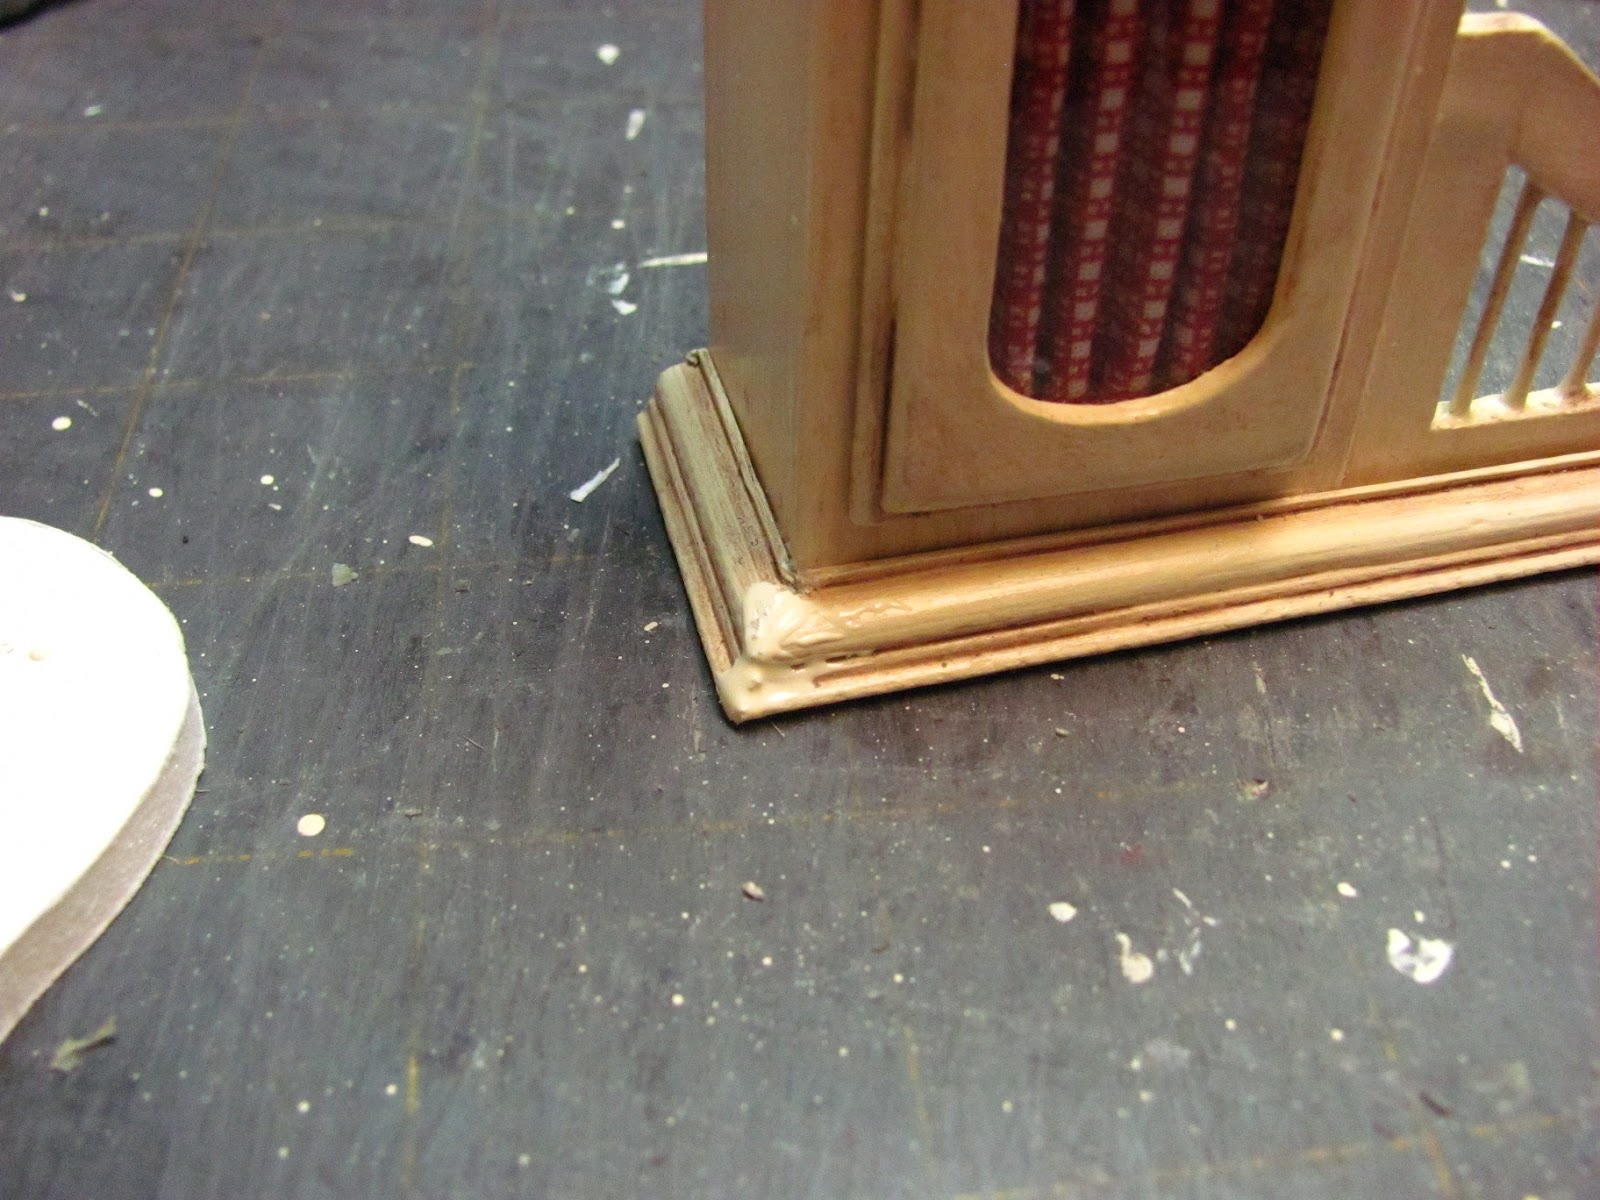
I wanted to show you another top. This piece is from the same kitchen, it's in the dining area. I found this full-size baker's rack in my Ethan Allen furniture catalog.

On this top I painted black first and splattered ivory, grey and a little dark red.

Pick a color to paint your cabinets. I mixed Delta's Ceramcoat Old Parchment with Magnolia White. It came out a light creamy yellow.
I want you to make a couple of sample boards. Cut them from scrap mat board. Do to them what you do to the cabinets. When it comes time to paint on the "antiquing" solution you will have something to play with first and get the hang of it.
I painted 3 coats of my base coat on the cabinet parts. I did this in one sitting. By the time I finished with all of the pieces the first piece was dry enough to apply another coat. Let dry a couple of hours after the 3 coats.
I sanded with 220 grit paper on all surfaces. I used a plastic clay tool to run over the grooves in the doors and corner posts to maintain the depth. You probably only need to do this once. The metal stylus made a dark line and I didn't want that.
After you've sanded and wiped off the surface paint it all again 2 or 3 times. Get a nice smooth surface. Let this dry a few hours or over night.

At this point I am going to explain what I did with my cabinets to antique the surface. This is just one way.
** I would like you to go back to "How to make a kitchen dresser from mat board" (this is in the listing of Things to Do on the left) and read about that finish. I refer to the section after the surface is dented with a rock. Between the two techniques I like the kitchen dresser the best. You don't have to paint on the acrylic varnish like I do here. You do have to use a water base stain, wipe off and buff with a piece of crumpled brown paper bag. You might want to review this tutorial before you choose the technique to use. Of course, you might have your own favorite way of antiquing, too.
Back to this tutorial. Sand lightly using 220 grit or finer. Wipe off the dust. I used Delta's PermEnamel Satin Glaze, you can use your acrylic finish, to paint an smooth coat on the cabinet parts.
Sand this coat, lightly, wipe off the dust. Apply another coat. Let dry.
Now, for the antiquing. This is where the extra mat board sample boards come in. You can try out what you have on hand and see what looks good to you and is easy for you to do. Try out different browns to see which color looks best on your base coat. If you don't have acrylic thinner, use glazing medium.

O.K. My notes from years ago say I used Folk Art Artist's Pigment Burnt Umber and lots of acrylic thinner. Well, Duh Kris, that stuff is super thick. We want a thin consistency, we are going to wipe it off leaving a little behind.

By applying a coat of varnish on the surface we are able to wipe off the antiquing solution.
Try things out. When you get something you like, finish the cabinets with it.
I am adding a lot of acrylic thinner to my burnt umber, painting it on and wiping it off with a piece of old "T" shirt. The tricky part is painting a large space like the front of the bottom cabinet. You don't want the antiquing solution to dry, keep it wet.

When you have all of your parts finished let them dry for 24 hours. You really need to do this or you will loosen the antiquing solution with the next step.

After 24 hours I waxed the surfaces with Finishing Wax by Minwax. Look in the stain department for a finishing wax, mine is liquid but I think paste would work just as well.
Apply the wax and buff off with a piece of an old "T" shirt.

Glue the door and drawer fronts to the front of the bottom cabinet.

Starting to look like something, isn't it?

Glue the sink in and the counter top on.
If you clamp, remember this is mat board, don't clamp too tightly. Put pieces of mat board onto the top so the clamps won't leave impressions in the counter top.

For the "glass" in the cabinet doors I use 1/16" thick acrylic. I buy a poster frame from Wal-Mart, the acrylic in the frame is perfect and the big piece lasts me a long time. I use my craft knife to score and cut the acrylic.

**You can leave the curtains out and glue in shelves if you want to. Load the shelves before gluing the doors onto the upper cabinets.**
This didn't come to me until I received my "Miniature Collector" for March 2012. If you have a Pretty Pleater, 1/2 scale use it.
I wanted something for miniaturists that didn't have one of those.
Back to the article. On page 22 a picture shows pretty curtains in a valance. The curtains are folded in a way that shows the lining. The caption says that Sandra Whipple, (the article is about her) sandwiches aluminum foil between the layers of fabric to keep the folds. How cool is that!?
That gave me an idea for this project. Our little curtains are just gathered, nothing fancy, and of course you could get your needle and thread out and still do that. I avoid a needle and thread as much as possible. I used to sew every day, all day years ago. I loved doing it, would never think that I would avoid it, but I do.
I'm showing how to make a small pleater you can use the aluminum foiled fabric with. You can use the foiled fabric with the Pretty Pleater, too. This is for those who don't have a pleater. You can make this larger by lengthening the strips of mat board.
Cut a piece of mat board a little larger than the door.

I measured my 1/2 scale Pretty Pleater and the ribs are 3/32" apart and 1/8" tall.
Cut strips of mat board 1/8" wide.
Glue to the mat board on a straight line.

Measure from that strip 3/32" and draw a line.
Glue on another strip of mat board.
Measure again and draw another line.

Eight strips should be enough for the door.
Try to cut the strips all the same width and even. If you don't you will have a hard time keeping the fabric straight when you start to pleat.
Let this dry.
With this being made from mat board I wouldn't use it with a steam iron. If you are careful I think you could use a dry iron with it. Don't use any sprays, either. Using an iron with this pleater place the fabric wrong side up. Press the fabric into the ribs using plastic credit cards. Use iron on interfacing to secure the pleats.

Here's your pleater.

Apply glue stick to the aluminum foil and glue to the fabric.
A 3" long piece should do.
Make it wide enough to fit into the cabinet hole.

Walk the credit cards across the ribs. Keep one credit card in a rib while you press the fabric into the next rib with the other credit card. Hold the first credit card tightly, don't let the fabric slip out. Continue this until you've reached the end of the pleater.

Glue narrow strips of fabric to the top and bottom of the pleats to secure them.

There's our little curtain.

Glue the curtain onto the door.

Glue the door onto the cabinet.

Look'in good!

The handles are made from 26 gauge paddle wire. Cut a piece, fold in half and twist together.
Paint the twisted wire black.

The escutcheons, (big word, huh?) are made from card stock diamonds. If you have a punch, use it.
If not you can draw diamonds onto card stock. My scrap measures 3-1/16" x 1-3/4". The length and width makes a difference in the elongation of the diamond.
I drew an X from each corner. This measured 3/32" between each line. Cut the diamonds with your craft knife.

We are going to make a form to bend the wire handle on.
Cut 4 pieces of mat board 1/4" wide. You change this width if you want. This is how long the handles will be.

Glue these strips together.

Bend the twisted wire around the form.

Trim the extra wire off even with the form.

Wrap tape around a scrap of mat board so that the sticky side is up. Put your diamonds onto this tape and paint them black. Be sure you get the edges, too.
Again, if you have a diamond punch and black card stock, use them.
I had to paint my handles, I didn't paint the wire before I cut the handles.

Peirce a hole into the center of the diamonds. Make sure the hole is big enough for the wire to go through.

Measure, mark and drill holes for the handles.

Glue the diamonds on.

Push the handles into the hole.
You don't have to glue the wire in.

We're getting there.

I want you to drill holes into the sides of the valance for toothpicks.
We are going to dowel the valance to the upper cabinets. This will hold much better that butt gluing.

Glue short pieces of toothpick into the hole with the points sticking out.
Press the points of the toothpicks into the side of the upper cabinet to mark where the holes need to be drilled.
Drill the holes into the upper cabinets and glue the valance to them.

The valance in now held securely between the upper cabinets.

I have a mitre saw to cut the mitres with. I don't know of any substitute for this.
Measure, mark and cut the crown mould for the upper cabinets.
If you have gaps fill with paint mixed with glue. Sand smooth and touch up with base coat and a little thinned brown paint. Wipe a little wax on and buff off and you're done.

We all have gaps!

Not much to do, now.

I used 18 gauge cover wire for the faucet. If you have a smooth wire and it looks to be the right size use it.
I glued together 3 pieces of mat board 1/4" wide and drilled a hole and glued the wire into the hole.
From the top of the curve to the top of the mat board it's 1-1/4".

A word about faucets. Go to Google Images and Google kitchen faucets. You will find many styles to choose from if you don't like the one I have here.
I have sanded the mat board and painted a layer of yellow glue onto everything to seal.

At the top of the picture I have a toothpick that has been filed and sanded to shape.
In the middle I have a decorative toothpick. See the little handle off to the upper right. That is made from the decorative toothpick. You can use this, but I thought it was too small so I used the one I shaped with the file.
I did use part of the decorative toothpick for the part of the faucet coming from the mat board. I carefully drilled a hole in the "bead", that's the rounded part that sticks out from the rest of the toothpick. I glued my handle into the hole.

This is my faucet. Look on line for ones that you like and you think you can make. Or you can buy miniature faucets, too.
I've drilled a hole into the bottom of the mat board for a toothpick to dowel the faucet into the counter top.

From paper I've cut narrow strips and glued them onto the end of the faucet and at the bottom of the part coming from the counter top.
In later pictures you will see that I also glued a narrow strip of paper to the faucet at the top of the mat board.

I forgot to tell you to measure, mark and drill a hole in your counter top for the dowel.

I painted gesso over the wire and mat board to make it look smoother.

If you want to make a drain pipe from card stock go ahead.
I used two paper punches to punch a ring for the drain hole in the sink. I punched this from card stock and punched 4 of them and glued them together.

I've glued the drain pipe in. This isn't really necessary, but I did it anyway.

I painted the inside of the drain pipe silver and painted the ring silver, too.
I've glue the ring onto the sink. Paint around the inside of the hole, too.

I cut from card stock the strainer and glued it into the drain. I will paint it silver.

I bet you thought I forgot about the toe kick. I did.
Cut from mat board a piece to fit inside at the bottom of the bottom cabinet.
Paint it black.
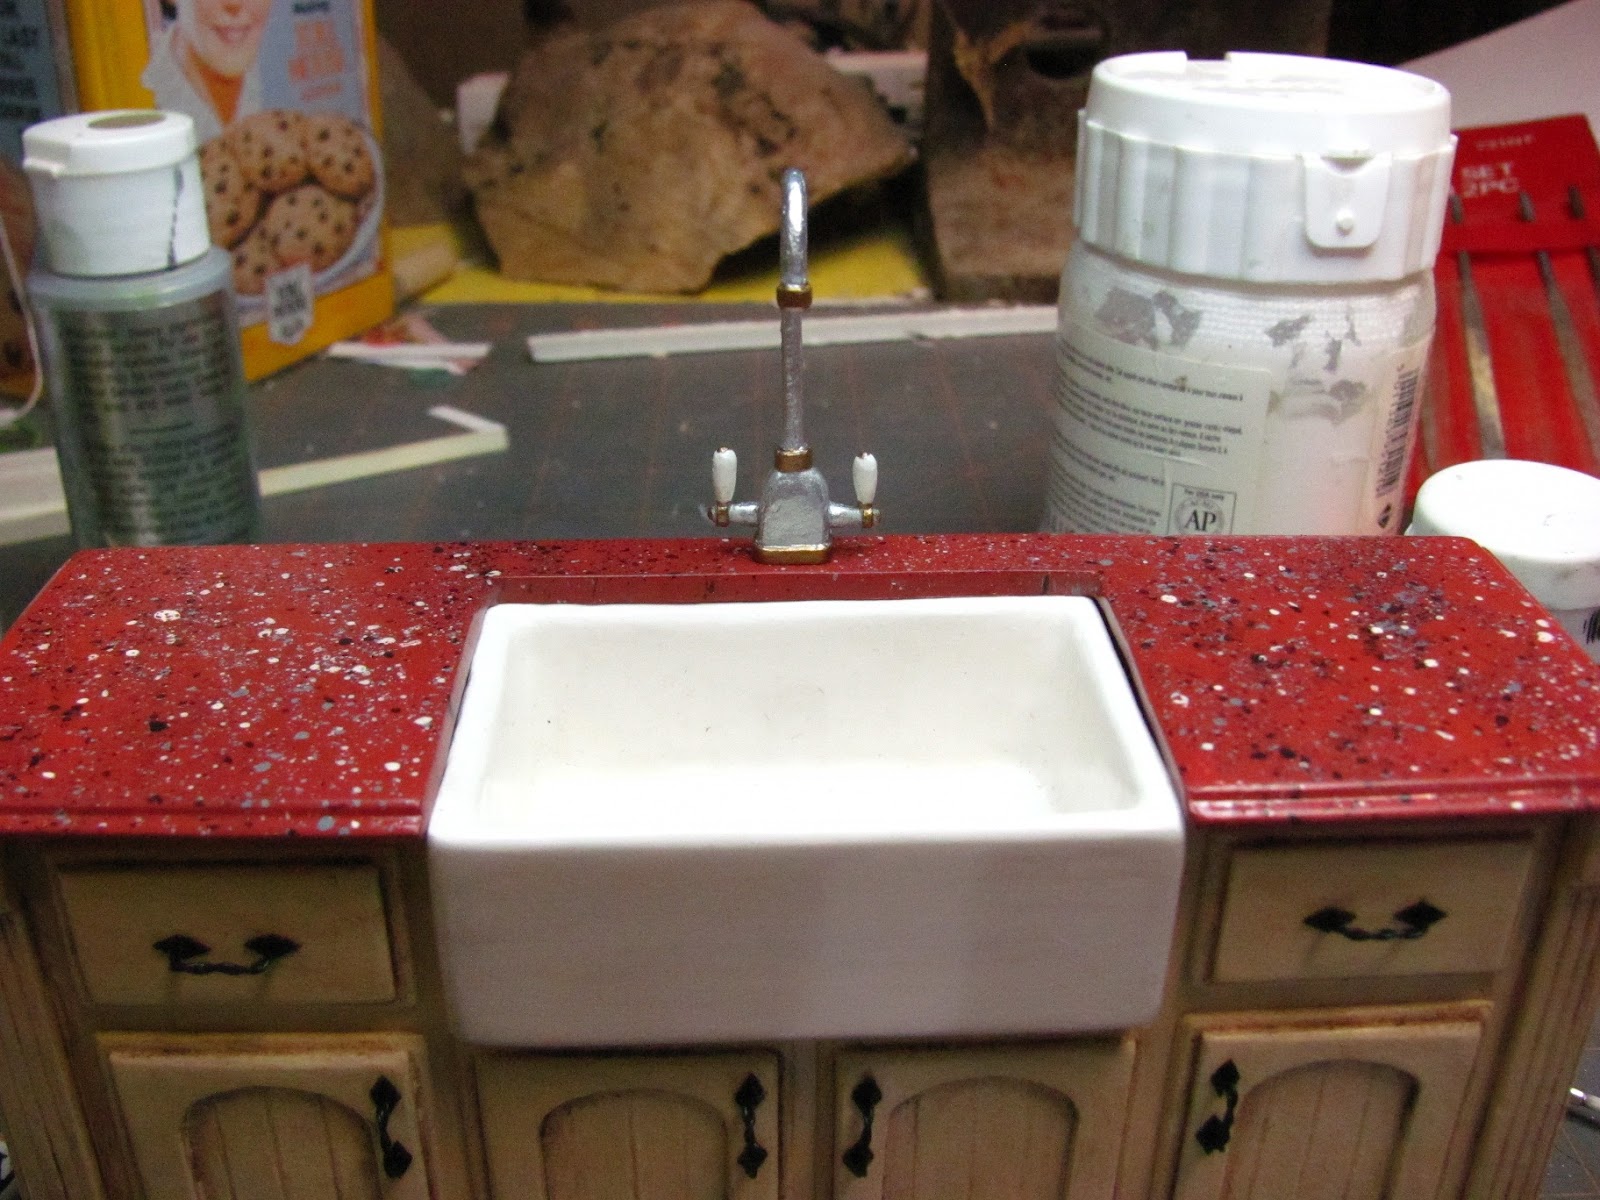
I've painted my faucet and placed it into my counter top.

And who says you can't make fancy cabinets from mat board. You can make that kitchen you have always dreamed about. Get on Google and Google up designer kitchens and take your pick. I really hope to get some e-mails with pictures of your kitchens! All it takes is time, go slowly, have patience and you can do this.
Have fun, expand on it, make it better, just keep making minis !!