

I'm late, I'm late for a very important date! I missed the 20th of the month this time and I am sorry.
I made a wall hung dish rack for the tutorial this time.
You could adjust the pattern to just have the dish part and leave the faux drawers and shelf off for a simple dish rack, too.

This is the bottom faux drawer section.
Cut from mat board scraps:
Top: 1 inch x 2 7/8 inch
Front: 1/2 inch x 2 3/4 inch
Sides: 1/2 inch x 7/ 8 inch
Bottom: 7/8 inch x 2 5/8 inch

I am going to use yellow carpenter's wood glue.
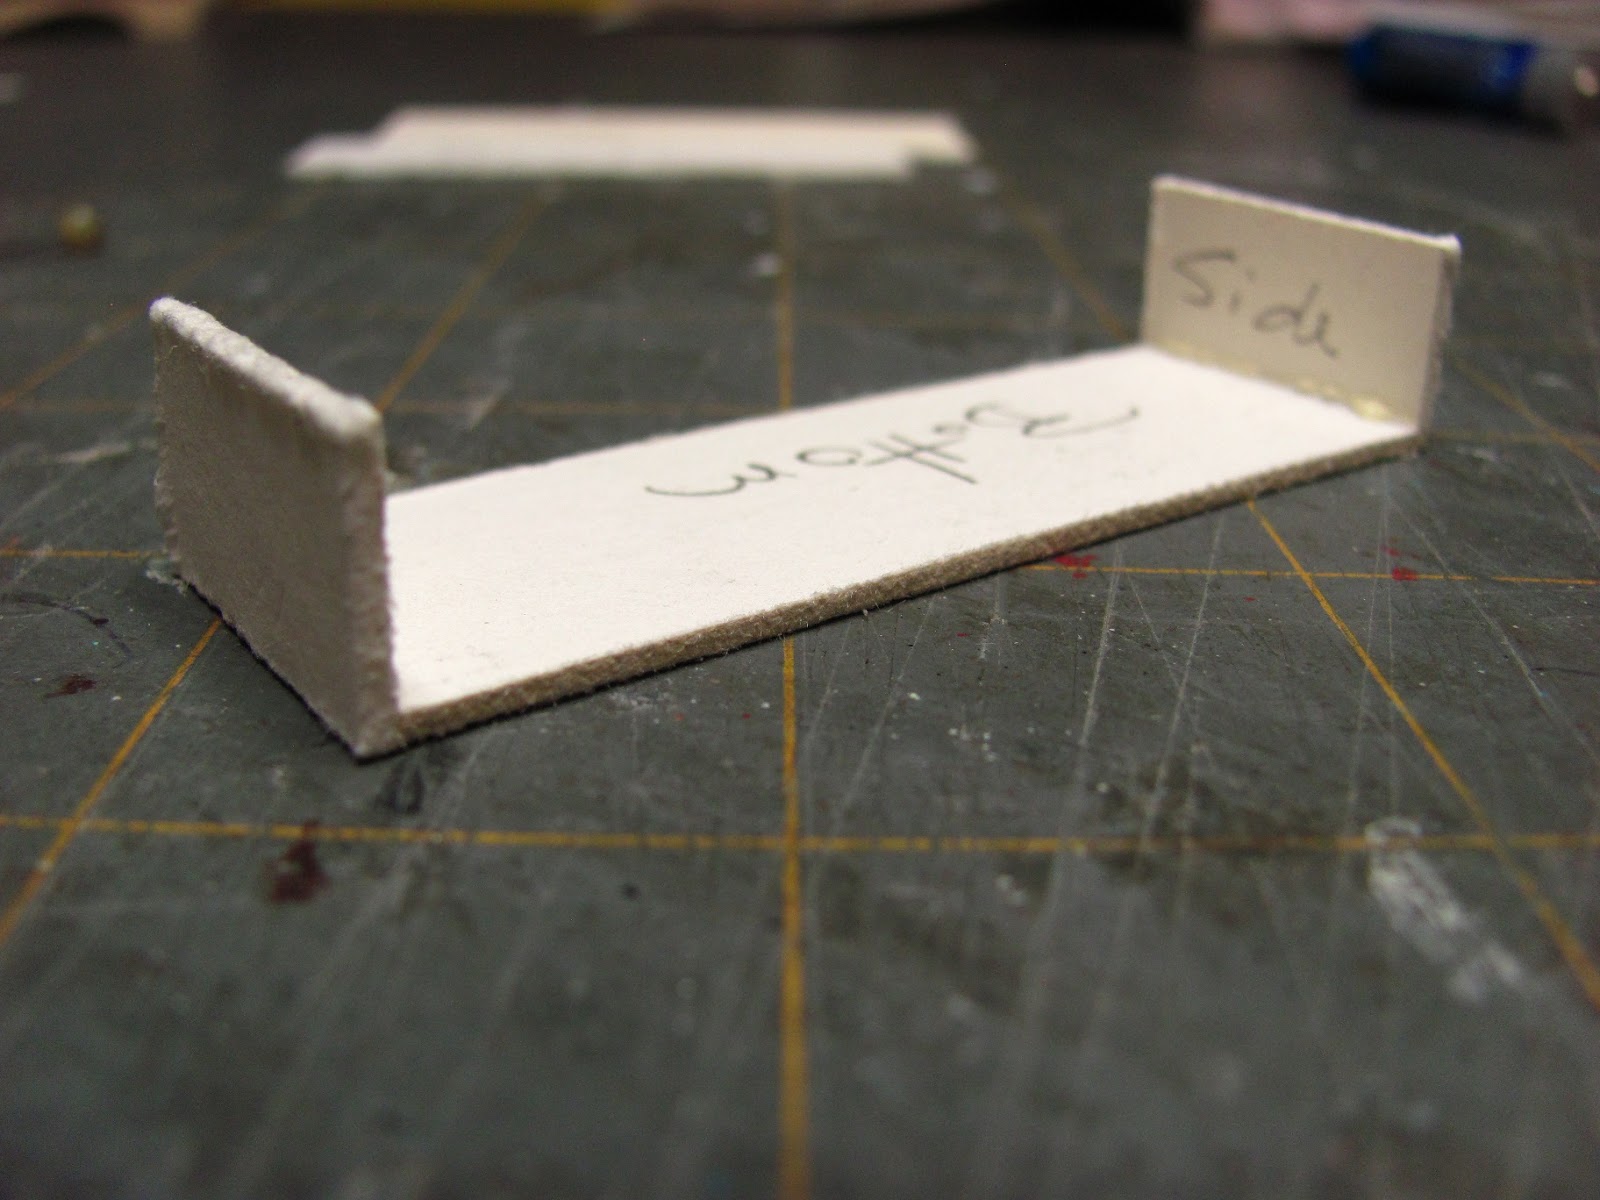
Glue the sides to the edge of the bottom. Glue to the short ends of the bottom.

Glue the front to the edge of the sides and the bottom.

Sand using 220 grit sand paper one long side and the two short sides of the top. Just round off the top edge and create a quarter round edge. Do you see the profile on the corner on the left side of the top?
Leave the last long side un-sanded, this is the back.

Glue the top to the sides and front. The top is centered with extra over the sides and front. The back is even with the sides and bottom.

I put in a back, this is optional.
I measured the opening, 7/16 inch x 2 5/8 inch.
I glued this into the back opening.
Set this aside for now.


These are the parts for the upper cabinet.
Trace using Nancy's pattern the two sides.
The rest is:
Top: 1/2 inch x 2 1/2 inch
Shelf: 7/16 inch x 2 1/2 inch
Cut 4 pieces that are 1/8 inch wide and 2 1/2 inch long.
I show 2 now but you will use 4.

Glue two pieces of the 1/8 inch wide mat board together.

The two pieces are glued.

Measure and mark the middle of the this strip, 1 1/4 inch.
Measure and mark 7/32 inch across the strip. There should be 11 marks.
I am sorry to use the 32nds but I had a plate with a thick bottom and I wanted to be able to place just about any plate in the rack. A 1/4 inch was just too big and 3/16 inch was too small.
Pierce the surface of the mat board with a "T" pin on your marks.

Instead of dowels I am going to use green paddle wire, 28 gauge. I buy this a Michaels.
Cut the wire at 1 1/8 inch long. You will need at least 11 pieces, I would cut a couple of extra.
It's important that these wires are equal length.

This is a pin vise with drill bits stored in the handle. Hobby Builders calls it a Mini Drill #37800, $12.49. This was one of the first tools I bought and still use it today.
Choose a bit that is the size of the wire and drill through the mat board in the holes you just pierced with the "T" pin.
I did use a piece of mat board to drill into, it's on the right. I took the strip off for the picture.

Set another strip of 1/8 mat board along side the one you just drilled holes into.
Make marks on the second strip between the holes.

I have my marks made.
I will use my craft knife to slice on these marks.
Go as close to the other edge without cutting the strip in half.

After experimenting I found that using scissors to complete the cutting worked very well.
I would make a diagonal cut with the scissors to the bottom of the slice I made with the craft knife. I would then make another diagonal cut the opposite direction to complete the "V".

From card stock cut a piece 7/8 inch x 2 5/8 inch.

Glue one side on top of the card stock on one short end.
Repeat for the other side.

Glue the two piece mat board with the holes between the sides at the front. The front has the slanted part on it.

Measure from the front edge 1/2 inch and mark on each side.

Cut a strip of card stock 1/8 wide to cover the front of the doubled mat board.

Glue the strip on and cut off the extra.

Glue the strip of mat board with the "V" cuts onto the bottom between the sides at the marks you made earlier.

Apply glue into the holes.

Set the wires into the holes.

Get the last piece of 1/8 inch wide mat board and mark the center, 1 1/4 inch. Measure 7/32 inch between each hole just like you did before.
Pierce holes on your marks. Turn the mat board over and pierce through again.

You won't have to drill on this single layer of mat board.

Find your shelf, it will be narrower than the top.
Glue this strip in the middle of the shelf.

Apply glue into the holes and slide the wires into the holes.
If the wires are equal in length this won't be too hard to do.
Please let this dry a couple of hours before you go on.

I measured and marked 1 1/8 from the bottom. This is where the shelf will be glued.
Set this assembly aside.

Trace Nancy's pattern for the scalloped topper for the cabinet onto mat board and cut out.

O.K., what I want you to do is to bend the wires back and straighten or level out the shelf all at the same time.
This is a good idea, the glue held the wires but the shelf peeled off. That's all right, I continued to bend the top wires with the 1/8 inch strip until it was level.
I re-glued the shelf on. No problem because I could see where it was before. I held it all together with small clamps.

I applied glue to the sides and glued the shelf on the marks I made earlier.
The shelf is even with the front of the cabinet. The shelf sets in at the back by 1/16 inch. The leaves room for the back to be glued in.

Glue the scalloped topper into the cabinet.

Measure and mark 1/8 inch from the edge of a piece of mat board.

Use 220 grit sand paper to round the edge to quarter round.

Cut this 1/8 inch wide strip off.
Can you see the profile I sanded?
Now you have quarter round made from mat board.

You could use a piece of crown molding for the decorative bit at the top. I chose this because I wasn't in the mood to cut miters!
Glue a small piece of your mat board quarter round to each side.

Cut the pieces off even with the back and front of the cabinet.

Glue a piece onto the front leaving a little extra to trim even.

I've sanded the quarter round in to make it look like I mitered. Look at the profile on the right side.
For the decorative top I cut a piece of mat board 11/16 inch x 2 7/8 inch.
I sanded the sides and front edge quarter round.
I glued the side with the rounded edge down towards the cabinet. Do you see the profile?

Looking pretty good for card board, huh?

Cut three drawer fronts, 3/8 inch x 3/4 inch.
Sand all four edges quarter round.

Cut a back to fit from mat board, I measured 2 5/16 inch x 2 1/2 inch.
This is a trial fit, no glue.

I measured and marked at the top and bottom the center of the back, 1 1/4 inch.
I measure and made marks 1/4 inch apart at the top and bottom.
I used a stylus and a ruler to indent lines on the mat board.

That's done.

Gave a first coat of paint.
Will sand when this is dry and apply a second coat.

Apply glue to the inside edge of the cabinet and put the back in.

Putting the back in last makes painting much easier.

Center and glue on the middle drawer front first. Glue on the other two drawer fronts.
I sprayed a coat of Krylon satin finish on the cabinet. I buy this from Wal-Mart.

I decided to use crystal beads for the drawer pulls.
I marked the center of the drawers and marked with a "T" pin and then drilled the holes. I used straight pins to hold the beads.

Now, you are ready to fill the cabinet with dishes.

Nancy Enge finished the Lisa Chair kit and sent me a picture. It matches her sofa and I think it's beautiful. Working with checks that small is an accomplishment and as far as I can see she's matched everything!

Susan, a miniaturist from Australia sent me a picture of her finished Lisa sofa kit, too. I love the way she's given it such a homey feel. I think I would love to be in that cozy corner.
I hope everyone sends me a picture of their finished kits. It just so much fun to see the fabrics they choose. The fabric changes the whole feeling of the sofa. I love that so far none have painted the feet brown to mimic wood! I never thought of painting the feet purple or a lovely shade of grey.
Hobby Builders has decided to sell my Lisa Sofa and Lisa Chair kits. They will be featured in the new April catalog. Wish me luck!
I will be upholstering furniture in the future, I haven't completely abandoned that. I want to get more patterns made for the kits and then go back to selling the finished furniture. Deciding where I will do that . . . .
Have fun, Expand on it, Make it better . . .
Just Keep Making Minis!