

Hi, I am finally posting a tutorial. I find that I am not bouncing back from my trips like I used to.
I have been wanting to make one of these for a long time.
I have a full-size dress form from the forties, it's just like the ones from Project Runway. I've always wanted someone to make it into a floor lamp for me. "Someone" hasn't, so I have made one in miniature!

You will need to order the Chrysnbon kit. I ordered mine from Hobby Builders Supply.

I also ordered the suggested glue for it.
I can go on about glues and "plastics". You know, everything us laymen call "plastic" isn't. That stuff is made from a lot of different formulas and not all glues work on all "plastic". I could go on, but I will spare you my rant.

This is a wonderful kit for making your own lamps. I love this kit and usually have a couple in my drawer.

I buy this directly from Cir-Kit Concepts, they do have a web-site.
The cost is about $10.00 per kit.
I wish Hobby Builders Supply carried these.
You have a choice between a plain shade or pleated shade.

These are the simple instructions.

Disconnect the dress form from the frame work in the package.
Then disconnect the bottom portion of the dress form.

This will leave small nubs.

File them smooth.

File the one on the side, too.

Cut off the knob at the top.

I used my Dremel to drill a hole in the top.

I know this seems silly but drilling the hole made it easier for me to cut off the rounded edge.

I have NOT glued the dress form together.
I am holding the dress form together and used my Dremel again to make a larger hole at the neck.
I had a 1/8" bit in and used it to carve out the plastic. I want as much out as the neck can stand. There is about a 1/16" left all around.

I used the 1/8" bit to drill a hole in the bottom of the BACK part of the dress form. This is for the electric wires to pass through.

I am using a good quality muslin to cover the dress form and mat Mod Podge to glue it to the dress form.

Dab on the Mod Podge.
I did not apply any Mod Podge in the indentation on the center of the back and front of the dress form.

This is important: use the fabric on its bias or the fabric will not stretch over the form nicely.

Press the fabric onto the Mod Podge, pulling the fabric over the dress form.

Pull the fabric tightly leaving no folds on the outside of the dress form.
Trim the fabric leaving enough to fold to the inside of the dress form.
Apply the Mod Podge to the inside and glue the rest of the fabric down.
Cut out around the two knobs at the bottom.

Make sure all your corners are nicely turned.

Apply the Mod Podge to the front of the dress form and pull the fabric to fit.
This will be a little more difficult because of the shape but all the folds and wrinkles can be removed.

The fabric is on with no folds.

Side view.

Trim the fabric and glue the extra to the inside.
Trim out at the bottom corners for the holes that receive the knobs.

Just holding it together.

The neck that will receive the socket holder.

Always test the light to see if it's working.
This kit does have a replaceable bulb but I want to know if the wires have a good connection to the socket.

I have applied Elmer's White glue along the edge and into the holes at the bottom.
I do not like tacky glue for this. Tacky glue remains flexible and I don't want this to be flexible. Please use the Elmer's white glue.
(I didn't use Elmer's yellow glue because I did not want the glue to possibly squeeze out and dry showing a yellow line.)

In both necks apply Elmer's yellow glue.

The yellow glue will hold the plastic socket firmly. I tried this the day before with tacky and it was wobbly, I want a firm hold.
Thread the wires through the hole you drilled earlier.
Place the socket into the neck and press the two parts together.

Hold the two parts together until you can see that they are holding without spreading back apart when you let go. This will probably take 3 to 5 minutes.
I let my dress form dry upside down to get the glue to dry around the socket.
PLEASE LET THIS DRY OVER NIGHT.

I've shown this lamp shade before but I've changed the size for this lamp.
Use the pattern to print out the pieces.

Use the directions from the "Things to do, Things to see" list at the left of the blog, HOW TO RE-SIZE THE PATTERNS. Print it out onto card stock.

Use your fingers to bend the card stock shapes a bit.
Use Elmer's yellow glue, not tacky to glue the pieces together.
Butt the edges of the card stock together, do not overlap them.
Glue pairs together first. Let these dry for about 5 minutes.

Glue two pairs together and glue the last piece to the last pair.
Let this dry for about five minutes.

Glue the two pieces together and let dry.

Glue the last seam.

We will need to enlarge the lamp shade base for our shade.
I am using plastic from packaging.

I've used my pattern and scratched using a "T" pin into the plastic.
Can you see my lines?
Cut the new lamp shade base out.

Using the Testors glue I centered the new lamp shade base onto the original lamp shade base and clamped.
I let this set over night, along with my lamp shade.

It's another day and the glue is dry on my new lamp shade base.

Another view.

Using the Testors glue glue the stand onto the form.

You will have to purchase a plug from Hobby Builders Supply to attach the wires to at the end of your light.

I painted the inside of my shade gold.
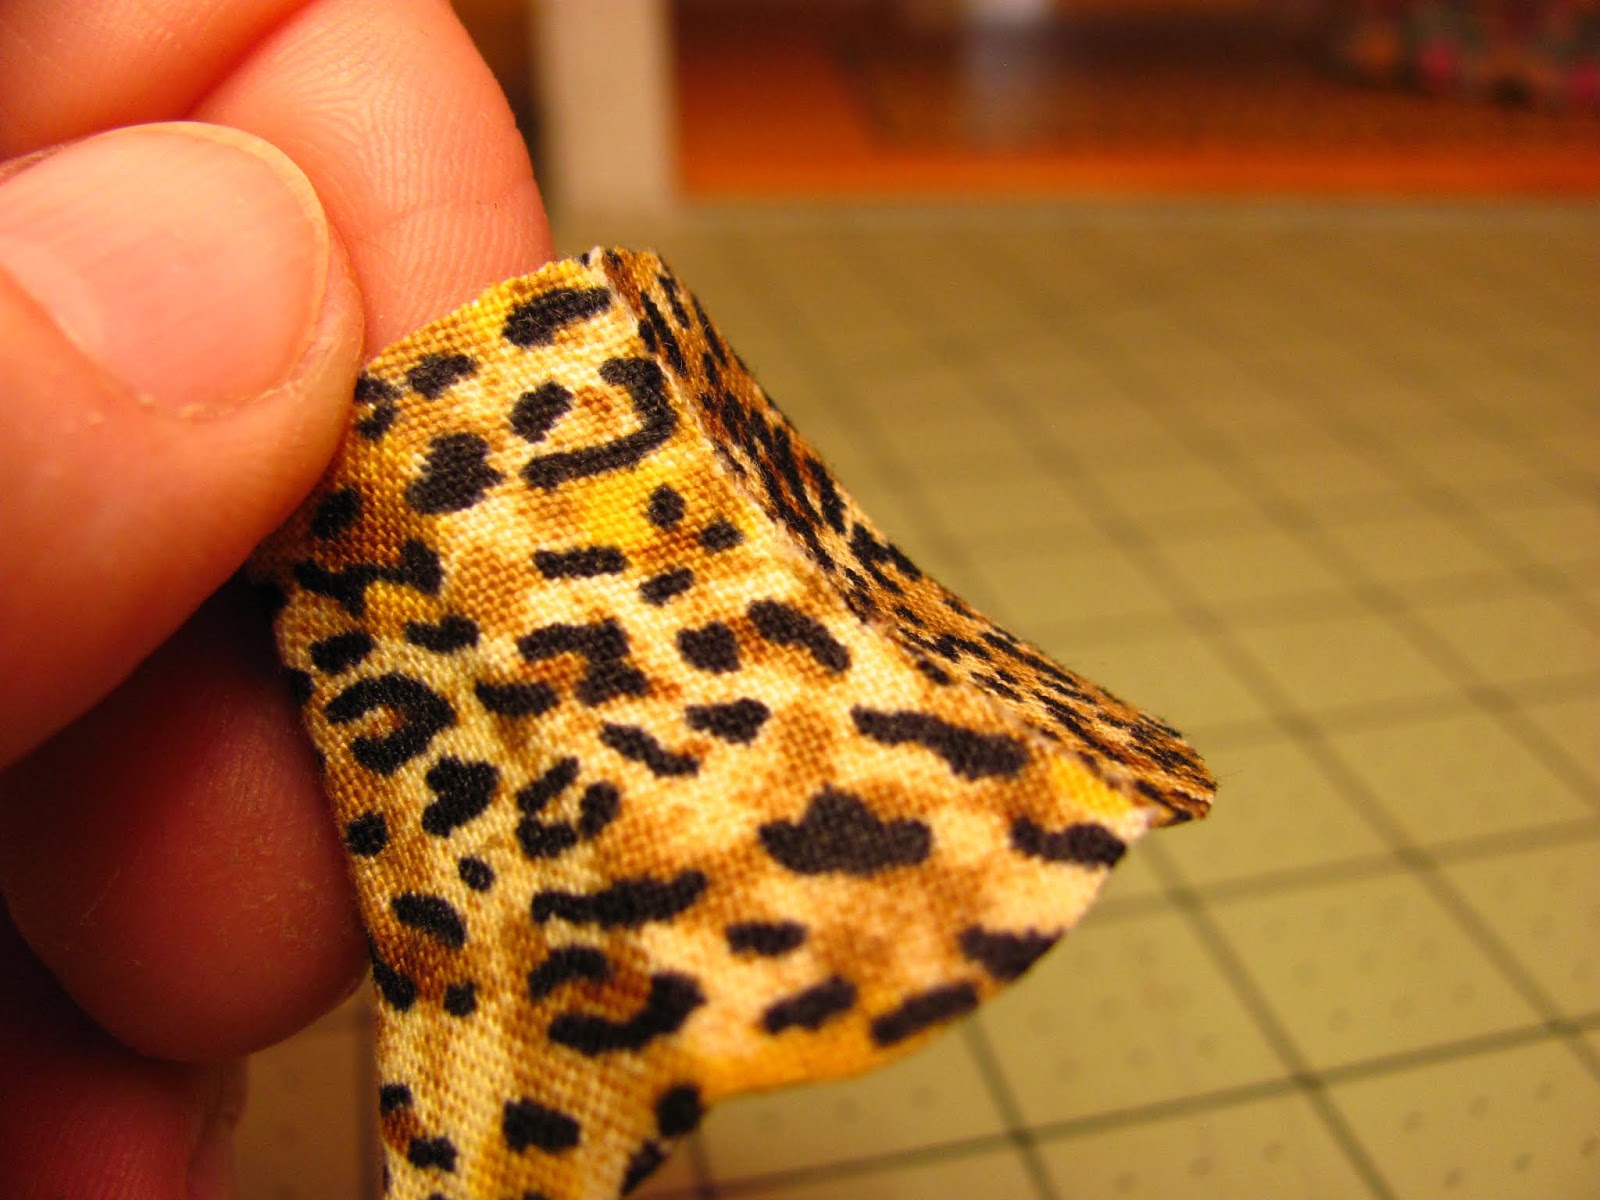
I am using a leopard print and some tiny braid I bought at a miniature show years ago.
This braid is available from miniature doll suppliers. I used the braid instead of the ribbon for its ability to curve without folds. I did not pull the threads on the braid, I left it flat. That will be explained on the supplier's site.

I know this looks like a big chuck of fabric to cover this shade, it is. We have to use the bias again and trimming that down has not always been a good idea for me, I've come up short a couple of times and lost the shade.
Give the fabric a good tug on the diagonal to get the stretch going.

I debated about using Elmer's white glue or the Mod Podge, I settled on the Mod Podge.
Apply the Mod Podge onto three of the shade's panels.
Press the fabric onto the shade, smoothing the fabric over the shade.

Apply the Mod Podge to another couple of panels and smooth the fabric onto the shade.
Apply the Mod Podge to the last two panels and bring the fabric together.
Trim off the extra fabric at the top and bottom, leaving about a quarter inch all around.

You can see the gold on the inside of my shade.
Trim the fabric to the very edge of the shade.

Using a tiny, tiny brush I painted the top and bottom edges of my shade gold. Don't get any paint on the fabric.
You could probably do this before you glued the fabric on, huh Kris?
Cut the extra fabric off the side of the shade.
Cut as close as you can get!

I just realized that I did not show you a picture gluing on the braid.
Guess what, I used tacky glue to glue the braid to the top and bottom edges of the shade.
I did not glue my shade to the lamp shade base, it sets nicely on its own. I will leave that decision up to you.
Here she is in the attic next to the chair.
I've got to get the second layer of foam core papered and on the walls. I think that maybe the next tutorial.
Have fun, Expand on it, Make it better . . .
Just Keep Making Minis!
Kris