

I had a suggestion to write a tutorial for a wicker pet carrier.
I had figure out how I wanted to go about weaving it. I had a few ideas and a few false starts.
This is what I came up with and I hope you have a little dog or cat that can use it.

Here are the patterns for the opening and the door. Use the instructions for re-sizing the patterns from the "Things to do, Things to see" list at the left of the blog.
I used a little larger marker for tracing these two patterns. After you have them sized CUT THEM OUT BY CUTTING OFF THE LINE. Then when you trace the pattern onto the mat board the size will be right.

Cut out two pieces of mat board, 1 5/8" long and 1 1/8" wide.

Glue these two pieces together using tacky glue.
We are going to use tacky glue for the rest of the tutorial.

I am using 3 ply waxed LINEN, not waxed cotton. I haven't ever tried waxed cotton, if you would like to try that and let us know how it works, please do.
I have a tutorial for wicker chairs and in that I explain the waxed linen and where to get it. I also explain an alternative.
I am using 20 gauge covered wire, that's the larger one. The smaller wire is covered 26 gauge wire.

After the mat board has dried measure 1/16" from each side and mark.

Before drilling I use a "T" pin to make a starting hole for my drill bit.

Draw a line 1/16" from edge.

Mark the center on the sides and the back.
Leave the other end, it's the door.

One the sides measure and mark lines 3/16" apart.
On the back I made two marks on either side of the center evenly spaced.

Use a "T" pin to pierce a hole at each of your marks.

I drilled holes at all the marks. I used a bit that the 26 gauge wire will slip through.
At the corners I re-drilled using a larger bit for the 20 gauge wire.

Cut the opening pattern out, remember cut the line off. Trace around it onto four pieces of mat board. Cut out the shape. Glue the four pieces together to make a bending form.
I clamped mine together to dry.

From the smaller 26 gauge wire cut 7 pieces 2 3/4" long for the sides. For the back cut five pieces 1 1/8" long.
From the 20 gauge wire cut 2 pieces 2 3/4" long.
It is important that you apply glue to the ends of the wires to seal the threads. The wires will not slip into the holes if the threads are not sealed down. Paint your wires to match the color of your thread.

Bend the 20 gauge wire over the form. The 20 gauge wires will be at the front and back of the pet carrier.

Apply glue into the holes and insert the 20 gauge hoop.
Make sure the ends of the wire go through but not beyond the mat board.

Make hoops from the rest of the wires.
The smaller 26 gauge wire hoops are in the center with the larger 20 gauge wire hoops at the front and back.
Insert the short 26 gauge wires at the back of the carrier.

Trim off the extra wire.
Glue the tips of the wires to the back hoop.
I let this dry over night.

I painted the bottom of the carrier to match the wires.

In my first try the front and back hoops were sloped inward and no amount of pulling got those hoops standing straight again.
Cut a scrap of mat board and set it on top of your carrier and mark where the wires are. Use your craft knife to cut out the slots, larger slots for the front and back hoops.
In later pictures you will see the device on my carrier.

I used a small curved needle to weave with. You don't have to go out and buy one, you can weave using your tweezers to pull the linen through. I will have to change to tweezers when the space gets too narrow for the needle. I am just showing you what I used.

You will have to cut a length of linen to weave with. I used a two yard length.
I left a tail of linen inside along the wires on the left side.
I wrapped the linen twice around the front hoop.
I'm left handed so I might be starting on the wrong side for some of you.

Over and under, that's all it is for the most part.

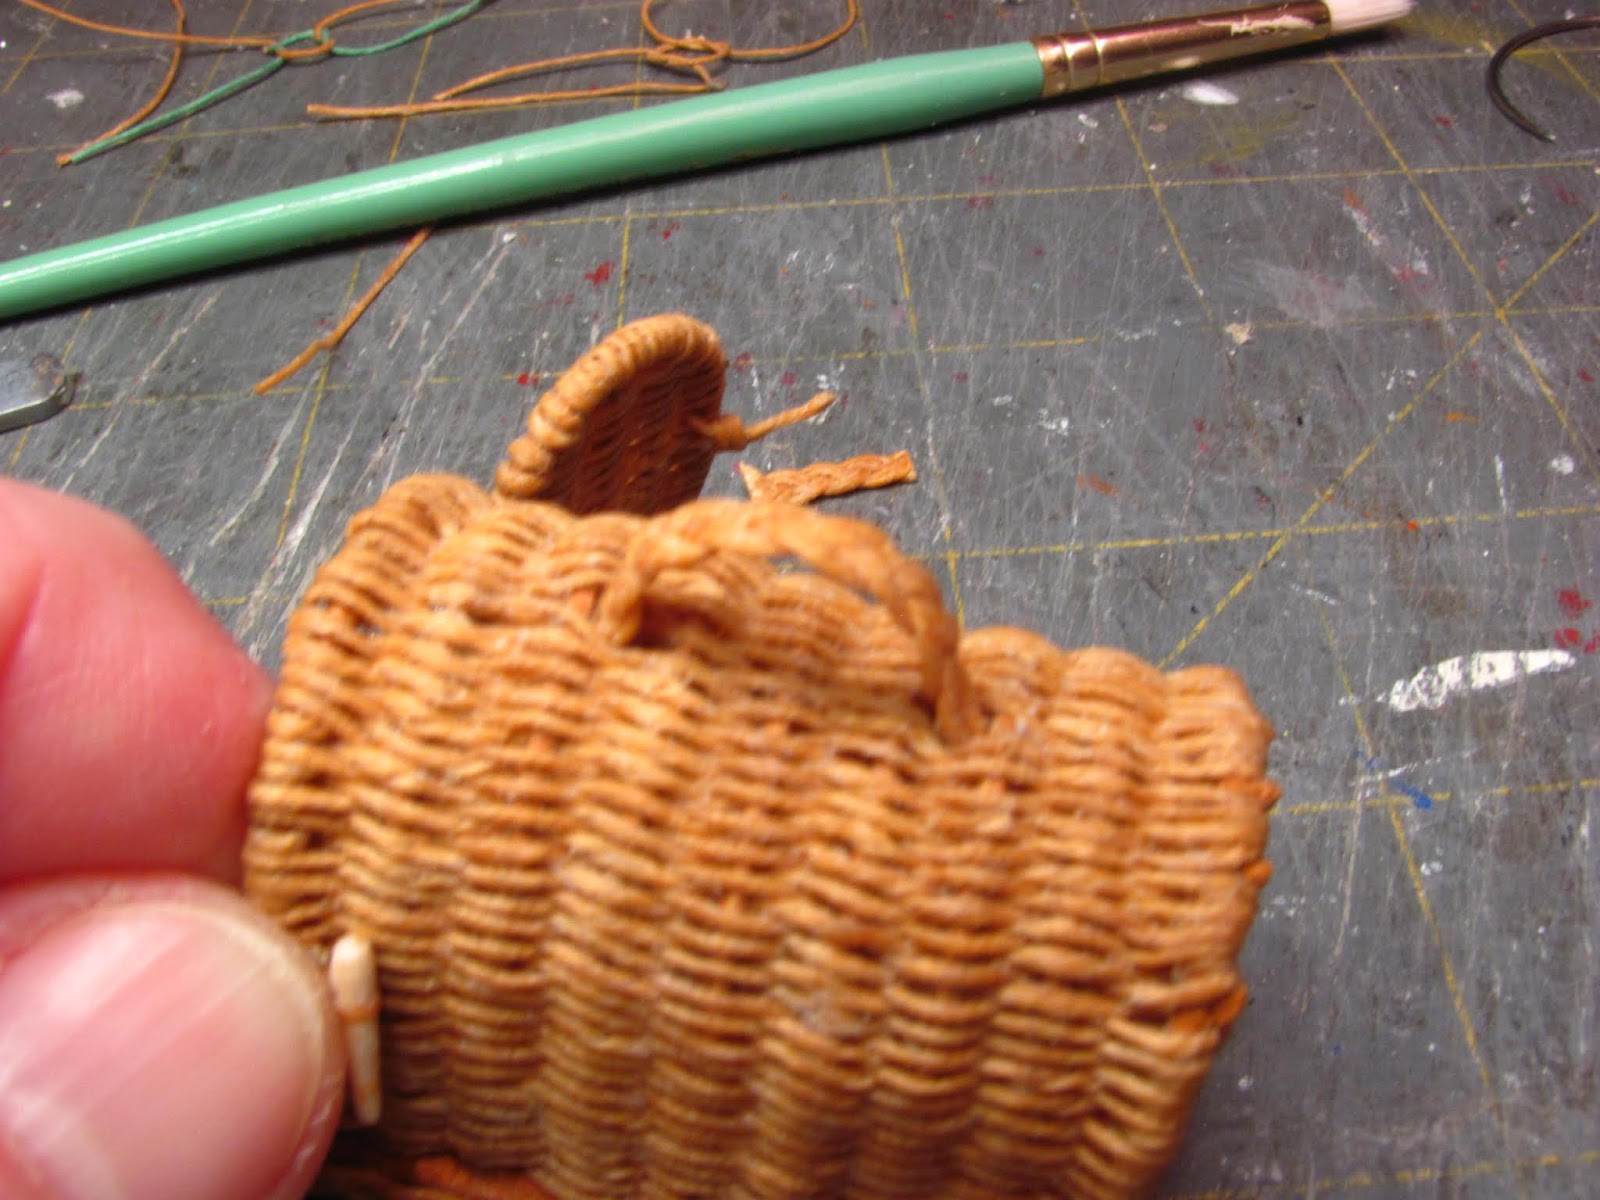
I am at the back corner.
The linen is going under the corner.

When the linen goes under the corner you will wrap the linen around the wire and continue to weave, over and under.

There is my little device keeping my wires nice and straight.

In the next corner the linen is going under the wire, wrap the linen around the wire as you did before.
Continue to weave, over and under.

Weave to the front.
Now, what I do for the front wires is to double wrap, sometimes. I used to double wrap always on my chairs, but it looked too crammed, so I double wrap maybe every other time. You will know when to double wrap, you will see that you need to fill in to keep the weaving level. Don't sweat it.

I am back at the corner, this time I am weaving over the wire so I don't need to wrap the linen around the wire.
Continue to weave, under and over.

I am at the other corner and weaving over the corner wire, continue to weave to the front, under and over.

I am back where I started, I've wrapped once and have begun to weave around again, over and under.

I've been weaving for a while.
I am keeping the weaving level and I'm not pushing the weaving down.

Still weaving.

I've run out the linen.
Weave your thread under a wire.

Start a new piece coming from under the wire where you left off.

I am continuing to weave.

This is the inside. You may glue the ends down and trim them shorter if you want.

Showing my progress.

When I get up to where the curve starts I am going to just weave the back.
I will change to tweezers for that.

I am going to weave and fill in the back hoop as I go.
We will still be weaving over the back hoop so you don't have to fill it in completely.

I have filled in the back. When you have finished with the back, cut your linen and glue the end down. You will begin to weave at the front of the carrier.
I've left space on the back hoop for me to wrap when I am filling the rest of the top.

I've cut my linen and glued down the end.
I'll cut another two yards. and begin at the front.

I've started at the front by double wrapping and gluing down the end. I woven to the back corner.

Since I've got the back filled in I am now weaving back and forth over the top.
I am moving my device over as I fill in the top.

I am back to using the curved needle and continuing to fill in the top.

My notes say that I used three pieces of linen two yards long and finished up with a one yard piece.
I am filling in the last little bit.

About to weave the last row. Look at the weaving. Do you see that my weaving is the same above and below the space? To finish I have to weave one more row to make the weaving correct.
If I thought that the weaving was too loose, I would have to weave two rows or four rows or six rows. I would have to add rows by two to make the weaving correct. So think about that when you think you want to add rows, do you have room? You can't just add one row, the weaving wouldn't be correct.

All filled in.
When you end, wrap your linen twice around the front or the back wire. Leave a short tail of linen on the inside and glue it down to the weaving.

To cover the edge of the mat board cut six twelve inch lengths of linen.
Tie the pieces off at the top.
Carefully braid the pieces using three sets of two.
When you are finished apply glue to the edge of the mat board and glue on the braid.
You should have enough braid left for a handle, at least an inch.

The braid glued on.

The back of the carrier.

Trace the door pattern onto four pieces of mat board. Cut out the shapes and glue them together.

Cut one piece of 20 gauge wire 2 3/16" long.

I've bent the wire around the form.
The two ends are on the bottom, flat side of the door.
I have a piece of paper under the wire where to two ends meet.
You may have to trim the ends so that they meet.

This is the bottom of the door wire.
My ends are meeting and I have glue under the wire so that the wire is glued to the paper.

I have applied glue to the wire and wrapped the paper over the wire ends. I've only wrapped one side of the paper, trim off the other side. We don't want a lot of bulk here.
Let this dry for a couple of minutes.

Pull the door frame off the form, pull from the top rounded edge.
I have a lot of room around the door frame for the waxed linen that will be wrapped around it.

Cut three 26 gauge wires to fit INSIDE the frame.
Glue the wires into the frame.
I let this dry over night.

I painted the wires.

After the paint was dry I began to weave.
I wove over the starting tail to cover the end.

I trimmed the tail and kept wrapping.

I wrap until I am at the curve and then I begin to weave.

I ran out of linen. Because I am able to tuck the ends into a previous row I do. I couldn't do that with the carrier so I just glued the ends down.

I've trimmed off the extra and continued to weave to the top.
I will wrap the top.

This is the right side and I am wrapping the top of the door.

I'm done and I am ending the weaving.
I run a needle under and thread and bury the linen under it. Trim off the extra.

The wrong side.

The right side.

Fitting the door.
(It fits!)

I am using a toothpick for a closure. I made this for the sewing basket from needle point canvas tutorial.
I used a file to make a groove all the way around. I did this before cutting the piece to length.

My little knob is about 3/8" long.
I have the groove made and I've rounded off the end.

Tie a piece of waxed linen around the knob with the linen being in the groove.

This is how to tie a square knot.
We are using these to tie everything together.

Spread the weaving a little to thread the linen through.
On the outside of the door you will see two wraps of linen. On the inside you will see one and tie square knots with the ends.

Tying my square knots.

The knots are tied and I have a little glue on them.

The outside.

I've taken a piece of linen and tied an overhand knot leaving a loop a little over a 1/4" long, (not counting the knot). This loop has to be long enough to go over the knob that will be tied onto the side of the carrier.

The ends of the loops are inserted through the weaving at different places, one above the other. Tie a square knot to secure.

Tie the knob on just as you did with the loop.

All closed up.

Cut a length of braid.
Spread the weaving and insert one end of the braid and glue to the inside.

Glue the end of the braid and press it to the weaving.
Insert the other end and glue it to the weaving.
Press the braid to the inside top of the carrier and hold for a few moments to make sure the handle is securely glued.

Push the weaving back into place.

Inside the carrier.

The wicker pet carrier finished.

I always enjoy making wicker miniatures.

Send me your pictures for the Follower's Gallery at:
camceiling@frontiernet.net
Next month we will have Lynn teaching us about the Cricut Maker and how it will cut basswood according to your original design or loading in a design from the blog. She says this new Cricut Maker is a game changer, I've read her tutorial and she's right. This machine is just the ticket for miniature makers!!
Hobby Builders Supply, www.miniatures.com will be selling 6 new designs of my upholstered furniture kits soon. These kits have DIGITAL INSTRUCTIONS. The kits WILL NOT have written instructions included with the kits. The instructions will be e-mailed to you. The digital instructions have large color pictures so that you can see things more clearly. As always I am available for questions if you get stuck.
Have fun, Expand on it, Make it better . . .
Just Keep Making Minis!
Talk to you later,
Kris