I don't know why I can't get the drawing for the basket bottom to print out the right size, but the other drawing, the spokes, do. Left click on the drawing and a new page will come up, click on your file button and click print. If you have trouble, let me know. You will have to draw your own bottoms, I use a architect's template for circles and ovals.
These baskets imitate Al Chandronait's baskets, I hope I have that spelled right. His baskets are exceptional.
Print your spokes onto card stock, copy and paste plenty of spokes to fill a page and save for later.
I used white card stock, if you have to go out and buy card stock you might want to look at the browns and tans, basket colors and maybe some contrast colors, too. I used Minwax oil base stain, Ipswich Pine to color my card stock. I have also used it to color tan card stock with good results. If you buy colored card stock, though, you don't have to stain.
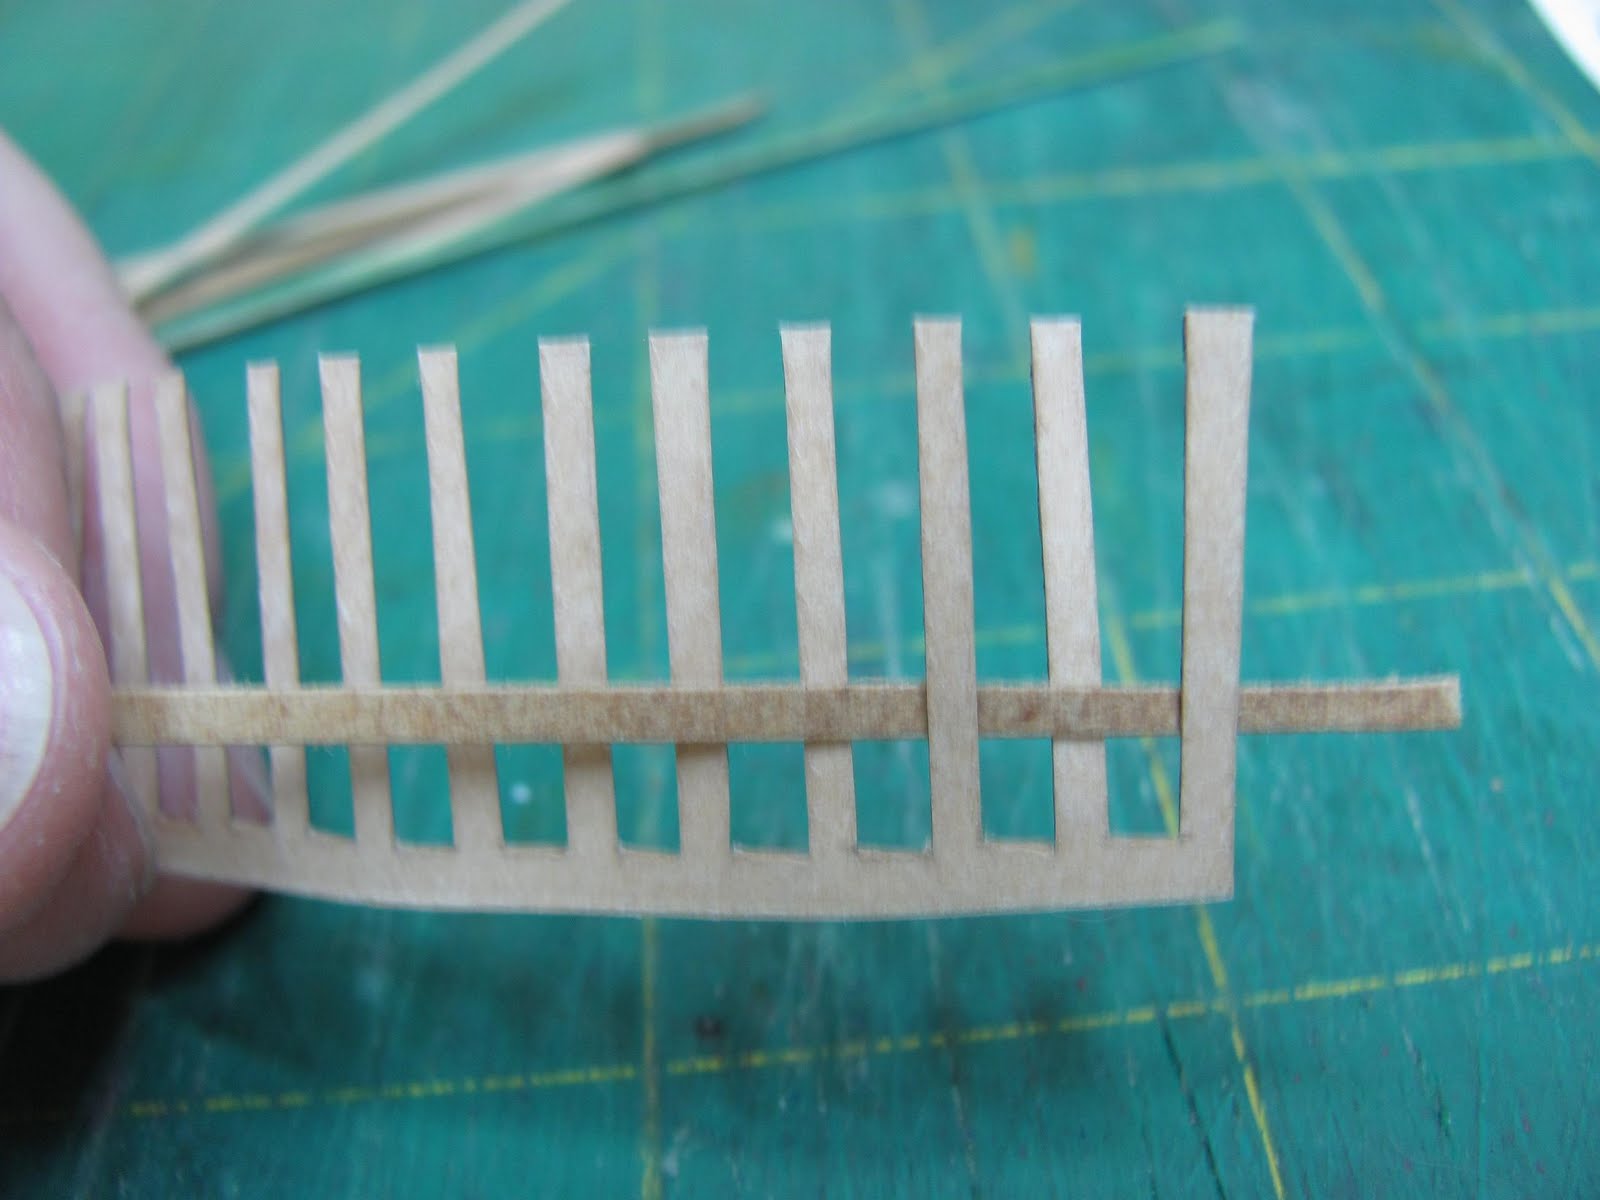
Cut out the spokes, I used a steel rule and craft knife. If you feel more comfortable with scissors, by all means use them. I know I have my ruler upside down, I don't like the cork setting it up off the table, I can't seem to set the ruler on the line so I turn it over.
I left the lines on when I cut, it made them a little wider and sturdier. By the way I built the spokes on Paint in Windows. Set the spokes aside.
Keeping the ruler on the spokes when cutting the bottom of the spaces keep the spokes from tearing.
I also used card stock for the bottom. If you have basswood, 1/16" thick and can cut it, use it instead. You can also use poster board glue together to get 1/16" thickness.
Trace your bottom pattern onto the card stock 3 times. Cut out around all 3 and cut another piece of card stock out the same size.
Apply Elmer's white glue to the card stock. Lay the other piece on top.


I find if I smear the glue back and forth and up and down with the 2 pieces until the glue grabs, then line up the edges, give it a good press with your hand and the card stock will not ripple.


It can get messy, try not to get glue on the card stock.
Cut the 3 shapes out and glue together doing the smearing until the glue grabs, line up the edges and give them a good press with y

our hand.
Test fit the spokes around the bottom, I had a picture to show this but it just doesn't want to stay in the line up.
Trim off what you don't need. You want the spokes to overlap by one spoke.
From card stock cut weavers. These are a healthy 1/16" wide. I use a steel rule and craft knife, but if you have a paper trimmer use it, it saves a lot of time.
You can cut some weavers a little wider for accent weavers to add interest. These can be painted, stained another color, you can also use felt tipped markers to color them. You can also use think threads to weave into the spokes, called twinning. I will be posting that very soon.
Three weavers need to be cut a little wider for the rim and handle.
If you need to stain, do it now. If you don't and get glue on the card stock that spot won't take the stain and it will show a light mark. Stir the stain to get the pigment up off the bottom.
Hold the spokes, bottom, weavers and handle by tweezers and dip into the stain.
Set them aside to dry on newspaper.
When everything is dry begin weaving. Over and under, alternate this on every row.
Under, over. . .
Under. . . .
Over.
Done with one row.
Begin another row, this time opposite of the first.
Over, under, over, under, over. . .
I weave at the top of spokes then I gently push the weavers down.
Push them close to the first row.
I wove 5 rows with an accent row of green in the middle.
Put a dot of glue under every spoke and weaver, do this on one side, then turn over and get the other side.
Trim the spokes and weavers off.
Bend the woven piece around your finger.
Starting at the middle of a side apply a thin line of glue, I used Elmer's again.
Keep applying glue and rotate the woven piece around the bottom, holding it in place until the glue has grabbed.
Finish by overlapping 1 spoke and glue the side seam.
Take 2 of the wider weavers and glue them together.
I had another picture drop out, sorry.
I want you to bend the handle around the end of the basket to shape. Hold it there for awhile until it will stay in the shape of the basket.
The height of the handle is generally half of the length of the basket. Add a little more to glue to the basket.
Glue the handle to the outside of the basket.
More missing pictures, I had 34 to show you, I guess Blogger just didn't want you to see them all.
Now, take the other wide weaver and glue it around the top of the basket over the top weaver. Hold this all together with small clamps.
At least we have the finished basket full of summer vegetables.
Will post sometime this weekend for the twining and a wire swing handle.
Kris


 I make a wooden handle from a toothpick. I use toothpicks a lot in my work! Cut off the pointed end and about an 1/8th of an inch from the end make a groove with a file, my file has sharp edges and a little rounded on the broad sides, you can use a triangle file, too. I round out the groove and move to the other end leaving a middle that's about 3/16 of an inch. Make another groove, don't cut off the handle yet.


 With your trusty "T" pin make a hole in the center of the end of the handle, just a hole, don't go waddling it out or you might break your handle.