Please, if you want to ask me anything about a tutorial e-mail me. I cannot always find your e-mail addresses when I click your names, so your questions go unanswered. My e-mail is: kkcompas@yahoo.com. This is listed in my profile, too.
To Alexandra: In the list on the left side of the blog "THINGS TO DO, THINGS TO SEE" there is a tutorial listed: "How to make piping for pillows".
Thanks, Kris

Learn how to make miniature dollhouse furniture, mini paper accessories and get techniques, tips and monthly tutorials.
Friday, August 30, 2013
1 INCH SCALE ANTIQUE MIRROR - How to make a 1 inch scale antique mirror with mat board and card stock.

I'm back!!
I was in Chicago cat-sitting for my daughter and son-in-law. Katie, my daughter, had this beautiful mirror in her bathroom and I thought it would make a good miniature.
Katie told me that it is called an Abraham Lincoln mirror. Lincoln popularized beards so much that men needed small mirrors to keep them trimmed.
Her mirror measures about 12 inches across and 15 inches from top to bottom. That proved a little small for me so I enlarged it just a bit. You can adjust the size of the patterns to fit your needs. My finished miniature is 1 1/4 inches across and 1 5/8 inches from top to bottom, in full-size measurements that would be 15 inches across and 19 1/2 inches from top to bottom.

I am adding this catalog picture to give you another idea of finishing. There are so many things you could do with this pattern, not only mirrors but great grandpa would look nice in the frame, too.

Here's a picture of my finished miniature. I have more embellishment at the top than Katie's.
Let's get started . . . .

Here are the patterns. I have a 1 inch square at the top, I forgot to label it, it's not a pattern. On the first page of the blog, on the left side there is a listing of Things to do, Things to see. In that list you will find "HOW TO RE-SIZE THE PATTERNS", follow these instructions to make the size I did or change the size to suit your needs.

First of all ignore the first frame of the three shown here. That was an idea that didn't work for this small of a mirror.
Print the pattern onto computer paper.

Use glue stick to glue the paper patterns onto mat board.

Ignore the first frame, please.
Put a new blade in your craft knife.

Cut the patterns apart.
To begin cutting make a light cut first, adding pressure with consecutive cuts.

Cut the frame A first.
Try to keep your blade straight up and down so you won't get a beveled edge.
I cut the center first. Don't discard the center. We will use that for a pattern to cut the mirror.
Guess where Katie went while I cat-sat.

Cut the outside line and now you have frame A cut out.
Set this aside for now.

To cut frame B out I did tip my blade. This will make a bevel and make my time sanding the edge round shorter.
Can you see I am starting with the inside line again and my blade is tipped toward the outside edge of the mirror. This is important or the pieces won't match up.
If you don't feel comfortable doing this, please cut the frame out with your blade straight up and down.

You can discard the center of this frame.

I am beginning to cut the outside line of frame B. My blade is slanting towards the inside of the frame.

Frame B is now cut out.

Turn frame B over and you will see the beveled edges.

I used 180 grit sand paper to finish rounding off the edges. I smoothed out the surface with 220 grit sand paper.
I try to keep the frame flat on the table top. This keeps me from maybe bending the frame!

I've got the frame sanded round.

Place the frame onto a scrap of card stock.

Make sure your pencil is sharp, a sharp pencil makes a closer line to the edge you are tracing.
Trace around the frame.
Have you guessed where Katie went, yet?

Use your ruler to measure from the inside line. In this picture I measured 1/16 inch away, but I trimmed this down to almost a 32nd. The size of this lip is up to you and what are you going to do with it. You can add embellishment to it and if you do you might want it to be 1/16 inch wide.

Cut out the card stock frame.

I used yellow carpenter's glue to glue the card stock frame to the back of frame B.

Here's a closer picture of the two glued together.
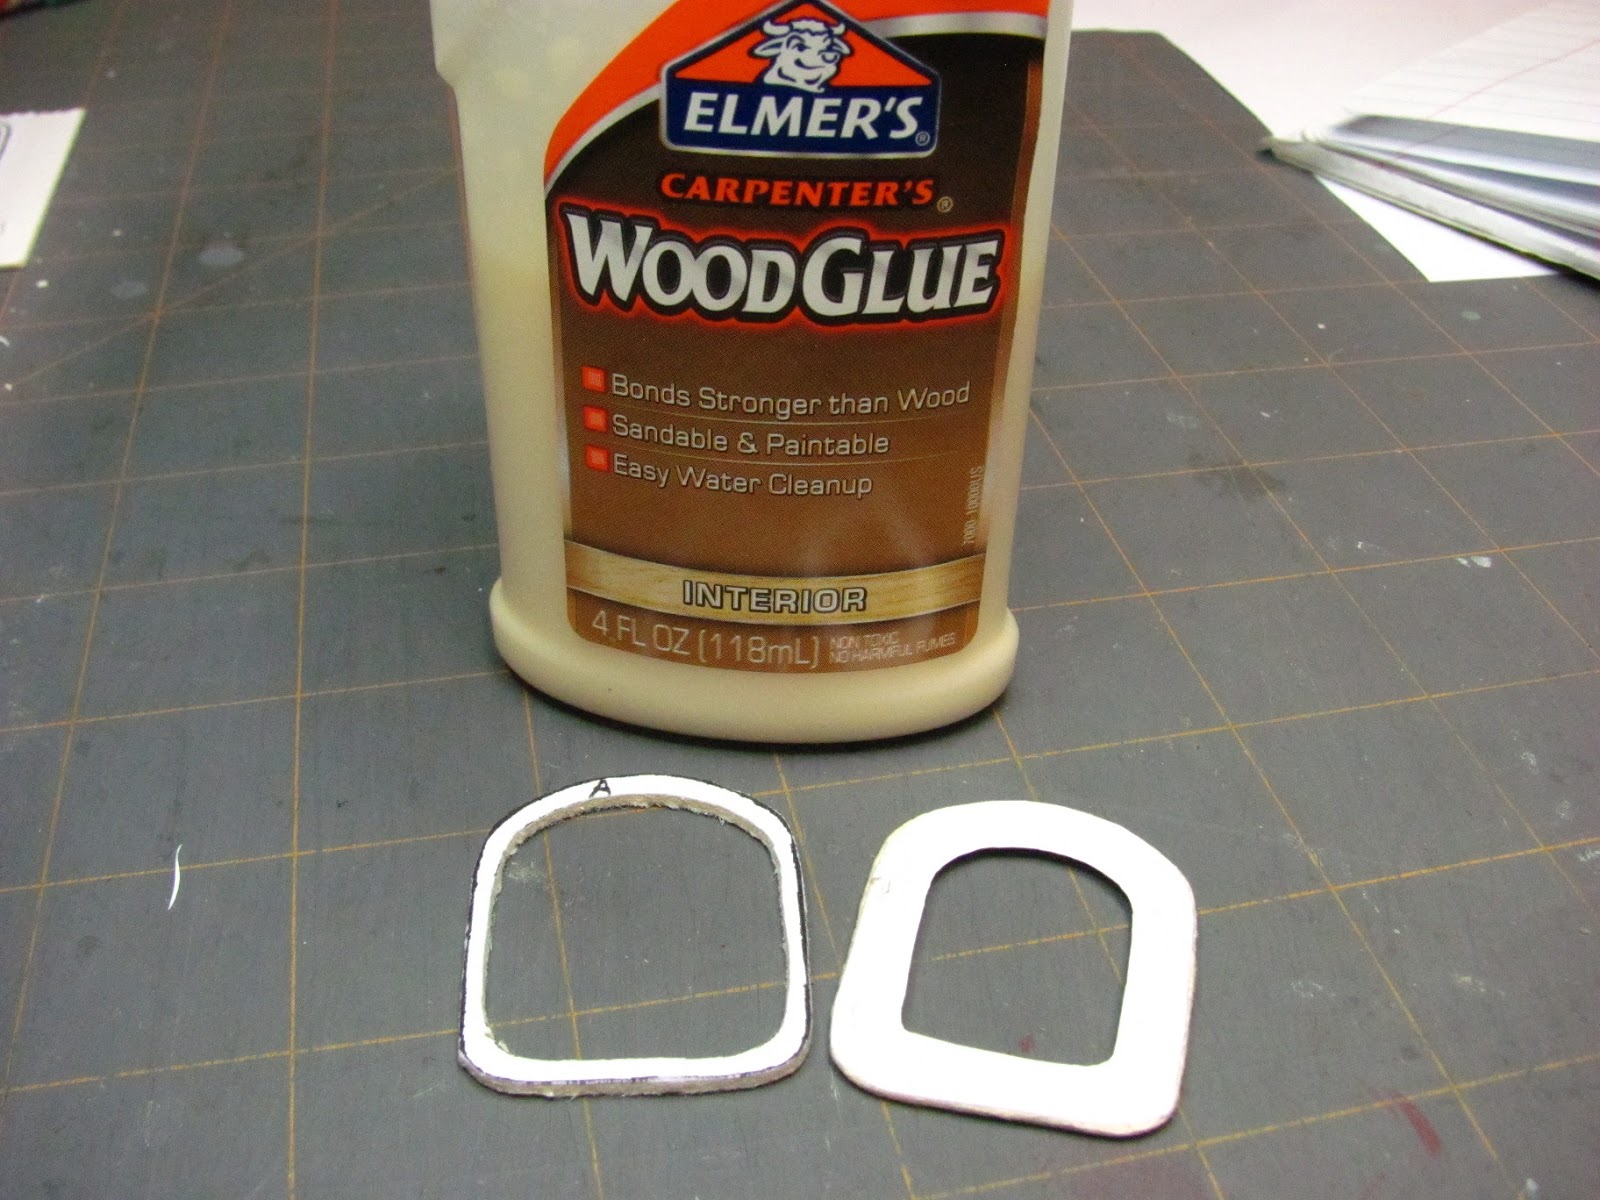
I used yellow carpenter's glue to glue frame A to the back of the frame B assembly.
Ideally the outside edges should match up.
What we have created with frame A is a "rabbet", not a soft furry animal but a cut (usually made with a machine called a shaper or a power tool called a router) that allows another piece to fit into it. This space will allow the mirror to fit without sticking out of the back.
Using 220 grit sand paper I sanded the outside edge of the frame, rounding a bit more to merge with frame A. Try to keep the frame on the flat surface of your table top.

Set this new assembly onto a scrap of card stock.

Trace around the outside of the frame.

Measure out from the traced line 1/32 inch. This can be any width you need so if you want to change it please feel free to so.

Here are the two pieces, the frame and it's back.

I am going to paint my mirror ivory. This is just a first coat, when this is dry paint again, sanding between coats with 220 grit sand paper.

I use acrylic from poster frames. I buy mine from Wal-Mart, I know Michael's also carries these. You can buy them in lot's of sizes. The acrylic is 1/16 inch thick and I can score it with my craft knife and then finish cutting with my scissors. I use this for my "glass" in cabinets and windows in houses.
Use the center piece you saved from cutting frame A. Trace around this pattern.

The acrylic has a plastic cover on both sides.
I carefully cut on the traced line with my craft knife a few times, scoring a deep line.

After I've scored my line I use scissors to cut the piece out.

Make a trial fit and trim where needed.

I used what I had on hand, Folk Art's # 506 Silver Anniversary for the paint.

Peel off one side of the plastic covering.
Dab silver paint onto the acrylic.

With the paint side down press the acrylic onto white paper, I just used computer paper. Press down to seal.
I suppose you could also just paint the paper and press the acrylic onto the paint and paper.
Turn the paper over and run your finger over the back of the acrylic to seal the whole thing better.
Set aside to dry.

Have you been painting the frame and sanding smooth with 220 grit sand paper?
Paint and sand until you are satisfied with the surface.
You could do a lot of things for embellishment. What I am showing here is just me trying to re-create my daughter's mirror. Look in furniture catalogs for accessories for ideas. Embroidery floss twisted back on itself makes a great accent. Tiny charms or parts of jewelry can be glued on the frame. Right now we have fall starting in the U.S. and there are all sorts of things falling onto the ground that could be glued onto the frame.

Katie's mirror has little ball-ie things on it. To make these all the same size I used an 1/8" hole punch. I punched a few circles and soaked them in a bowl of water. Let the paper change color.

Carefully roll the paper circle into balls, don't squeeze too hard.
You can use something else for balls. I do find that if I use paper for the balls they tend to stay glued.
You will need 7 good balls for the frame.
I have a large punch that included ivy leaves. I will sometimes buy a larger punch for the small bits I can use.
For leaves you can use tiny hearts, they work really well.
I punch the leaves out and let them fall on a damp paper towel. Let the leaves absorb the water.
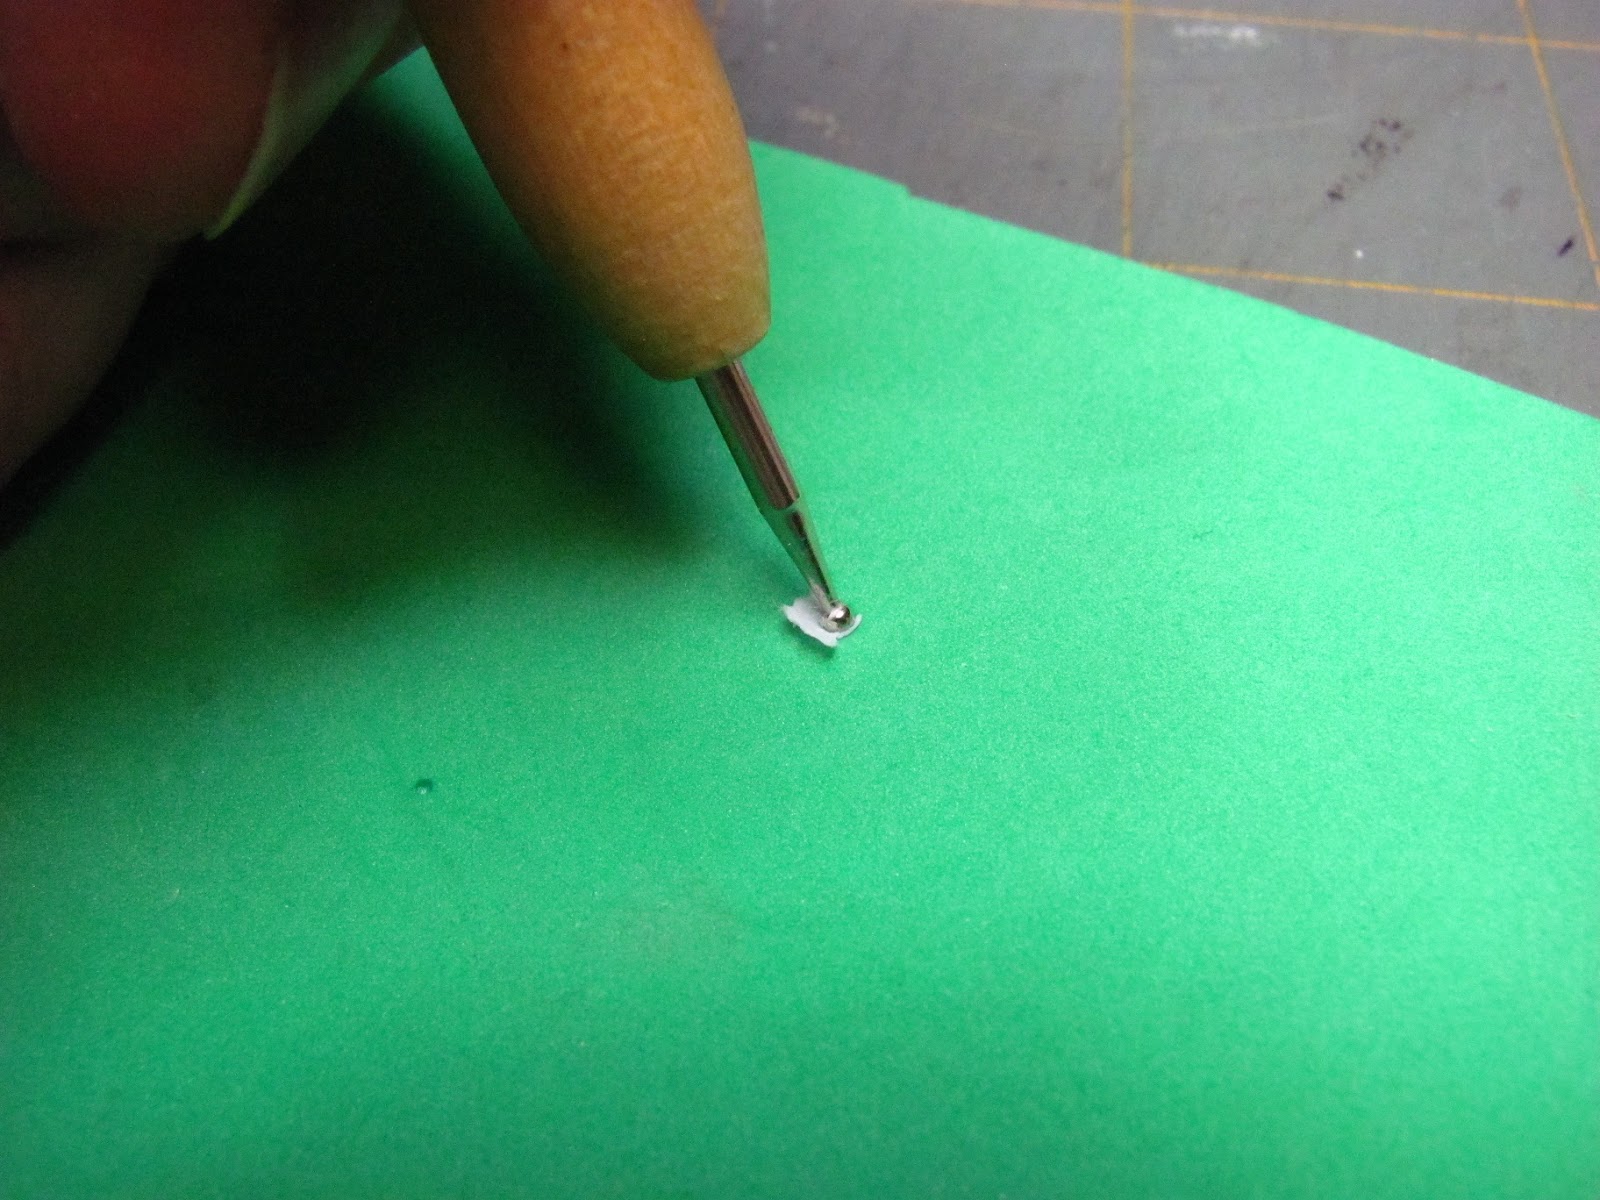
Transfer the leaves to a piece of craft foam and shape with a small stylus. I pressed into each lobe of the leaf.

Let the leaves and balls dry before using them.
I am asked, "Why wet the paper?"
Number one, you can get a deeper impression when the paper is wet; Number two, the paper will keep this shape when dry.

I've been painting and sanding my frame and I think I'm done.
I glued 3 balls at the top and 2 in each corner. I used tacky glue for this.

I glued 2 leaves on each side of the balls at the top and only 1 leaf on each side of the balls in the corner.

I think I need some Bunka for filler.

There, I think I like this arrangement.
Let the glue dry.

After the glue is dry I painted the whole thing ivory.
A little tip: if you want a little cracking at spots smear a little tacky glue in the spots where you want the cracks.

I used Krylon's clear gloss to coat the frame.
I buy this at Wal-Mart.

Here it is all coated.
Let this dry.

To make my embellishment stand out and to also imply that the frame is old I am going to apply a dirty wash.
I used Folk Art's Artists' Pigment #504 Van Dyke Brown and Delta's acrylic thinner.

I used lots of acrylic thinner and 2 old stiff brushes.
I dabbed on with one brush and dabbed off with the other. Wipe off the dabbing off brush frequently to keep it clean.

Here's a closer look at the frame after it's be given a dirty wash.

In this picture I am holding the mirror with it's edge towards you. I've pulled a little of the plastic covering off.
I want you to pull a little of the plastic covering off around the edge and trim that little bit off. I want to put the mirror in the frame but I still have some painting to do and I don't want the mirror ruined. If we trim a little off around the edge and put the mirror in it will still be protected and we will be able to pull the rest of the plastic off when we are done.

Place the mirror into the frame, don't glue the mirror in.

Glue, using yellow carpenter's glue, the back onto the frame.

Now I am going to try something new, dimensional fabric paint to blend the card stock back to the frame. This is usually done with a piece of moulding called cove.
Any brand will do, this is what I have on hand.

I used the nozzle on the bottle to apply the paint.
After I applied the paint I used my finger to wipe the extra paint off. I wiped from the top of the frame downward to the card stock.
Let this dry. I think it's going to shrink and I will have to apply another layer.

The dimensional paint did shrink. I will apply another layer just like I did the first layer.

I like this much better.

I've painted the new addition ivory.
I will spray this with Krylon's clear gloss.
Give the edge a dirty wash to match the rest of the frame.
When this was dry I sprayed the whole thing with Krylon's clear satin.

In this picture I have used my tweezers to pull up an edge of the plastic. Continue to pull the plastic completely off of the mirror.

Here it is all finished and ready to hang.
I am sorry you had to wait for this tutorial. I hope you have fun trying this out. You never know where you will be inspired, all way to Chicago in my daughter's bathroom!!!!
Have fun, Expand on it, Make it better . . . . .
Just keep making minis!!!!!!!!!
TTUL Kris
P.S. There is a hint on my table about where Katie went, she brought home a souvenir for me.
Subscribe to:
Posts (Atom)