

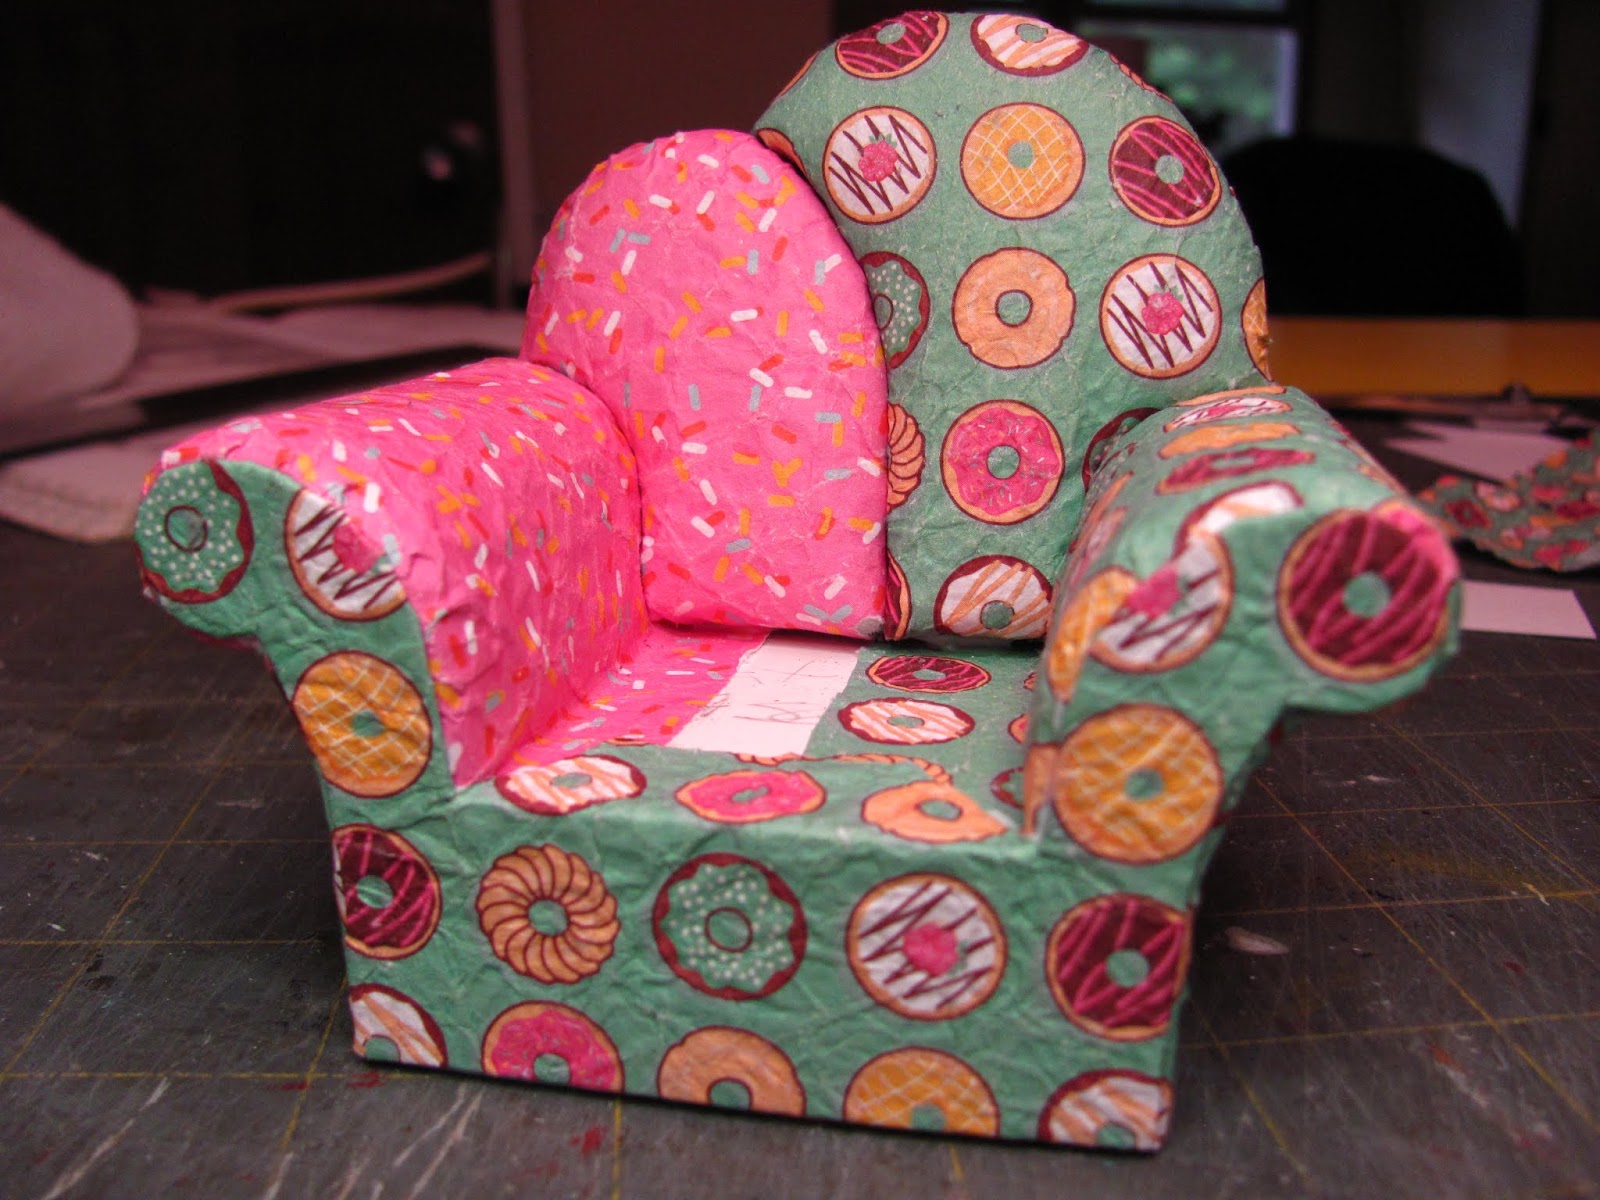
I've been messing around with this idea for awhile, using paper to upholster a chair.
I know fabric is sometimes hard to come by. I keep trying to direct you all to quilt shops. They will have the 100% percent cotton that will always glue for you. The Goodwill and other thrift stores are a good place to look, too. Silk blouses are really cheap there and that's a good fabric to use, too.

Silk ties are a good source of fabric if you like the design. You would need a couple of them for a chair, though.

I went to Michaels and bought a tablet of scrap book paper to use. My Michaels was woefully low on separate sheets so I settled on a $5.00 special tablet.
This won't be for everyone but I thought I would give it a try for something different.


Here are your patterns for a chair. Use the directions in the "Things to do, Things to see" list at the left of the blog "HOW TO RE-SIZE THE PATTERNS" to get them to 1 inch scale.
Print them out onto card stock to trace your patterns.
I have included an alternate back and back cushion if some of you want a single back instead of a two part back.
Always dry fit your parts. This is important to do before you are committed with glue.

Of course my paper was double sided.
I tried a few methods to get the two layers apart.

The best method was to wad the paper up a few times to loosen the layers; I then carefully pulled the layers apart.

If you try this with single layer paper you don't have to do this step.

The ball on the left is when I began with both layers together.
The ball on the right is after I carefully wadded and un-wadded the paper.
You will have to spend time on the wadding and un-wadding to get the paper soft and pliable.

After I got the paper soft and pliable I ironed it with steam on a cotton setting.
The paper is still pliable enough to use. This ironing took a lot of the wrinkles out.
I would think that paper has it's differences and this method may not work on all scrap booking paper.

To build the chair begin with cutting four layers foam core and two layers mat board for the seat base.
Glue them together with tacky glue. I place a weight, like a book on top of the stack until the glue dries. I usually wait at least a couple of hours.
Trace and cut out the back and the front from mat board.

The back is not as wide as the front.
Center the back over the front.

Turn the set over and trace the front onto the back.
We use these lines when building the chair.

If you don't have a saw that can cut angles you can skip doing this.
To keep the chair from looking too boxy I tip out the upper back.
Use a ruler and the back edge of your craft knife to score a line all across the back on the line you just drew.

Don't cut through.
Carefully tip the upper back to bend it slightly.

Center the back onto the back of the seat base and glue them together.
There should be about a 1/16" left on each side.

Center the front onto the front of the seat base and glue them together.
There should be about a 1/16" left on each side.

This is what you should have.

I use 1/2" diameter dowels for the arms.
These are cut with a 7 degree angle on one end (the back).
I set my saw to 2 1/4" and cut the dowels. I then set the angle of the blade to 7 degrees and re-cut the dowels.
If you have an adjustable miter saw you can do this.
I measured my dowel and along the short side is 2 3/8". The long side is 2 1/4".
If you can't cut the angles cut the dowels to 2 1/4" long.

Yes, I do use the little plastic clamps. I have the other kind you get at the big box stores. Most of the time they aren't long enough for what I want.
Glue the dowels between the front and the back. Hold onto the chair until the glue tacks or use clamps.
Leave this to dry, really dry.

Side view.

Cut a strip of foam core 1/4" wide.
This will be for the braces.

Cut two strips to fit between the front and back.

Glue them in.

Cut two more strips to fit further up the arm.
Glue them in.
These will support the card stock arm covers.

Cut two end/sides from mat board.

Bend it slightly at the top.

Apply glue to the chair.

Glue the end/side into the side of the chair.
This fits between the front and the back.

I wanted to show you the difference of the sides.
Paper has a grain, like wood.
I cut these two pieces laying opposite ways.
You can see that the bottom piece was easier to bend and also looks nicer.
Experiment to find the grain of your mat board. This also holds true for card stock.

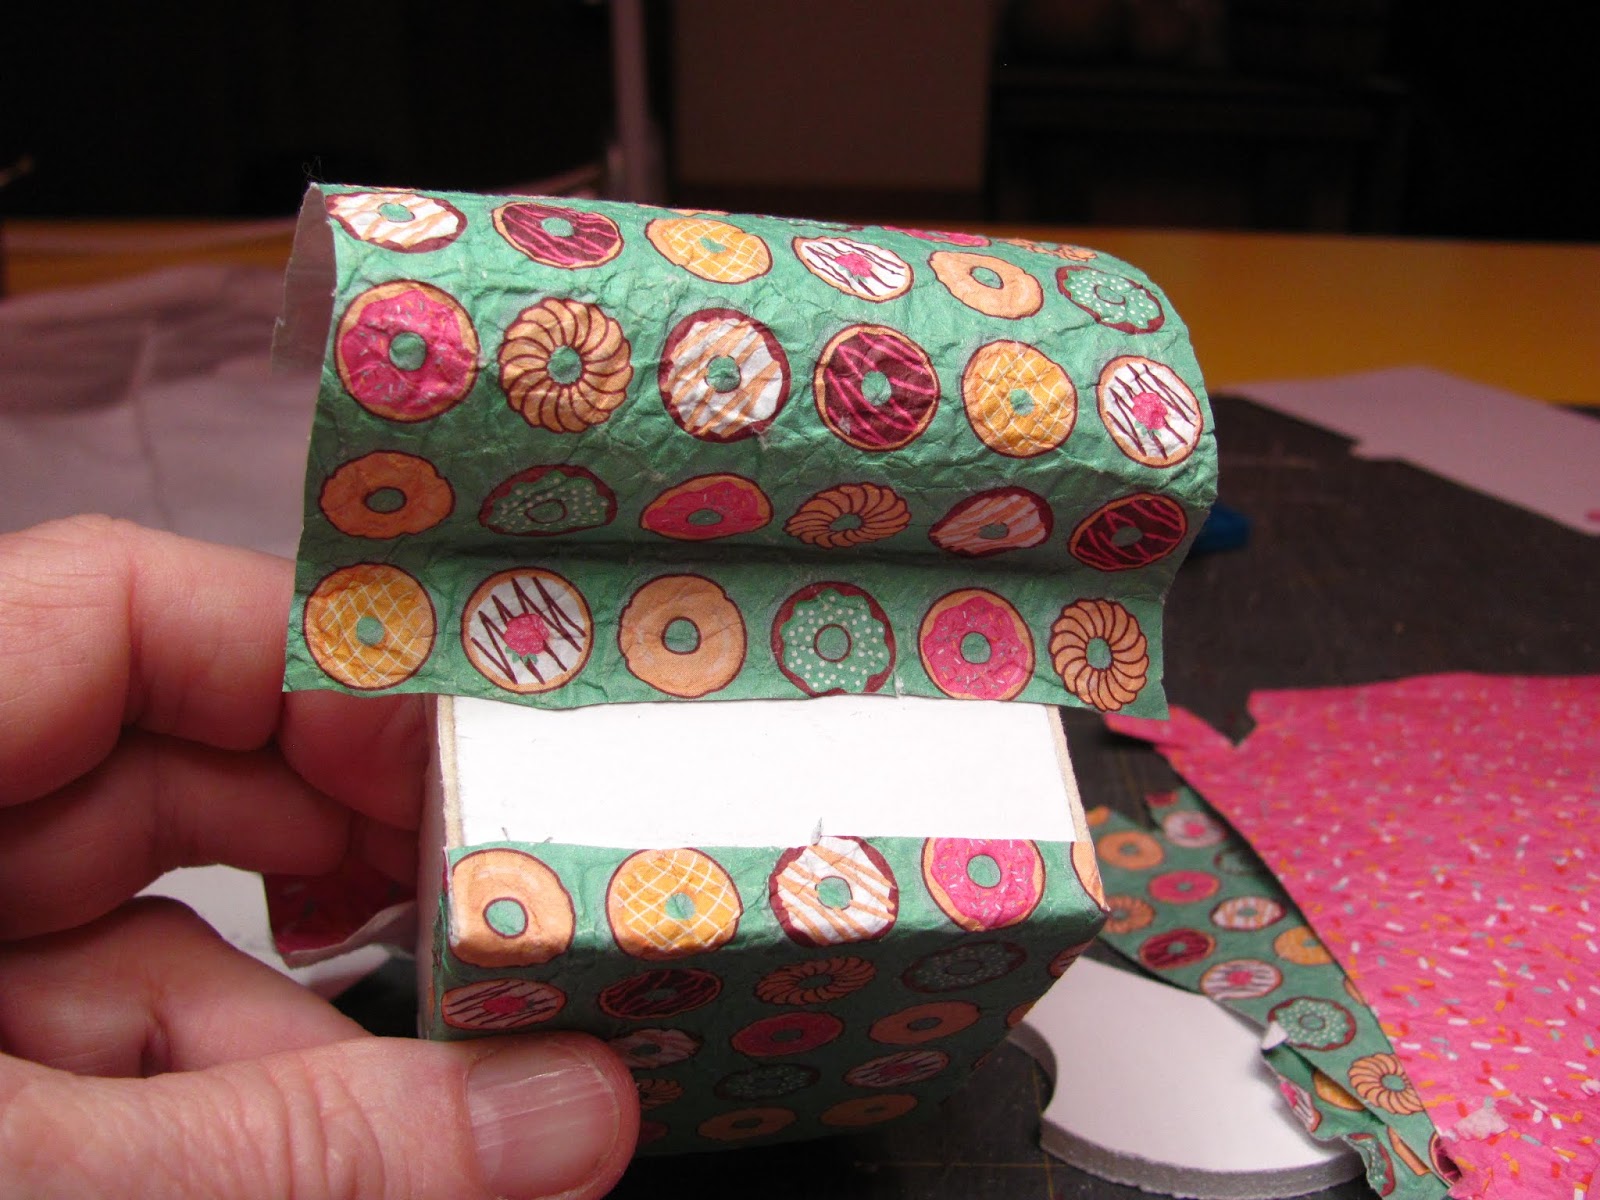
Are you dry fitting?
Be sure to dry fit and trim if needed.
Use the arm cover pattern to trace onto card stock two arm covers.
To make gluing easier I run the top of the cover over the edge of my table and then I roll it using a pencil.

Apply glue to the foam core braces and the dowel.

Apply the glue all around the dowel.

This piece fits between the front and the back mat board pieces.
The cut out area fits at the back.
Glue the arm roll cover to the arms.

Glue the card stock over and onto the dowels.

Your chair is built.

Place the chair onto card stock and trace around the bottom edge.
This is your bottom cover.

I use glue stick to glue the paper/fabric to the card stock.
If you want use fabric for covering the chair that's just fine.

Cut the bottom cover out and apply glue stick to it and glue it to the wrong side of the paper.
Trim the paper leaving around a 1/4" extra.

Use tacky glue to glue all the card stock covers to the chair.
Glue the bottom cover to the bottom of the chair.
Apply tacky glue to the bottom edge and glue the extra paper to the chair.
Trim off the triangles at the corners.

Use the arm roll cover pattern to cut your batting.
I use Thermolam Plus, no iron, from Pellon. Walmart used to carry this, no more, at least for now.
A thin batting will work, buy this from a bolt. Don't buy a quilt batting in a plastic bag, that will be too fluffy.

Apply tacky glue to the arm cover.

Gently press your batting onto the arm.
Leave about an 1/8" gap under the arm. This will insure a crisp line of paper.

Cut out enough paper to fit over the arm.
Use the arm roll cover pattern as a guide.
Begin gluing under the arm.
You can do both sides like this now.
Leave this to dry for a while.
You will pull on this a bit, not as much as you would if using fabric but you will pull and this needs to be dry.

After the glue is dry you may begin to cover the arm.

Pull the paper over the arm. Cut a slash at the beginning of the back.

Carefully pull the paper over the arm and mark the corner with a pencil.
The firmer the pull the less wrinkles we will deal with at the front and back of the arms.
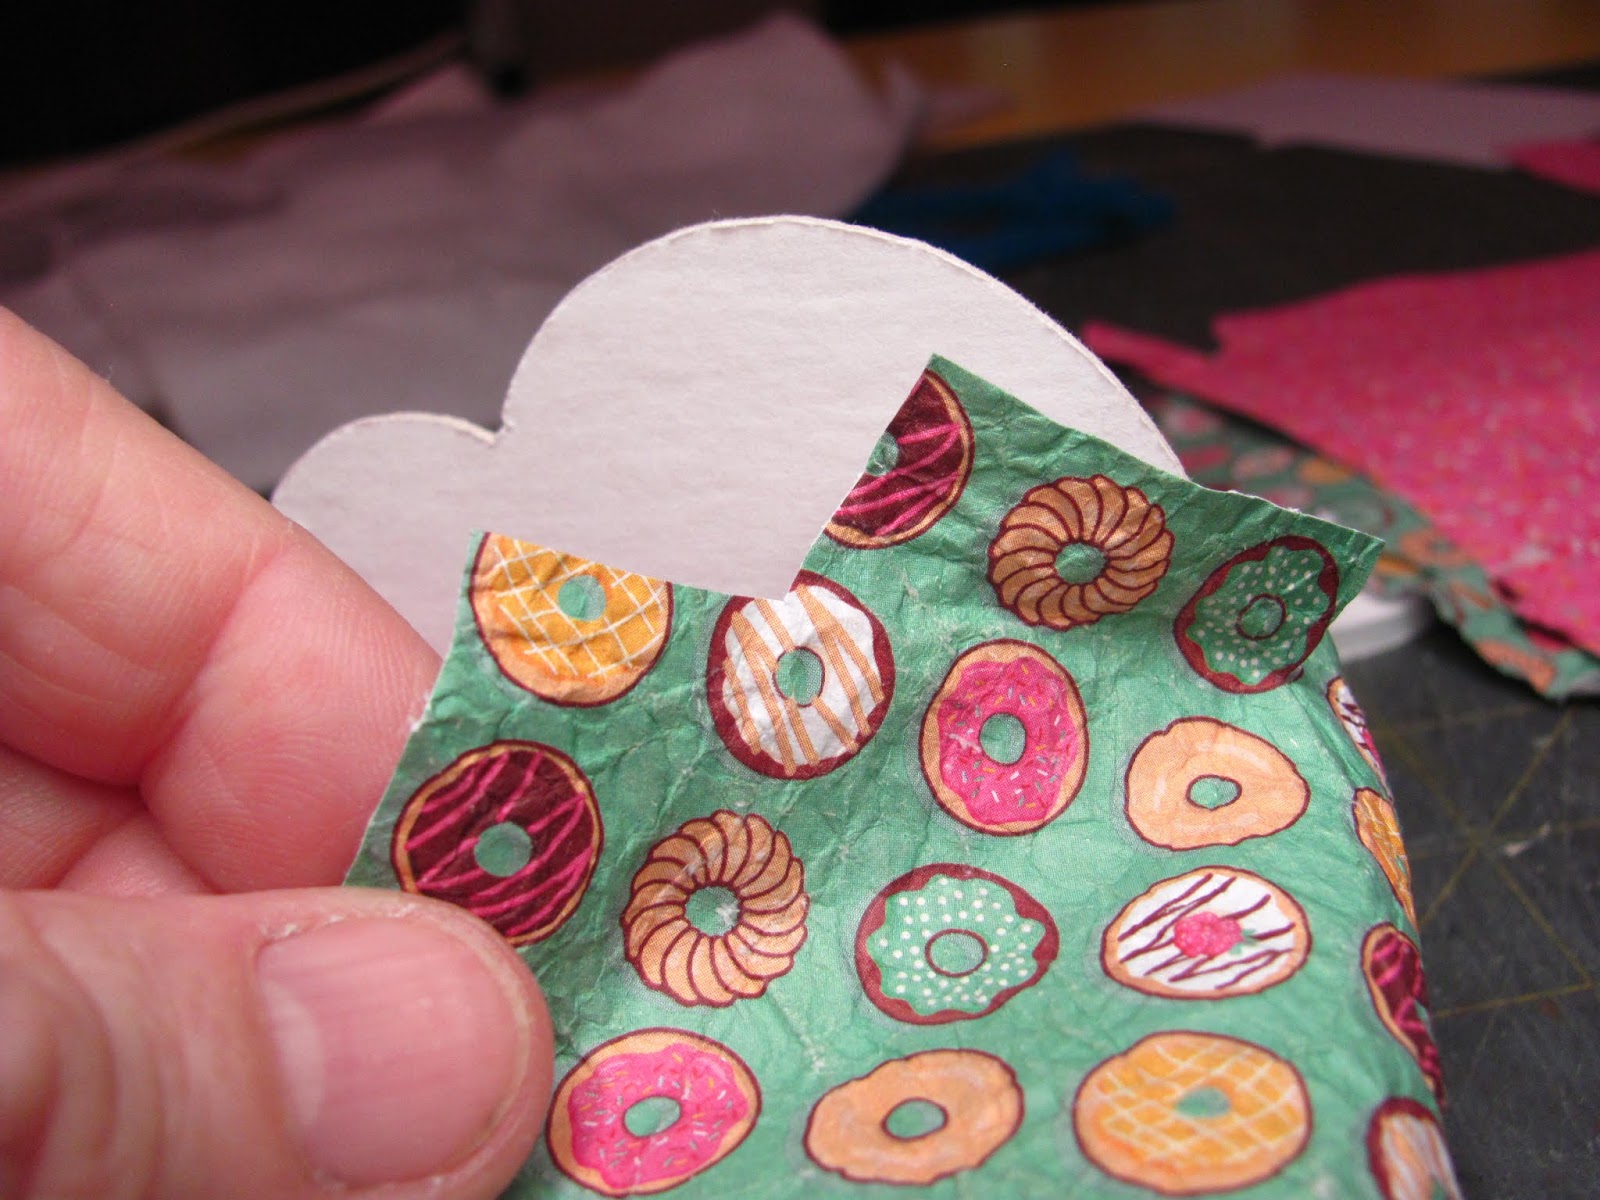
Cut out a square from the corner you marked.

Cut notches in the paper so it can fit over the curve.

Glue the paper to the seat base and to the back of the chair

Cut a slash into the corner.
Trim off the extra paper at the end of the arm to about a 1/8".

Cut notches around the curve of the arm.

Glue the paper down to the front of the arm.

This is the front.

This is the back.

Cut a piece of foam core a 1/4" wide to fit into the back of your chair.

Glue this piece into the back of the chair.
This piece tips out the bottom of the back cushion.

To make the side covers use card stock.
Place the card stock on the chair, lining up the top with the bottom of the dowel and the side with the front of the chair.

Trace around the bottom and the back.
Cut this out.

Dry fitting and trimming if needed.

Apply glue stick to the side cover and press onto the wrong side of the paper.
Cut out the corners as in the picture.

Glue the top and the bottom to the card stock.

Glue the side cover onto the chair.

Cut notches out from the extra paper and glue the paper to the back of the chair.

Cut notches from the paper and glue the paper to the front of the chair.

Dry fitting the back cushions.
I have an alternate back pattern for those that do not to want to make a two part back cushion.

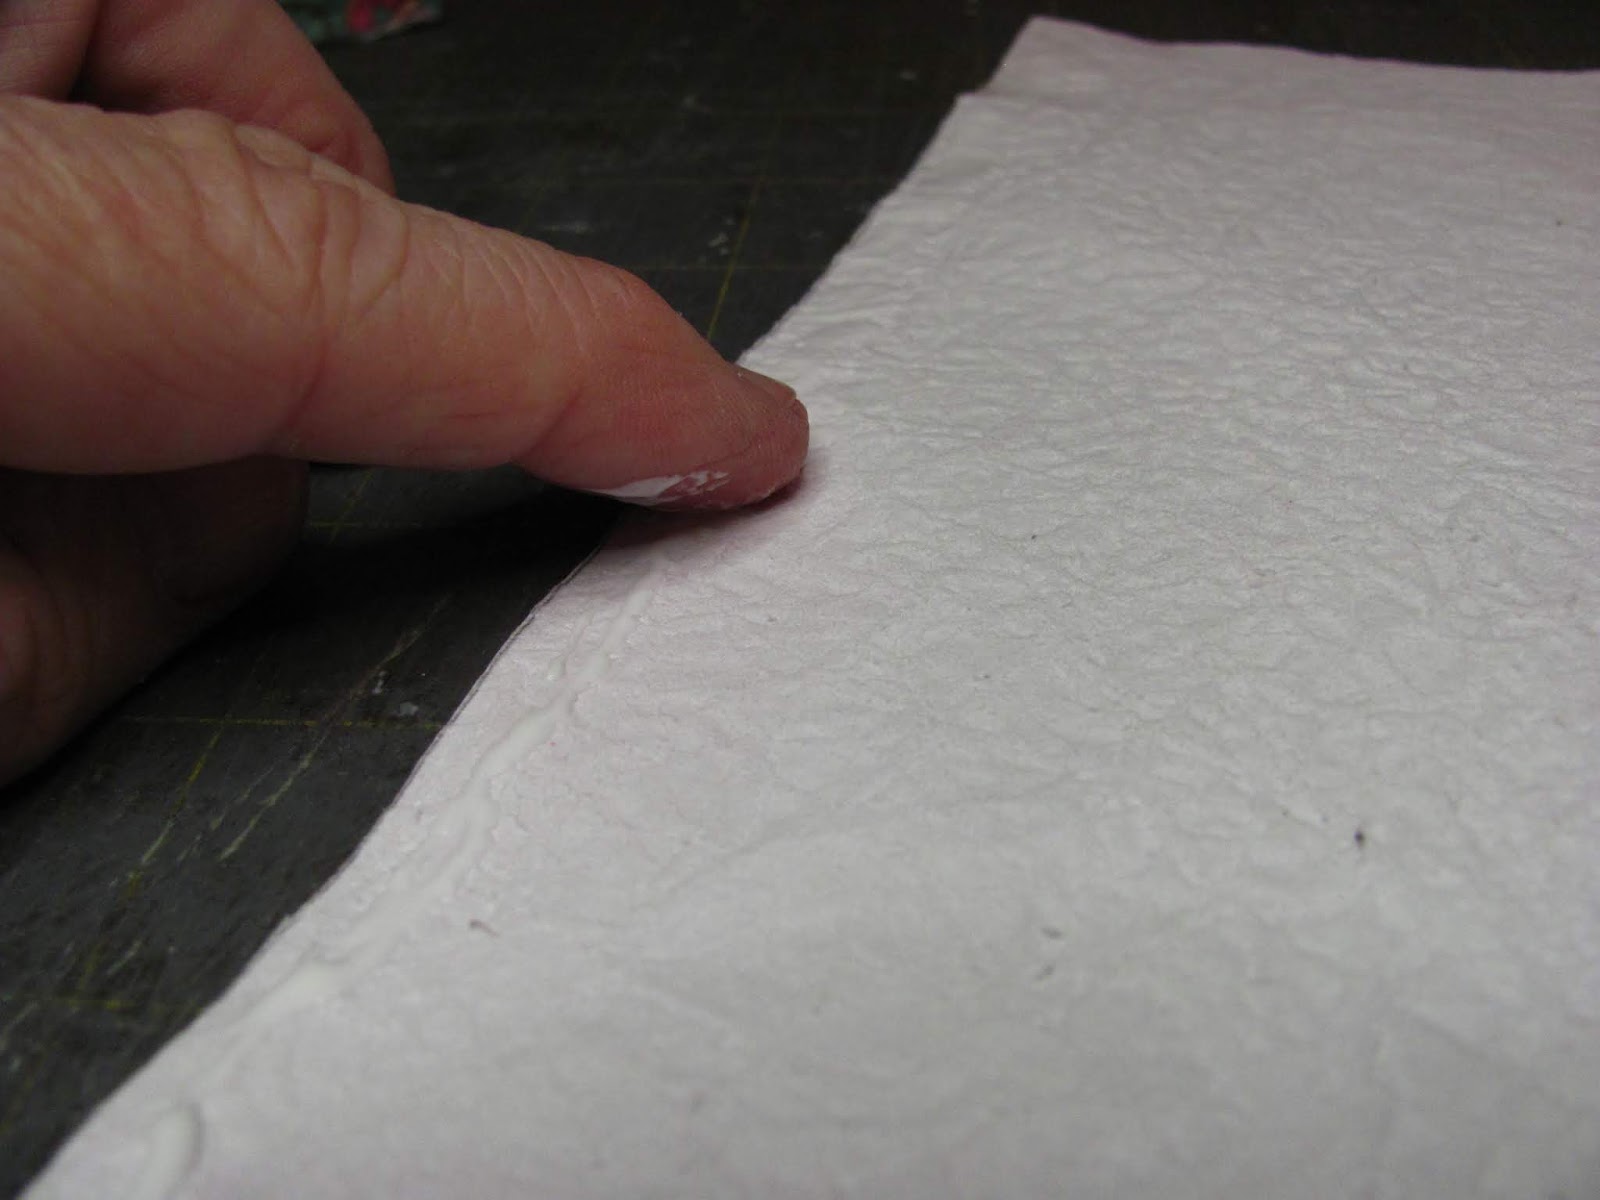
The top edge of the back cushions need to be softened.
I do this with my thumbnail.

This is how they should look.

The backs will have three layers of batting.
The first layer is about a 1/4" smaller all around.
Apply tacky glue to the foam core and glue the first layer on.

The second layer is the same size as the cushion.

The third layer is cut to size every where but the top.
The top is pulled over the top of the back.

The third layer on the front of the cushion.

Apply a little tacky glue to the edge of the batting on the sides and bottom.
Don't apply glue at the top.

Place the cushion into the chair and trim off the extra.

I've got both cushions with batting.

They have both been trimmed.

Cut paper large enough to cover the cushion.

Begin with gluing up the bottom.
Trim as shown in the picture.

Cut notches in the curved area and glue the paper to the foam core.

Set the cushion into the chair and cut a slash at the top to match the where the back is dipped.

Apply glue to the top of back and to the bit of foam core on the seat base.
Glue your back cushion into the chair.

This is what the back should look like.

Trim the paper and cut notches out.
Glue the paper to the back of the chair.

Getting ready to glue the other back cushion in.

The other back cushion is in the chair.

The paper is trimmed and the notches are cut.

The paper is glued down.

Looking good.

I wanted to show you a close up of the texture of the paper.

Trace the back pattern onto card stock to make a back cover.

Apply glue stick to the back cover and glue it to the wrong side of the paper.
Cut notches along the curved areas.
Apply tacky glue to the card stock and glue the paper down.

Apply tacky glue to the back of the chair and glue the back cover to the chair.

Trace the front cover pattern onto card stock and cut out.
Apply glue stick to it and glue it to the wrong side of the paper.
Trim around the front cover cutting notches around the curved areas.

Apply tacky glue to the card stock and glue the paper down.
Leave the top un-glued.
Apply tacky glue to the front of the chair and glue the front cover on.
Glue down the paper that is at the top of the front cover to the top of the seat base.

Dry fitting my seat cushion.

The first layer of batting for the seat cushion is about a 1/4" smaller all around.
The second layer fits all around.
Apply tacky glue and glue the first and second layers onto the seat cushion.

The third layer is glued to the bottom of the cushion.
This will go up the front and over the top.

The top is not glued down.

Cut out enough paper to cover the cushion.
Glue the front and back to the bottom of the cushion.

Make sure the batting is trimmed to the foam core. If any batting is left hanging over it will make it difficult to glue the paper down or fabric for that matter.
Fold the sides as in the picture and glue down.

Fold the paper down and glue.
Trim off the extra.

Carefully remove any glue before trying your cushion.
Yes, I am making piping.
Apply tacky glue to the edge of the paper. Smooth the glue out to the edge of the paper.

I use size 10 crochet thread.
Press the thread onto the glue.

Fold the paper over the thread.
The thread has to be in the very fold of the paper.
I fold with one hand and push the thread over to the right with the other thumb. This tightens the thread and makes it easier to get it into the fold. I don't know if that helps you or not.

For fabric I use my nails to seal the thread down.
For the paper I found that setting the edge of this ruler close to the thread works better.
Don't slide the ruler, set it down and move on. Flip the paper over and do it on the other side. I did this a couple of times on both sides.

Cut your piping away from the paper.

Apply glue to the seam where the back cover meets the chair.
Start at the bottom back and over the arm, over the top, over the other arm and down to the other back corner.

I apply glue to the seam where the front cover meets the chair and apply the piping to the front of each arm.

Apply glue to the edge of the seat cushion and apply the piping.
I only apply piping to the front half of the bottom of the cushion.

This is an option.
I added a piece of piping along the seam where the two back cushions meet.

The piping is on.

Fourteen to sixteen inches is what I used for the length of the ruffle. I had to glue two pieces of paper together. Make the overlap about a 1/8". Larger and it will interfere with your gathers.
I first turned a hem and glued it down. Measure from the bottom of the hem 1". Draw your line on the right side of the paper. Fold on that line. Trim off the paper to 1/2". Apply glue to the edge. Smear the glue towards the cut edge. We don't want too much glue in this tube.

This is 26 gauge covered wire, I eventually switched to 20 gauge covered wire because the 26 gauge would not push through my tube.
Go ahead and fold the paper over and glue it down.
So we've made a hem and a rod pocket for the wire to be threaded into.

You can see my 20 gauge wire now.
Carefully thread the wire through the tube, gathering a little bit as you go. The paper will not push together a long bunch of gathers.
When you have the length and the amount of gathers you like cut the wire and bend it back as in the picture.
I have both ends bent, the paper is covering the wire a bit on the left.

I made a deep ruffle for this chair, I thought it fit with the spirit of the chair.
Apply tacky glue along the front edge.

Press the ruffle into the glue, holding it a bit to tack.
I had to have my end seam on the side because I made my overlap too large and it interfered with my ruffling!
When I came to the end I straightened out my ending wire and glued the paper to it. I then cut the wire so that it butted up to my beginning ruffle.

So, how did you like that? You know I am going to use this in my attic. I liked the experiment and could see me using the paper again if I found something that was "just the thing".
Have fun, Expand on it, Make it better . . .
Just Keep Making Minis!!
Talk to you later, Kris