

I had a request, (last summer) to make a Peacock chair in 1 inch scale. I finally got to it.
It is almost all card stock and pretty easy to make.
I want to mention something about the fabric I use. I have been getting questions about finding "miniature prints" fabric on-line. I don't buy my fabric on-line. I use 100% cotton fabric, usually from quilting shops. I like to stop in owner operated shops, nothing against the national chain fabric stores, I have bought plenty of fabric from them, too. The fabric pictured is a cute boomerang print. I found it in a owner operated craft/quilting store on the flat fold tables, kind of buried. I wish they would have had other color combinations but I bought my 1/3 yard and ran home happy. There are tiny to small prints available you just have to look around.


Print out 2 pages of the frames for a total of 4 frames.


Here are the patterns Nancy drew for us. Look in the "Things to do, Things to see" list for "HOW TO RE-SIZE THE PATTERNS" for instructions on how to make the patterns 1 inch scale.
Everything is printed onto card stock. Print two pages of pattern number 2 for a total of 4 frames. Depending on how tightly you weave you might have to print two pages of pattern number 4, the weavers.

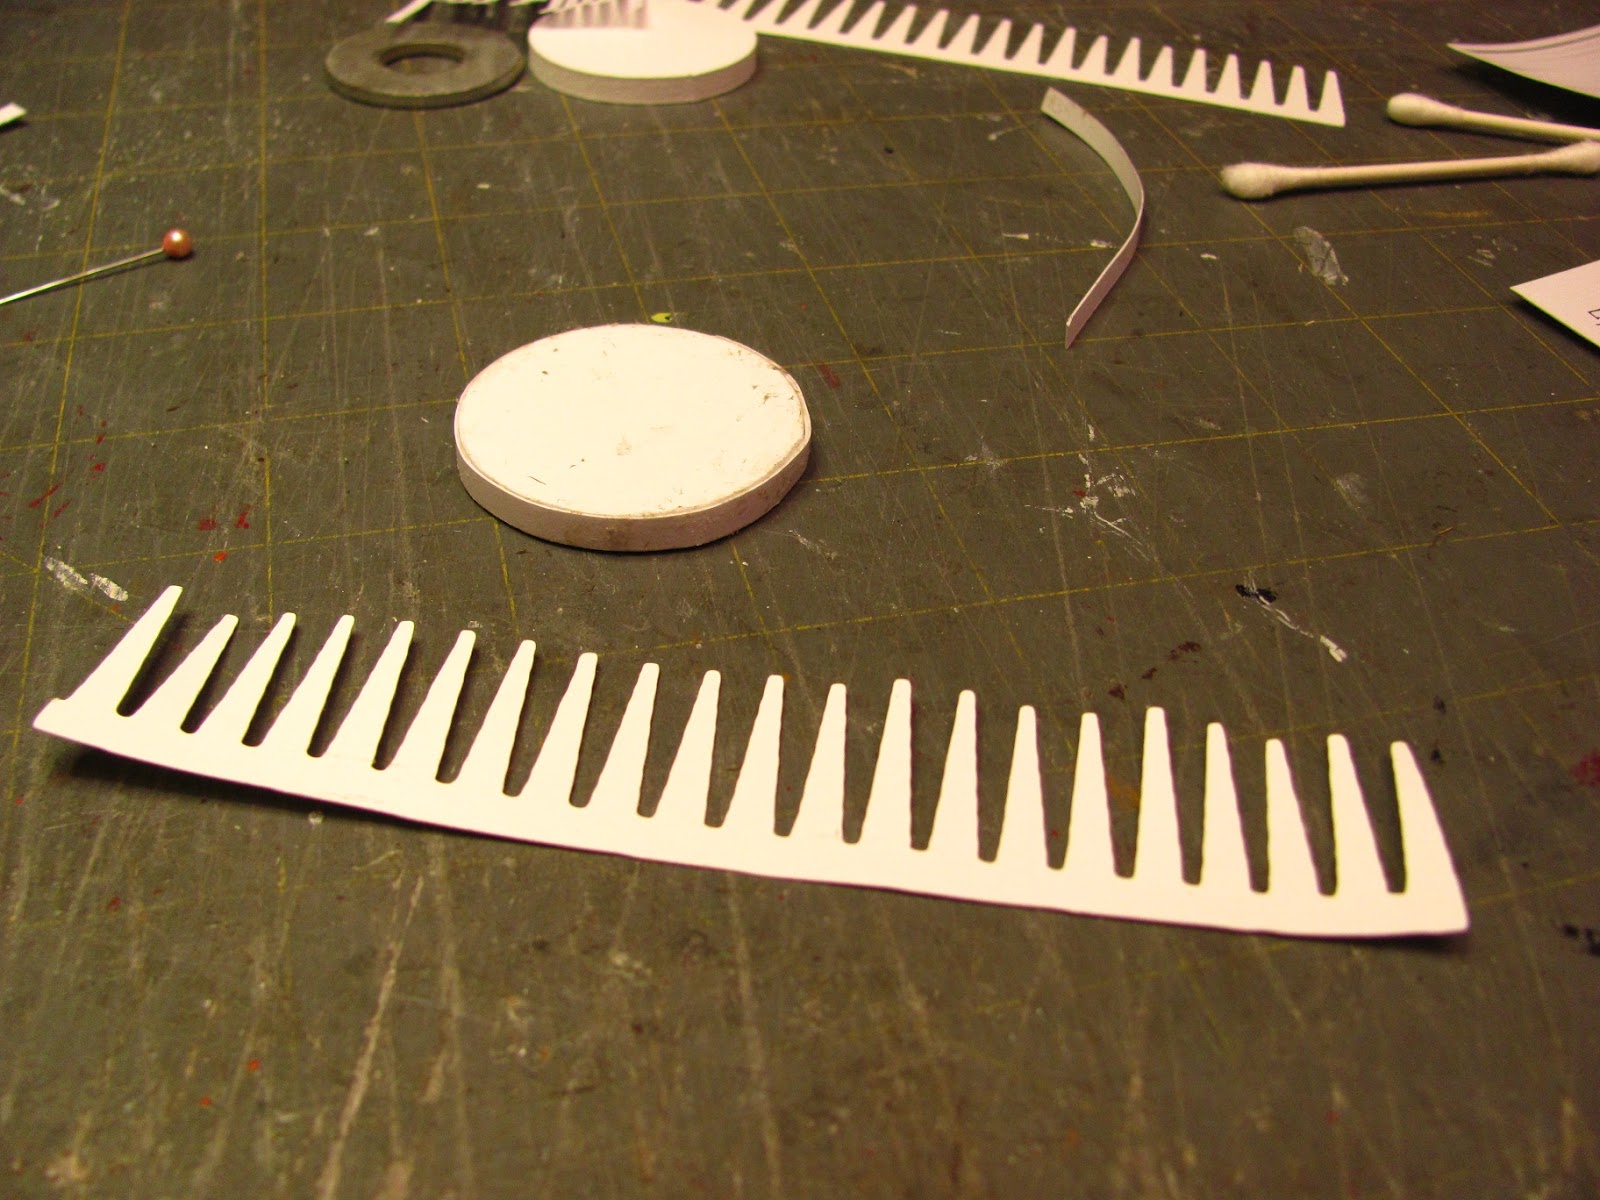
Use your craft knife to cut out 1 back, 4 frames, 2 pointed strips and your weavers. Not pictured on the left is the seat/base connector, cut 1 of those also.
Use your circle template to trace 2, 1 5/8" circles onto 3/16" thick foam core. While you are tracing mark the quarters onto the circles.
At the end of this tutorial I am offering what you see in the picture above at a kit, the patterns are all ready cut out for you.

From scrap card stock cut 5 or 6 strips 5/32" wide.

To cover the foam core middle I used tacky glue to glue on a card stock strip.

Depending on how you cut the foam core and because I sent Nancy measurements forgetting I had covered the edge with the card stock you will dry fit the pointed strip.
The ends of the pointed strip should meet, not overlap.
Apply more strips of card stock using yellow carpenter's glue until the pointed strip fits.
There is one of my pointed strips and one of my foam core circles.

The pointed strip now fits, the ends just touching.
Just a dry fit, don't glue the strip on.

To add weight to the chair I am using a washer.
This washer is 1 3/8" in diameter and maybe 1/16" thick.
You could leave this out but I think the chair would have a tendency to tip.
Ace Hardware, Lowe's or Home Depot would have something like this.

Trace around the washer onto one side of one of the foam core circles.

If you didn't do it before, I didn't, mark the quarters onto one side of the foam core circles.

Here are the 2 circles marked.

My trusty bottle of yellow carpenter's glue.

The Peacock chair has 4 uprights between the base and seat.
To make these I am using Q-Tips.
Carefully scrape or cut off the cotton on the ends of the sticks.

My Q-Tips measured 2 3/4" long.
I need 1 3/8" for each upright. I was able to cut my 2 sticks in half.
If your sticks measure differently cut 4 sticks 1 3/8" long.

Use a "T" pin to pierce a hole, not through the bottom, into the space between the line and the edge at the quarter marks.

Drill holes into the marks, not through, on both circles of foam core.
Dry fit the uprights. Don't glue them in just yet.

Use your craft knife to cut on the line you drew earlier, not through. Take out the foam core.

Clean out the center leaving the margin with the drilled holes and the bottom paper intact.

To fill the center hole of the washer I cut a small foam core circle to fill it.
Place the washer into the foam core circle and glue the small foam core circle into the center.

Trace a 1 5/8" circle onto card stock, mark the quarters and cut out notches for the uprights.

Glue this over the washer matching the notches to the holes.

The next piece is the base/seat connector. Cut it out and run it over the edge of the table to begin the curve.

This connector is 7/16" in diameter. I was going to use a dowel but cutting it off with a truly flat, level end is hard to do. Nancy draws such accurate patterns that I thought it best to use her card stock pattern.
I did use a dowel to fold the connector around and glued the overlap with yellow carpenter's glue.

Glue the connector to the washer filled base matching the quarter marks.

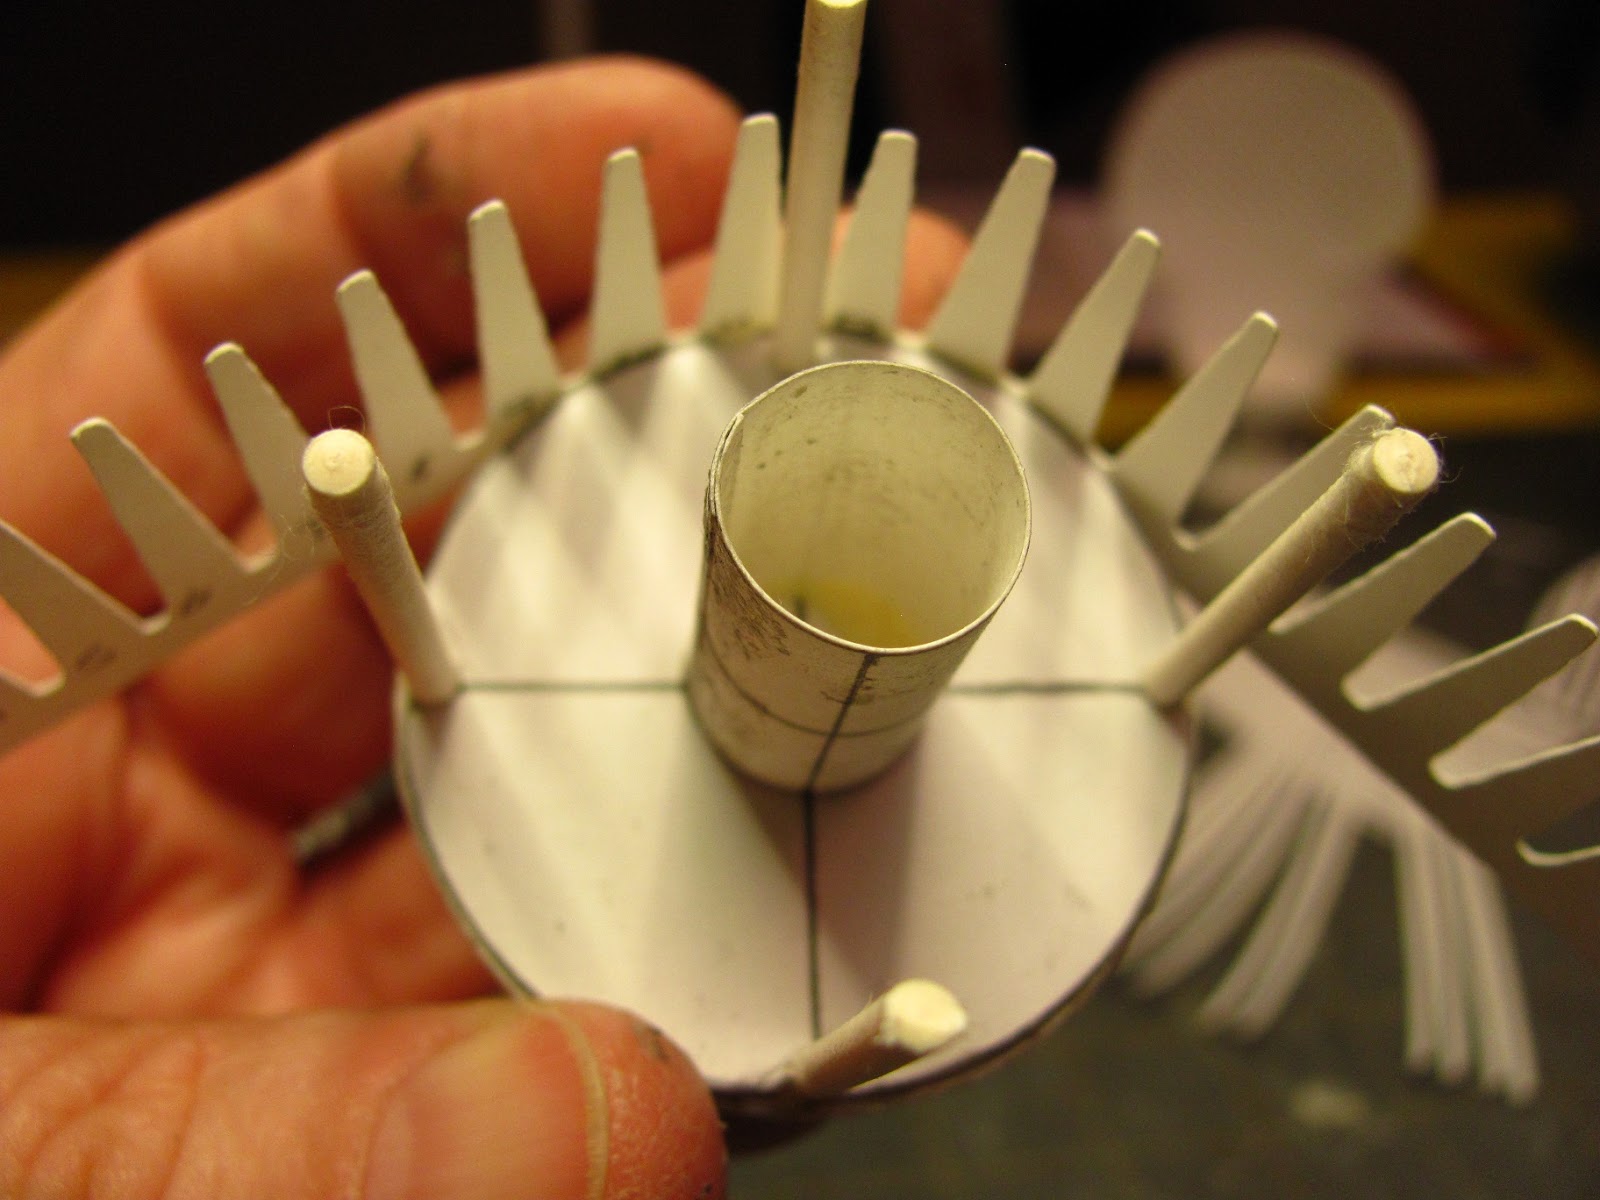
Glue the 4 uprights into the holes.

Lay the pointed strip down on the table with the tab end on the left.
Count over to the 12th point and mark between it and the 11th point.

On the other foam core circle, the seat, glue the pointed strip matching the mark you just made with a drilled hole.

Finish gluing the pointed strip onto the foam core circle matching the ends.
Mark the other pointed strip the same way and glue it onto the base just like you did with the seat.

Showing another view.

Because I only did the math for fitting the points evenly around the outer edge and the center connector and not for fitting the 4 uprights into spaces I want you to cut out the point at the center back on both the base and seat.
Set the base and seat off to dry.

Begin to weave, over and under on the back.
You may weave with very little space left between the weavers or you may leave lots of space between the weavers. I leave this up to you and what you like.

I think I could have left more space but I was on my way.
I DID NOT glue the ends of the weavers to the frame.

I'm done. I'm beginning to trim off the extra lengths of weavers.

All trimmed off.

Apply yellow carpenter's glue to the bottom edge.

Press the bottom of a frame into the glue. Apply glue a little at a time and press the frame into place.

One frame glued onto the back.
Glue another frame on top of this one.
Glue the last 2 frames onto the other side of the back.

You have 5 layers all together.

If you didn't cut out the center back point on the seat before, please do it now.
The hole at this spot is the center back, where the center of the back will match and be glued.

Measure and mark the center of the bottom of the back.

Apply yellow carpenter's glue to the bottom edge of the back and press onto the seat, matching the centers.

I used a rubber band to secure the back to the seat.

Bend the points out from the base and seat.

Dry fit the uprights into the holes of the seat.
Take it apart and apply yellow carpenter's glue into the holes and on the edge of the connector.
Put the seat back onto the base.

Put the chair onto something so that it sits upside down.
This is so the glue on the connector will seal to the seat.
Please, Please let this dry overnight.

It is tomorrow, I've removed the rubber band and here is my chair ready to be finished.

Apply YCG, (I know you must get tired of "yellow carpenter's glue" all the time) to the center line of the connector.

Use your tweezers to press the points into the glue on the connector.

You will have to trim off the points at the side uprights.
I wasn't thinking of the uprights at the time, just getting the strip to fit around the circles, sorry.

I've glued both the top and bottom points to the connector.
I am going to spray the chair white.

For the seat cushion I took 2 pieces of scrap card stock and glued them together using glue stick.

Trace a 1 5/8" circle and cut it out.

Dry fit into the seat of the chair.

I cut 2 pieces of batting for the cushion.

Cut a circle of fabric and sew a gathering stitch around.

Fit the batting and card stock into the fabric circle.

Continue to sew a gathering stitch around getting closer to the edge.
Knot off.

Squirt some tacky glue under the fabric near the edge.

Press the fabric into the glue and trim off the excess fabric.

Dry fitting the cushion.

Another coat of white paint.

It is done.

Ready for a summer patio or . . . .
Morticia Addams!
In the "Things to do, Things to see" list you will find a tutorial on how to make piping.
Remember if you have any questions or want a finished tutorial put in the Follower's Gallery E-mail me at camceiling@frontiernet.net
Have Fun, Expand on it, Make it better . . . .
Just Keep Making Minis!
TTUL
Kris

Latrica sent a picture of her weaving in process.
I like the way she kept the chair frame together, this gives her something to hold on to.

This is her finished chair.
I so appreciate the miniaturists that actually make the tutorials. You keep me going . . . .
Good Job, Latrica!