

I decided to make a metal looking shelf this month. This could be used in a bathroom or if you painted it black with maybe marble shelves you could put it in a dining room.
I wanted to laminate quilling paper together as I have before but not use a form. Making the form can be tedious and might keep some of you from making the shelf. I tried another way not using a form but it didn't work out.
I went to my Brother Scan and Cut, it's like the Cricut Maker.
Finally, I have something I can ship you in an envelope. My other things have been over a 1/4" thick and I have to send them out as parcels at $3.50 a piece and I really dislike doing that to you.
At the end of the tutorial I will have the information for the getting the curly parts.

You will notice that I have a textured surface on the shelves. I am going to show you how to do that first.
I used heavyweight poster board, the shiny side up to paint on.
I used a metallic paint, a very light gold. I sponged it on the shiny surface. This paint is shiny when it is dry, it has a slick surface. Let this dry.

This is the poster board that I buy from Michaels.

Showing the paint I used. This paint does dry with a slick surface. This helps when I coat it with another layer of paint. The new layer won't dry out so fast.

Way too much paint!!!

Way too much paint!!!!

I've brushed off the extra paint but the paint is still wet.
That's important, the paint must be wet.

I applied plastic wrap onto the wet surface and wrinkled it up.
I pressed it flat.

I pressed it flat some more with the roll of plastic wrap.

Leave this for at least ten minutes.

After ten minutes peel off the plastic wrap.
Set this aside to dry.

I thought maybe I could make a marble looking sample this way, too.
I painted this piece of poster board with a light grey acrylic craft paint. This paint doesn't have slick surface when dry. Let dry.

I painted this piece with spots of grey.
After the grey paint is dry I applied a layer of black paint, this was also acrylic craft paint. Being that it was acrylic craft paint I had to work fast and dip my loaded brush into water to keep the paint wet. I could have used an extender to keep the paint wet but this was only an experiment.

I ran out of plastic wrap and started using shopping bags, this one is from Dollar General.
Let this dry ten minutes.

This is the all grey surface.

This is the spotted grey surface.

Again, this is the spotted grey surface.
I think if I had taken more time I could have gotten a passable faux marble for shelves.

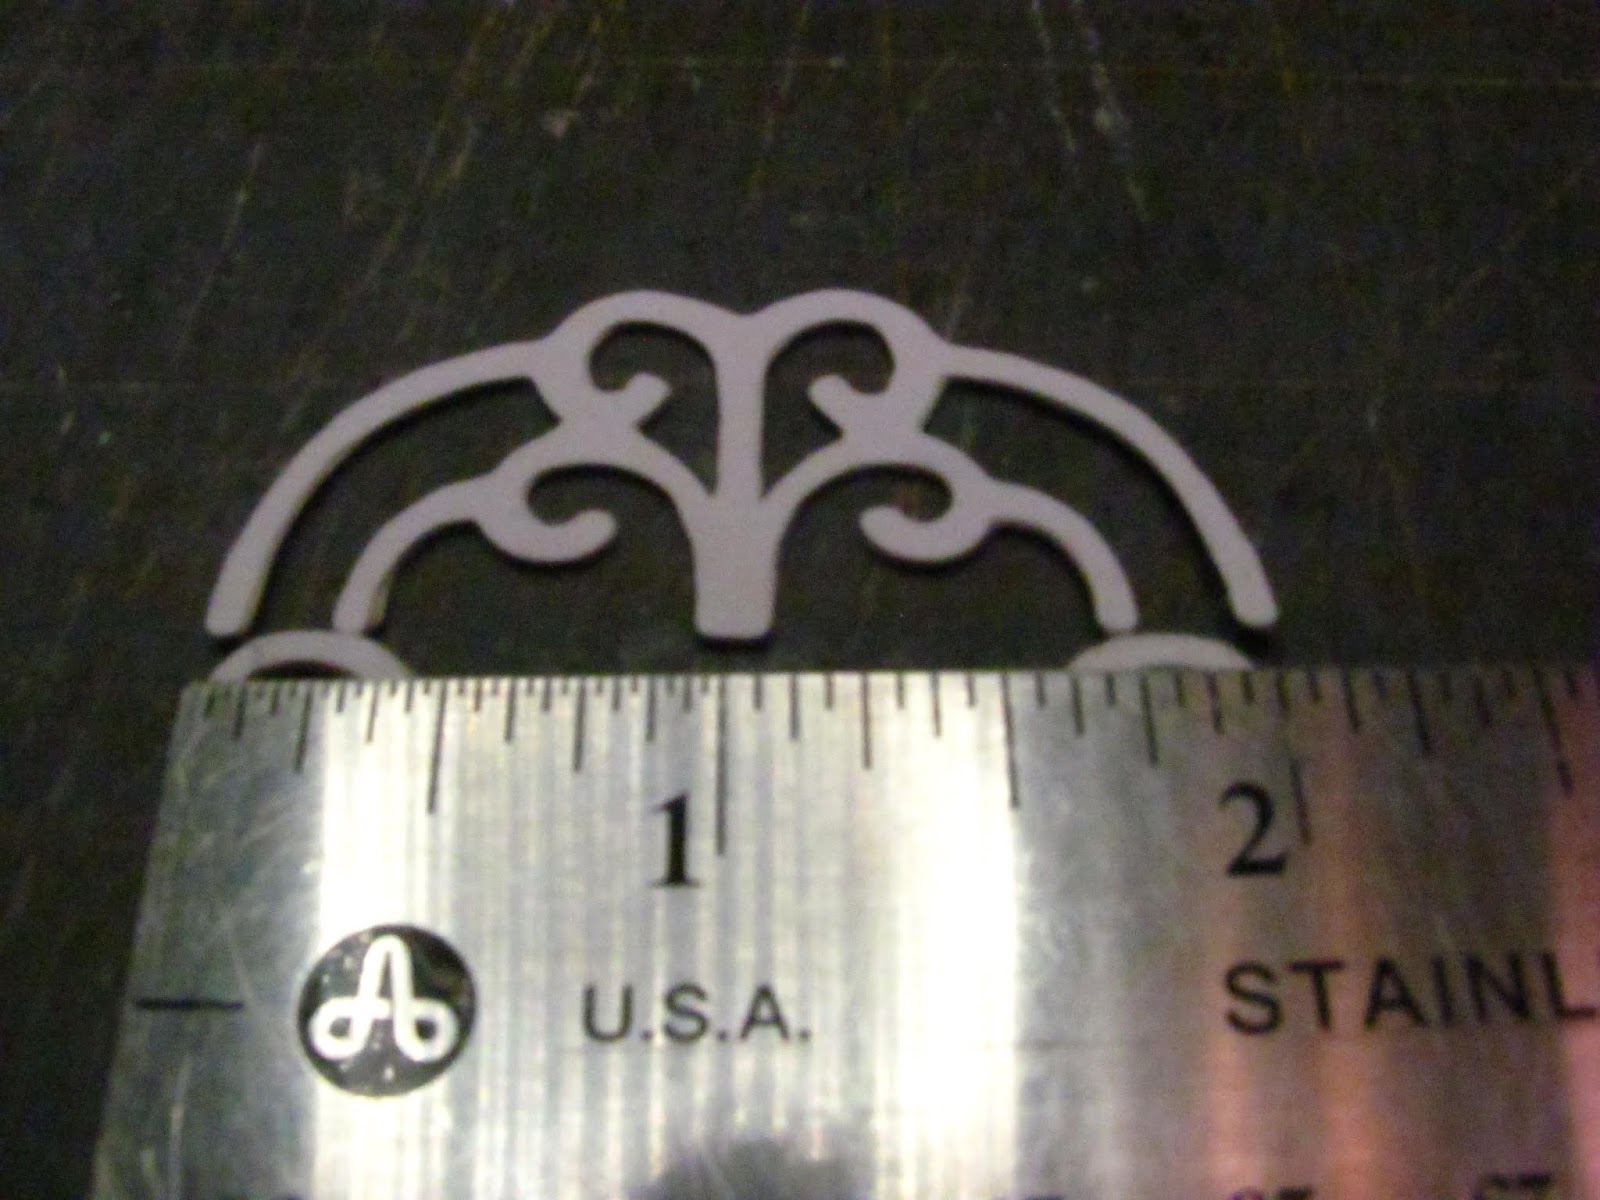
Here are the parts to copy if you have a digital cutting machine. Follow the directions in the "Things to do, Things to see" list at the left side of the blog.

With some help from my son-in-law, Neal, I have the parts cut out.

I glued three of the top curved pieces together.
Even though you see only four of the legs on the right side of the picture I decided to use five layers per leg. There are five layers glued together for the bottom stand.
I am showing a sponge at the top right because I found that using a sponge was an efficient way of gluing the layers together.

I have the three layers of the top glued together.
The two bottom stands are glued together, five layers each.
The four legs are glued together, five layers each.

This is how they will be glued together.
I used my top to measure where the tops of the legs should be.
Do you see that the ends of the top are in the middle of the curve at the top of the leg?

I am using my cutting mat to help with placing the pieces.
I divided the bottom stand in half, see the pencil mark? Tape the bottom stand down to the mat. I taped it right under a line on the mat.
Set the legs onto the bottom stand and glue with yellow carpenters glue. I taped the top of the legs down so my cats wouldn't move things around.

Use the lines on the mat to make sure everything is even.
Leave this to dry. I left mine overnight.
You will spend more time waiting on glue and paint to dry than you will actually spend putting the stand together. Letting the glue dry will only save you headaches.

Pop the assembly off the mat.

Trying to show how thick the stack is.
This shelf is pretty sturdy after it's all done.

I am measuring the length of my bottom shelf, 2 5/16".
Your measurements may be different depending on the way you positioned your legs.

I measured up from the bottom stand 1 1/8" and marked.
This is for the middle shelf.

Measure across, I am measuring 1 1/2" for the length of the middle shelf.
The top shelf will be 2" long.

I am going to use my little table saw from MicroMark. This the first table saw I bought. Although I did buy their bigger table saw because it's blade tips, I still use this saw all the time for cutting strips.
I don't think it cost much over $100.00 at the time that I bought it. They do have sales.

I am going to cut the width of my shelves at 1 1/2" wide.
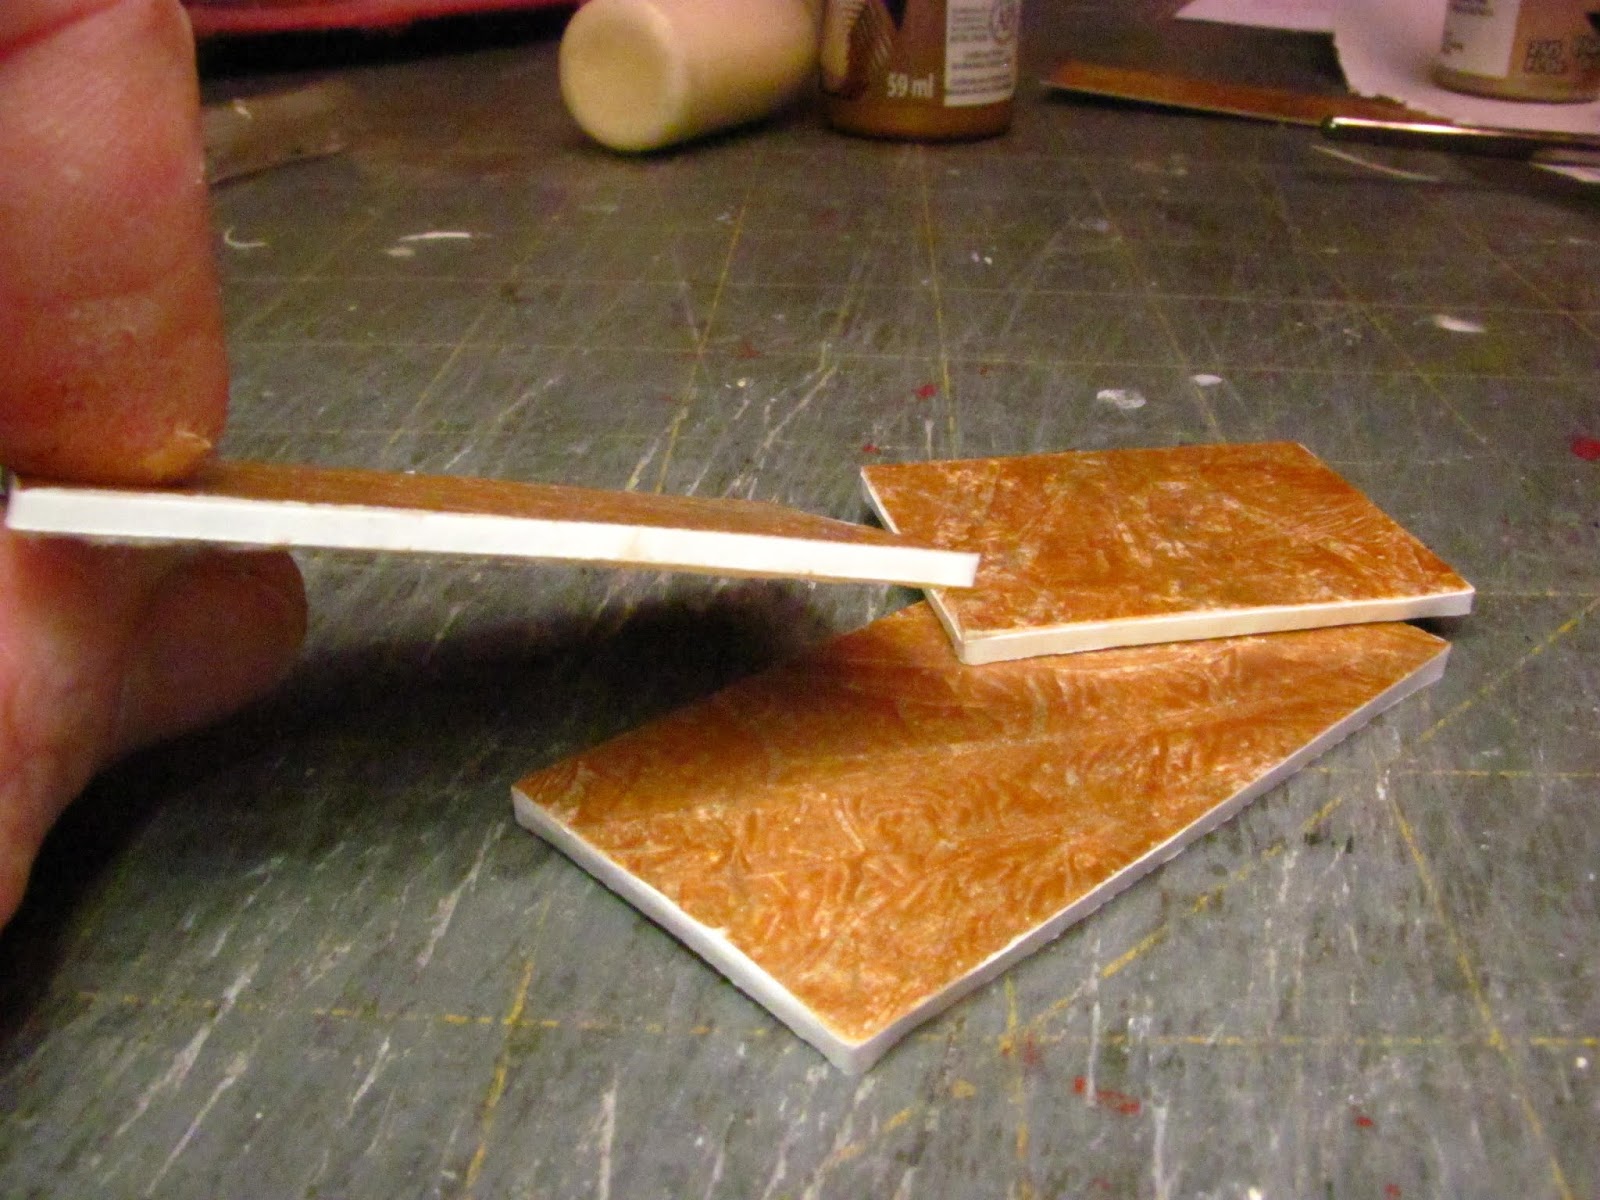
I am using one layer of mat board for my shelves because I am adding the heavy weight poster board on top to achieve the thickness I want.

I've got the shelves cut and the strip of gold painted poster board ready to cut and glue to the shelves.
Cut the poster board to fit the shelves and glue it to the shelves.
I used yellow carpenters glue for this.

Give the top and the leg assembly a first coat of paint.
Let dry.

For veneering the edge of the shelves I cut strips of PAPER, not card stock as I usually do.
The card stock will change the length of the shelves and we all ready have them cut.
Use yellow carpenters glue to glue the paper along the edge of the shelves.
Paint the edges and underneath gold.
After the paint is dry, very carefully and lightly sand, it's paper, lightly sand and apply another coat of gold paint on the edges.

Lightly sand the top and leg assemblies with 220 grit paper.
I want to remind you all that how you finish your miniature counts as much as how you assembled it.
You always sand after you paint the first coat. Yes, you can paint a second coat but you sand after that and apply your final coat. Just painting and repainting doesn't make the surface look better, it's in the sanding.

I carefully sanded the leg
assemblies.
Give everything another coat of paint and let it dry.

You can use tacky glue to glue the parts together since we are not gluing paper to paper but paint to paint. I used yellow carpenters glue and it worked just fine.
Glue the bottom shelf into one of the leg assemblies.

I am using an engineer's square (MicroMark) to make sure the shelf is square.
Let this dry before you go to the next step.

Gluing the other side on.
The new side is against the mat. I am doing this so that the shelf will be flush with the edge of the leg.
Let this dry.

Beginning to look like something.

Remember, I measured up 1 1/8" from the top of the bottom stand.
I cut the mat board 1 1/16" wide for a spacer. (Why? The mat board is 1/16" thick so I subtracted that from 1 1/8" and got 1 1/16".)
Score the mat board, fold it in half and use it to glue the middle shelf in.
Let this dry.

Letting everything dry.

Glue the top shelf onto the curly tops of the legs. Let that dry a bit. I turned the shelf upside down to the let the top shelf dry.
Glue the top onto the back of the shelf.
I placed the whole thing on it's back to let the top dry in place.
If you want you can spray a finish on the shelves. This paint is shiny so I really don't have to.

Here is a side picture of the shelf.
I would have preferred to have glued everything together with no paint, I just like gluing paper to paper. I wouldn't have the nice finish on the shelves, though.
You can glue it all together and then give it a couple of coats of spray paint depending on how you are going to decorate with it.
I can see it with a black wrought iron look and marble shelves, too.

United States shipping only.
I am going to be really elementary here, forgive me.
Send me a Long Self Addressed Envelope with $1.15 postage on it.
In your envelope send me two postage stamps for payment equal to $1.00.

I will send you back the parts you will need to make the shelf.
I am sending extra parts just in case.

The parts will be folded in the paper.
Legs in one side.
Top and bottom stands in the other.
Kris Compas
3900 Shipman Cutoff Road
Bunker Hill, IL 62014
Have you checked the Follower's Gallery lately? I've added some new pictures. They are all quite inspiring and I hope to see more pictures of the finished tutorials.
camceiling@frontiernet.net to send pictures or ask questions.
I want to wish everyone a Very Merry Christmas!!
Until next year,
Have fun, Expand on it, Make it better . . .
Just Keep Making Minis!!
Kris