Tuesday, May 20, 2014

1 INCH SCALE VINTAGE CARD STOCK CANISTER SET - How to make a 1 inch scale vintage canister set from card stock.


I saw this "how to" in a full size decorating magazine using a ready made canister, fabric and Modge Podge.  I thought it may be a quick project to do.
I am sure most of you know how to do what I am going to show but maybe we have some newcomers to the hobby that haven't seen it.
When I was researching vintage metal canisters on-line I saw so many I wanted to make, I could spend a year making one for each month there were so many!


The first thing you need are some dowels.  I used: 3/4 inch, 5/8 inch and 1/2 inch dowels for this tutorial.

Dowels are the easiest shape to find that are graduated in size.

When I was on-line I saw many canisters that used the largest diameter (3/4 inch) for all four canisters, they just graduated the height of the canisters.


From card stock cut 3 strips, 11/16 inch wide, 5/8 inch wide and 9/16 inch wide.


On another piece of card stock measure 1/16 inch away from the edge and draw a line.


I used a pair of scissors that cut a scalloped shape.  You don't have to have a shaped edge, the edge can be left plain or you can use other scissor shapes you might  have.


I used the line I drew to keep my width even all along the strip.

Set this aside for now.


Wrap the strips of card stock around the dowels, trim to overlap and glue.  I used yellow wood glue for this as I do for my paper projects.

I used the 1/2 inch dowel twice for two canisters that size.  Using a smaller dowel for the last canister seemed too small.


Make sure that the card stock isn't glued to the dowels, rotate the card stock to un-stick it.

After the glue has dried a bit I used sand paper to smooth the seam and take a little bit of the bulk away.


I used "Fruit Spray" by Mini Graphics wallpaper to cover the canisters.  You are probably saying, "Why don't you just use the wall paper and not the card stock?"  I wanted the canisters to be sturdier, maybe something a child could play with.

Cut strips from the wall paper the same widths as the canisters.


I used wood glue to glue the wall paper to the card stock canisters.  Rotate the canisters so that they are not glued to the dowels.


Apply glue to the bottom of the canister.


Set this down onto card stock and smooth the glue around the edge.  Let dry.  This is the bottom of the canister.


Apply glue stick to card stock and glue two layers together.


This is the glue stick I use.


Use a circle template to measure the diameter of the canisters with the card stock and wall paper on.


Draw circles on the doubled card stock for lids to fit the canisters.

You will notice I have four sizes drawn, I changed my mind about the largest canister and didn't use it.  It would be good for a cookie jar, it was 7/8 inch.


I am going to use button hole thread to create the rolled edge on the bottom of the canister.


I have a spool of sewing thread next to the button hole thread to show the difference.

Paint the button hole thread to match the background of your wallpaper.


After the paint is dry on the thread use tacky glue to glue it to the bottoms of the canisters.

Here I have the canisters, tops of lids and the scalloped strip of lip.


Use yellow carpenter's glue to glue the scalloped lip to the edge of the lid.

I use the carpenter's glue instead of tacky because the tacky doesn't firm up fast enough, it stays flexible and easy to move.  I don't want this piece coming off as I glue it on.


The lips are glued onto the lids.


Cut a strip of card stock 3/32 inch wide for the handles.


I cut the largest canister's handle 3/4 inches long, the next 5/8 inches long and the last two are 1/2 inch long.

I used my tweezers to turn the ends flat so that I could glue the strips to the lids.  I bent the strips over the handle of a paint brush to round them before I glued the handles on using carpenter's glue.


I made the lids removable, it's fun to have things work like the real thing. You don't have to.  You could glue the lids on just like the bottoms and glue the lip onto the canister.

I painted the lids red at least four times. I then used an acrylic varnish for shine. I gave the lids one coat of that and the canisters at least four coats.


Let the varnish dry before you set the lids on or the lids might stick.

I know this is an oldie but I think it's a goldie!


The weather is starting to warm up, save some time for minis and have a go at making the canister set.

If you have any questions please e-mail me at camceiling@frontiernet.net.

Please, send me photos of your finished tutorials, use the e-mail address above.

Have Fun, Expand On It, Make It Better . . . . .
Just Keep Making Minis!!

Kris

Friday, April 18, 2014

MAKING "BUTTONS" FOR 1 INCH SCALE DOLLHOUSE FURNITURE - How to make faux buttons from card stock for 1 inch scale dollhouse furniture.


I was asked by Roberta how I make the "buttons" that I put into the back cushions on my furniture.  I thought that was a good topic for a tutorial for this month.


This is not an upholstery tutorial.  I have that listed on the left side of the blog, Make and upholster a 1 inch scale chair.

I have a back cushion cut out and I have the button placement marked on the pattern.


Place your pattern on the cushion back and punch through the foam core with a pencil to mark placement.


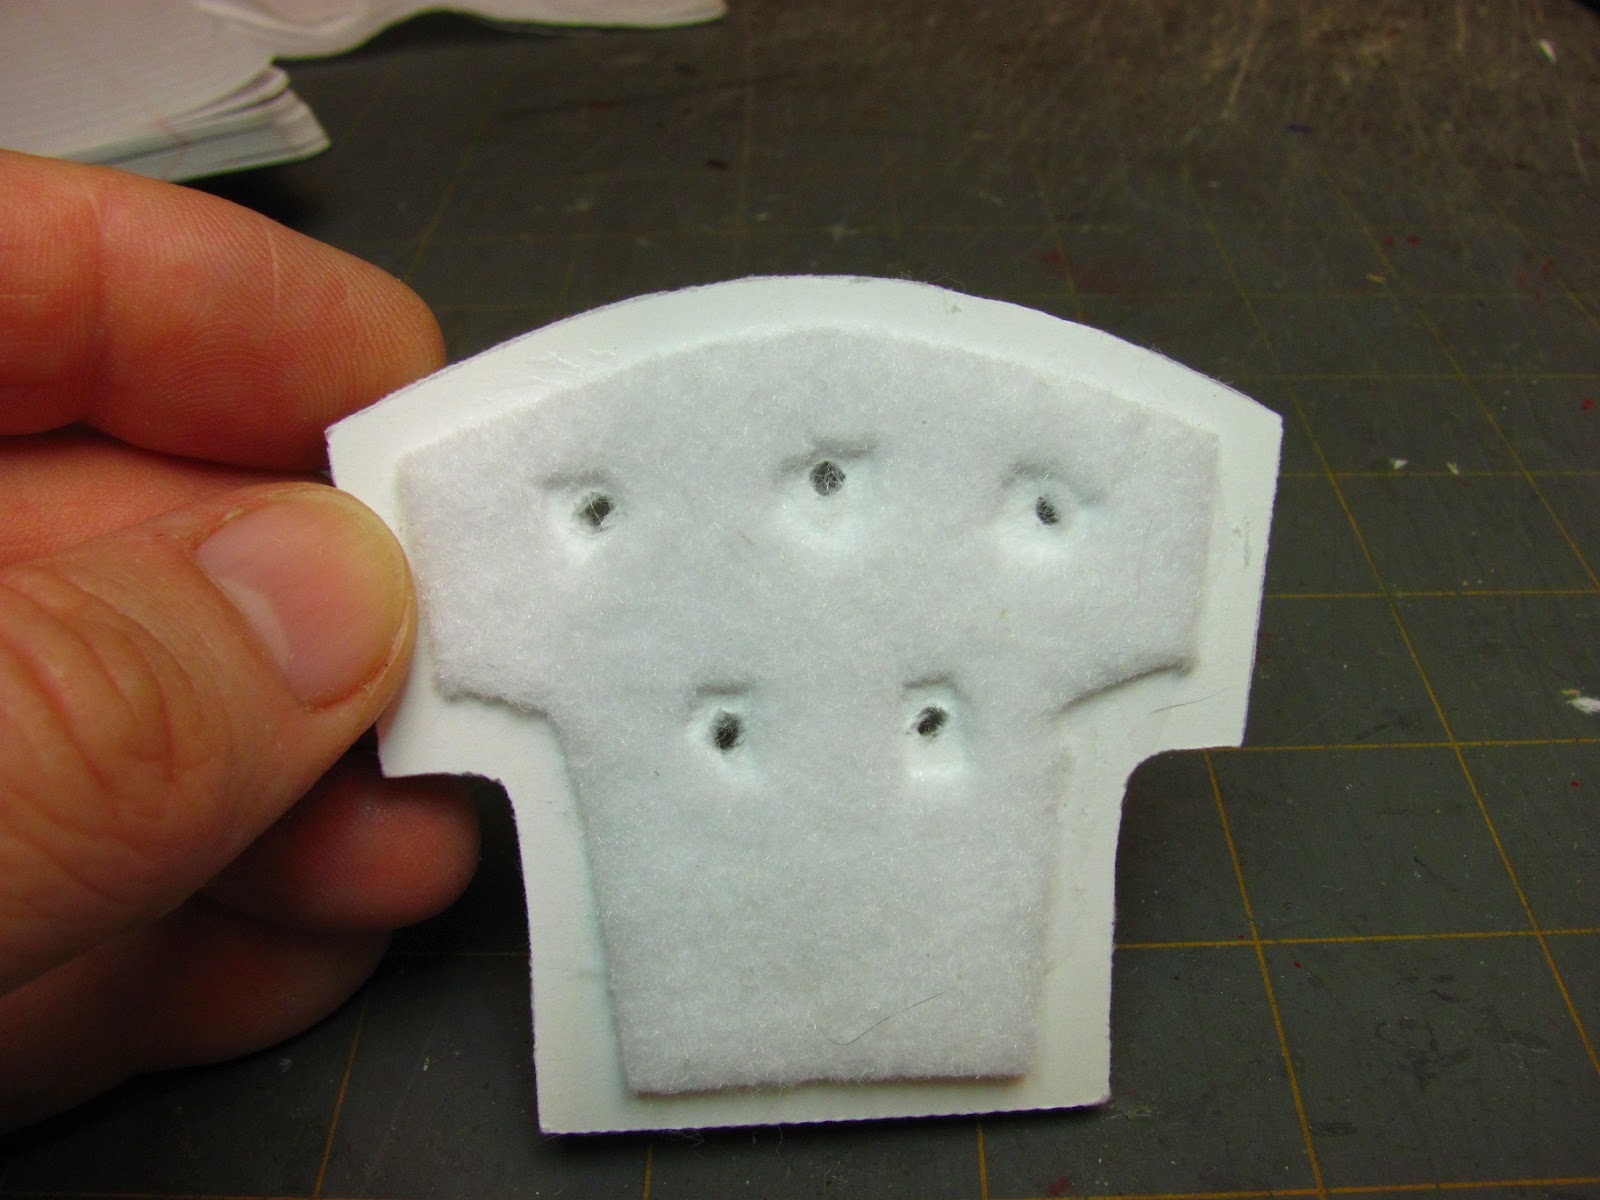
There are the holes made by the pencil.


I am using my Dremel to drill holes through the foam core.  That's probably a 1/16" bit.


Use tacky glue and apply it on the back cushion.  Can you see that I have left the area around the holes without glue?


This is my first layer of Thermolam Plus.  I buy this at JoAnn's or Walmart, do not buy the fusible.


With your sewing scissors cut out around the holes.

I say sewing scissors because we don't use those to cut paper with, do we? We only use our sewing scissors for fabric so they stay sharp.


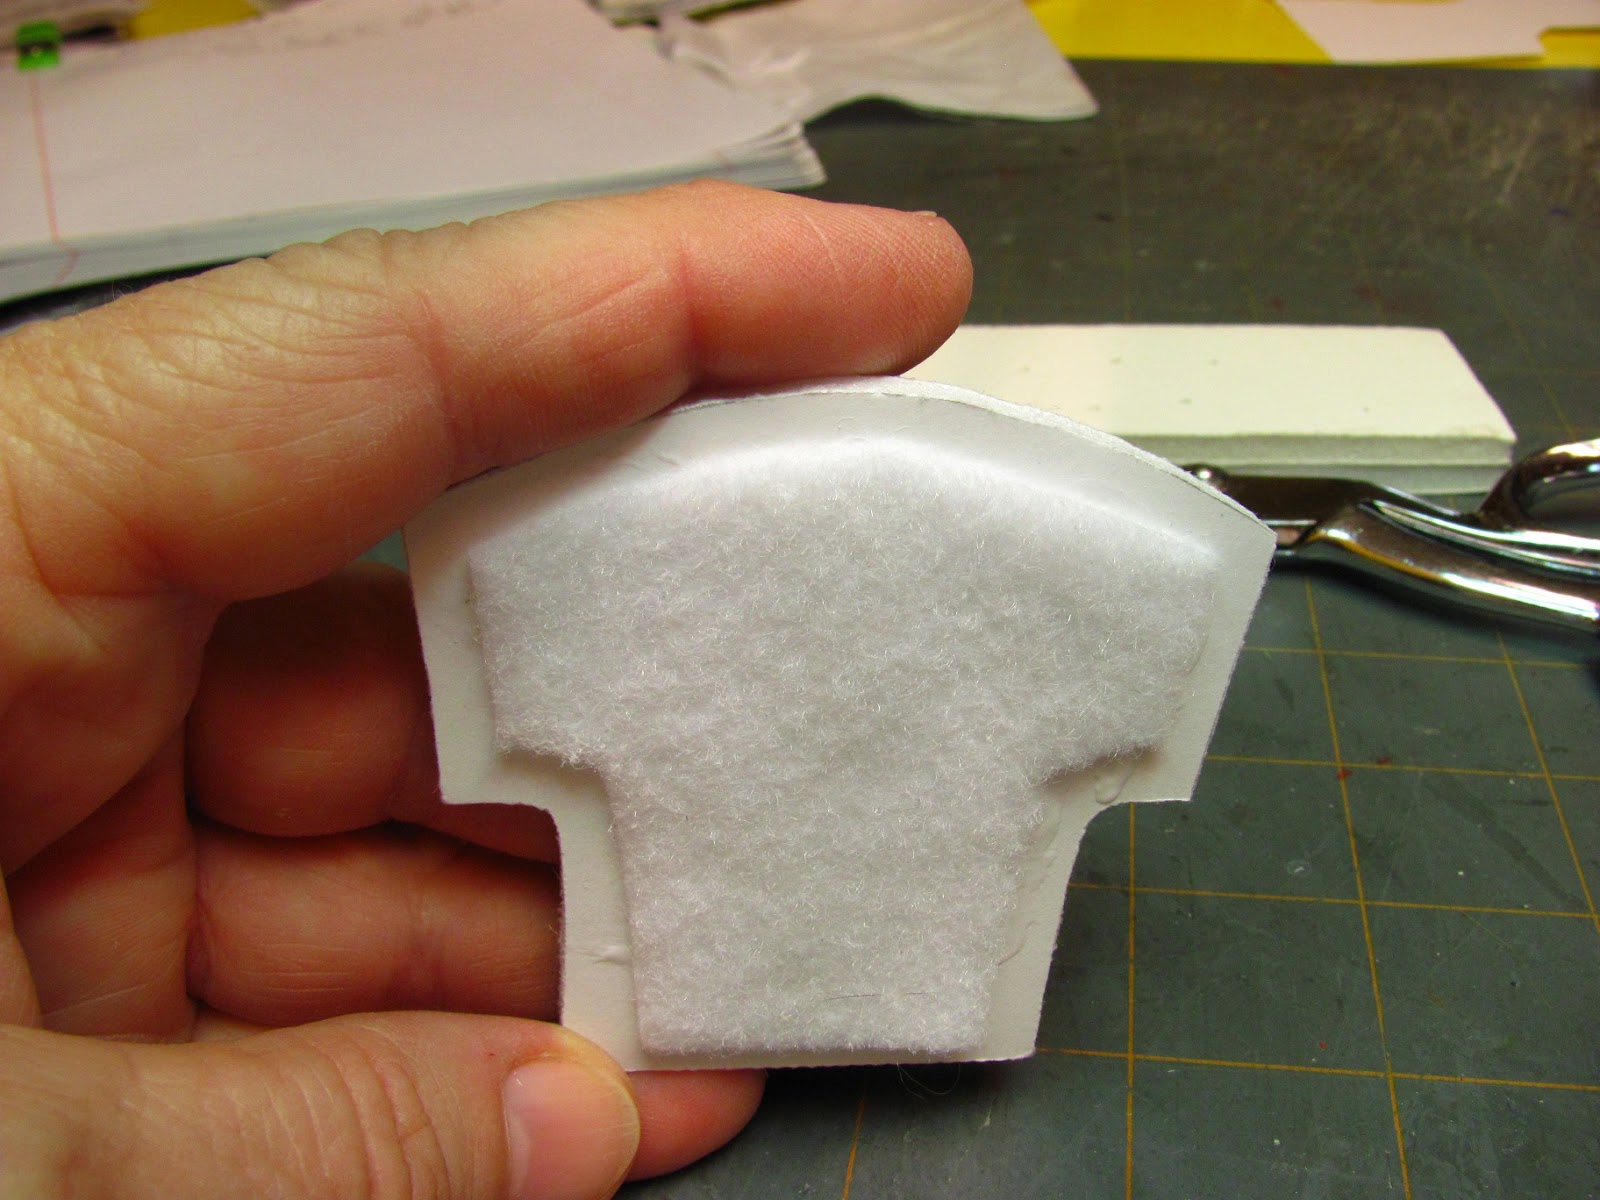
This is the second piece of Thermolam Plus.


The second piece is glued on and the holes are cut out.


This the last piece of Thermolam Plus.


I have this piece glued on, I will not cut the holes out on the last piece.


I've cut a large enough piece of fabric out for my back cushion.


Turn the fabric to the wrong side and place your pattern on the fabric and mark the holes.


My holes have been marked.


I have a tip for you, on a flat back cushion like this you can enlarge your pattern on the computer by a very small amount, maybe 5%.  This spreads the holes out and gives more fabric to be tucked into the dimples you are going to be making for the buttons to set into.  If you use more padding on the back cushion you would want more fabric to go into the dimples.  It's a little trial and error on just how much to enlarge.
On a curved back cushion, like in the first picture at the top you do not have to do this.  Mark the pattern on the fabric as is, the curve takes care of giving you extra fabric.


I use button hole or carpet thread to pull the dimples with.  You could probably use sewing thread just as well.


I double my thread and make a knot at the end.


Start the needle from the back of the back cushion.  Use the marks on the fabric to line up your needle.

Yes, the knot will go through the hole, it will catch on the Thermolam Plus.

Take a small stitch on the front and come back out at the back.


Go to the next hole in the back, insert on the mark on the fabric, take a small stitch and come back out  and on to the next hole.


Don't pull too hard, the dimple doesn't have to be deep.


I've sewn all of the dimples and I've gone back into the first hole and took another stitch.

Knot off and cut your thread.


Here is the front of the cushion with all of the dimples sewn in.


If I were making a chair I would be ready to glue the cushion into it now.


To make the buttons I use a leather punch.  I bought this at a hardware store, I know that Michaels also carries these.

I use white glue, too.  I want the card stock to stay wet for awhile and the white glue does not dry too fast.


I also use a double ball stylus.  I bought this one at Michaels.


I use craft foam to shape the buttons. This is also available from Michaels.


Apply white glue to a piece of card stock and press your fabric onto it.


I am using a contrasting fabric so you can see the buttons when I'm finished.


The leather punch is not designed to cut through fabric, it's not sharp enough and it's cutter presses against a flat metal surface.  The fabric isn't thick like a piece of leather.  A paper punch doesn't work.  The card stock and fabric are wet and  hard to cut out.

So what do you do . . . .


I place another piece of card stock on top of the fabric.  This gives a tiny bit of depth for the cutter to cut through and it works.  I have put the extra card stock under the card stock that is glued to the fabric but that is hard to separate after the circle is punched out.  If you don't separate the two pieces of card stock you run the risk of the button falling off because you didn't glue the button on, you glued the extra card stock on.

This does work, it just takes some practice.


Here are my circles setting on two pieces of craft foam.


I am using the small end of the double ball stylus to shape the circles into buttons.


The size of circle you cut is up to you.  For this tutorial I used the 1/8" cutter.


My buttons are shaped.  Leave them in the craft foam to dry.  It's important to let them dry.  You will be pressing them into glue and if they are not hard and dry they will loose their shape and you will have to start over.


There is one button.


Apply a dab of tacky glue into the dimple.


I have all of my buttons glued into the dimples of the back cushion.


O.K. so they aren't real buttons but I think they look great on a piece of miniature furniture.

I hope you are all getting outside, I really think winter might be over!!


If you have any questions please e-mail me at camceiling@frontiernet.net.

If you have pictures for the Follower's Gallery send them to camceiling@frontiernet.net.


Have fun, Expand on it, Make it better . . . . .

Just Keep Making Minis!!


Kris

P.S.  I'm sorry I forgot to put the reminder about sending in your photos of finished tutorials, please send me photos, the address is camceiling@frontiernet.net.

If you have any questions please e-mail me at the same address and I will do my best to answer them.