Gosh, this really started something. My husband started out as a carpenter, now with our mill we are more of custom architectural woodworkers. We build anything in your house to match what you all ready have. So . . . I know what particle board, ox board, MDF and all the rest is. I was thinking that the question was relating to mat board and possibly something like it called chip board, not anything made of wood. I have seen in scrap booking catalogs pre-cut shapes referred to as being from "chip board" which I thought was something like mat board, maybe not as refined, smooth.
Anything that is 1/16 inch thick, made from paper and can be glued and sanded would be find for the tutorials I make. I am not using wood. TTYL Kris

Learn how to make miniature dollhouse furniture, mini paper accessories and get techniques, tips and monthly tutorials.
Thursday, August 23, 2012
Saturday, August 18, 2012
CHIP BOARD VS. MAT BOARD
I've been asked about chip board. I have to admit I've heard of chip board but I don't think I have ever had any. I use mat board because it's 1/16 inch thick, if your chip board is 1/16 inch thick and it glues I would go ahead a use it. Will it sand? Will it take paint? If so, use it. I use what I have around the house for substitution. I think one of the great things about miniatures is that you use what you can find, it's all about substitution, if it works for you, use it.
Mat board is what is used to mat pictures with when they are framed, it's found in the framing department of Michael's or at a picture framer's. It comes in lots and lots of colors. You can also choose between white and cream for the inside color. That's for when the mat board is cut at an angle, you can see the inside contrasted with the surface color.
Mat board is what is used to mat pictures with when they are framed, it's found in the framing department of Michael's or at a picture framer's. It comes in lots and lots of colors. You can also choose between white and cream for the inside color. That's for when the mat board is cut at an angle, you can see the inside contrasted with the surface color.
Friday, August 17, 2012
OCCASIONAL TABLE TUTORAL - How to make a 1 inch scale occasional table with mat board.

This is the picture of the table that inspired me to write this tutorial.
I know this table is available in miniature for very little money. So, you might say . . . . "Why would I want to make one?"
Well, I would say . . . "Because I don't want to send off for one and wait for it, plus pay shipping." I don't know about you all, but I am always trying to find ways to save money when it comes to my hobby. I like to do more with less.
You can make one of these tables in a day from mat board and finish it the way you want. It's a good all around table that can be used for a night stand or end table. You can change the size and height and make it a coffee table.

I have taken a picture of the table before I put the finish on it with the Shabby Chic Bed, that's in the index on the left side of the blog.

Here's a close up. I plan to paint the table vintage green then winter white and sand down to the green for a shabby chic look.

Here are the pattern pieces. Copy these into a program that you can adjust sizes in. I have a 1 inch square in the corner for you. One inch is equal to 2.5 cm.
I would copy them onto card stock so you can trace with them. I would suggest you copy them onto copy paper and use a glue stick to glue the paper to the mat board, but the paper would add thickness to the finished pieces, so please don't do that.

I have my pieces cut out.

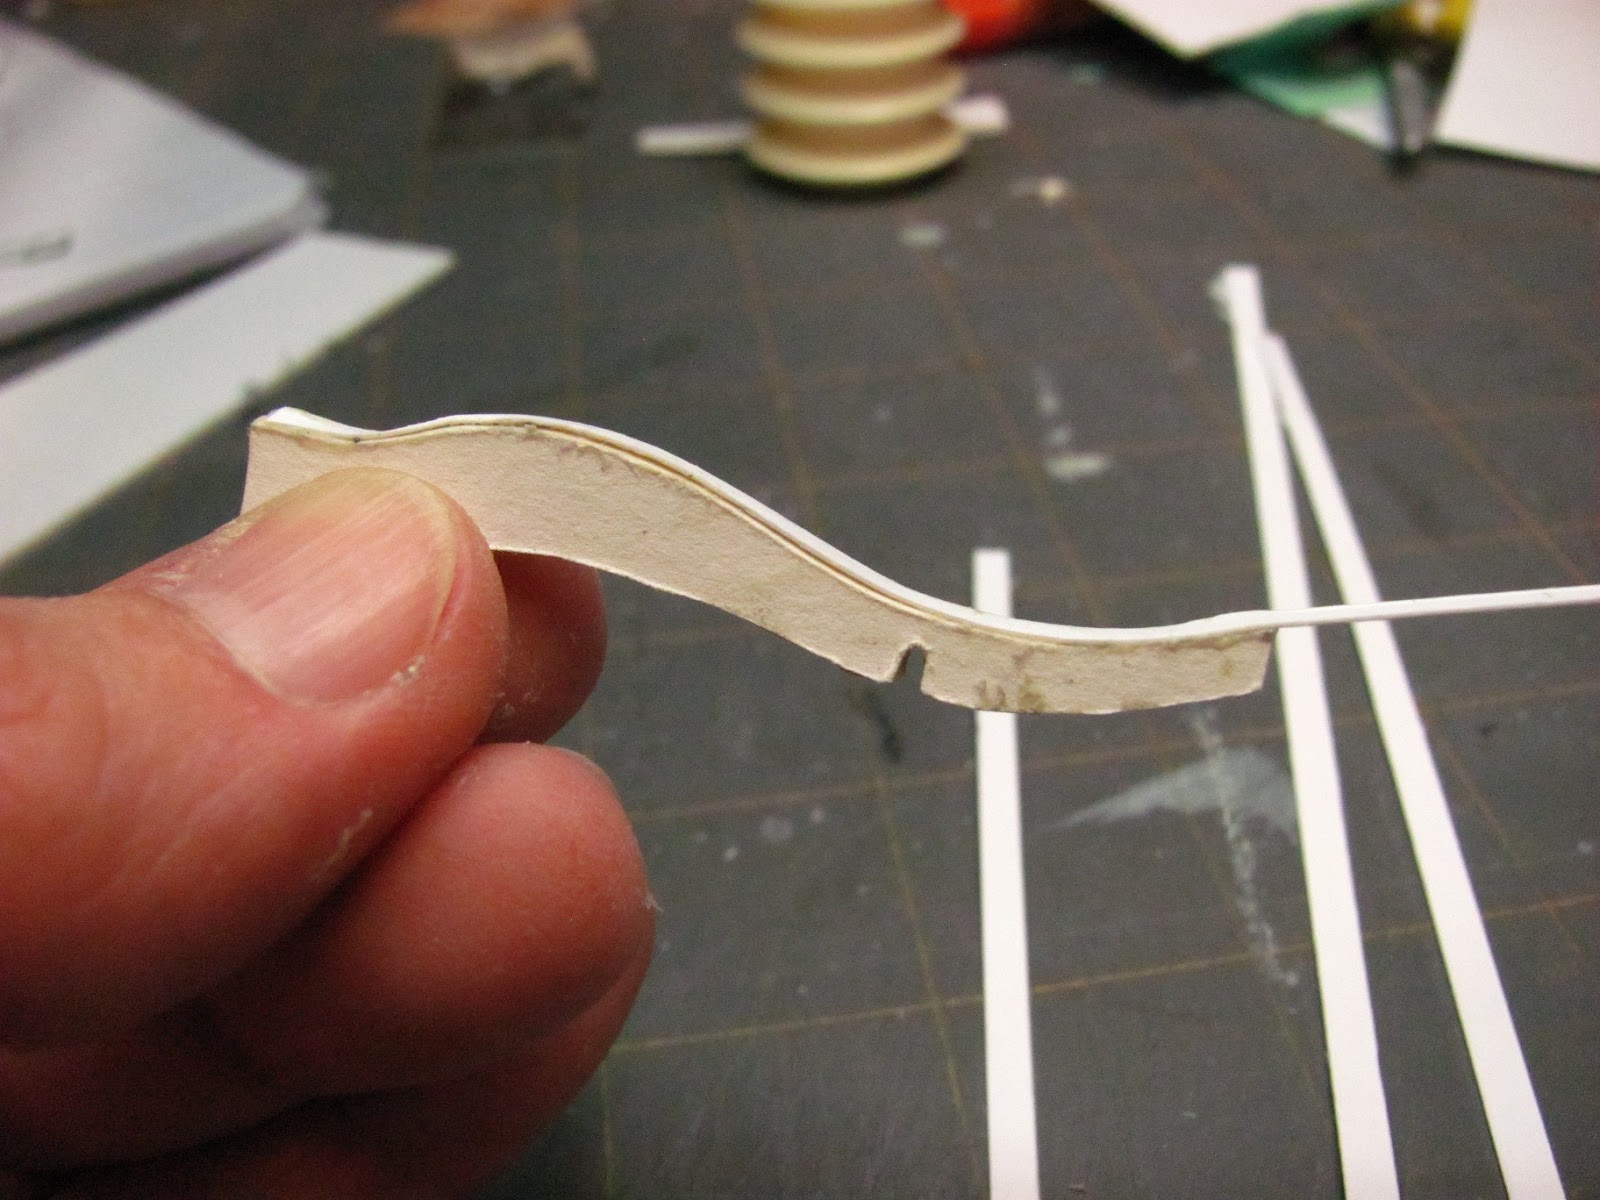
Let's start with the leg.
Keep your pencil sharp. The sharper the point on your pencil the closer you'll be to the size of the pattern.

"OMG! Look at how many legs she wants me to cut out!"
Yes, trace your pattern onto mat board 12 times. There are 3 pieces for each leg.

Put a new blade in your craft knife.
When you cut, cut ON your traced line.
Press lightly on your first cut.
Go Slowly, don't press hard. Pressing hard will tire your hands, may make you make a mistake or the knife may slip and you could cut yourself. Take care. You don't have to do this in one sitting, you know.

Here are all the legs cut out.

Here's my glue. It's yellow carpenter's glue or wood glue.

Apply the glue to one of the leg shapes, SMEAR the glue before you press the other leg onto it. Press the shapes together with some force, don't go crazy, but make sure the shapes are sealed together.

Glue three leg shapes together for each leg. Try to keep the front of the legs even.

All the my legs are glued together.

Trace the apron 5 times onto mat board.

Cut out the aprons and cut out the notches where the legs are glued into.

I've got all of the aprons cut out.

Glue the aprons together and press them together as you did with the legs.

Use at least 220 sand paper and sand the legs and the apron to even up the edges. Try not to change the shape just even up the edges.
We are going to veneer the edges with card stock.

Test the notch on the leg to see if one layer of mat board with fit in it.
If not, carefully cut out a little more from the top of the notch.

Measure the thickness of your leg.

Cut some card stock strips the width of your legs.
Using the wood glue, glue the card stock onto the face of the leg and trim off at the bottom.

Glue card stock onto the back of the leg.
Notice I haven't gluee any card stock at the top of the leg where it fits into the apron and no card stock is glued into the notch.
O.K., I got so excited that this was working out so well that I forgot to sand the edges of my legs. I had to sand them after I had the table glued together. I don't want you to do that. When the card stock is dry use some 220 grit or finer to sand the edges of the legs. Just soften the edges, don't round them off. Be careful and support the legs while you are sanding them.

Trace the shelf pattern onto mat board and cut it out.

Things are coming together, now.
Here are your legs and shelf ready to be glued together.

Using the wood glue, glue the legs onto the shelf at the corners.
Let this dry.

Since you have all ready done a dry fit with the legs in the notches this next step should work out well.
Apply the wood glue to the notches and with the apron on your table press the leg assembly into the notches. Make sure the legs are flat with the table top and pushed all the way into the notch.

My goodness, it looks like I was drunk when I cut out the apron layers!!
Anyway, so far, so good, huh?

Trace the table top pattern #1 onto mat board.
Cut it out.

Trace the table top pattern #2 onto mat board.
Cut it out.

We are making an "ogee" edge.
This is not the real way, the real way is to use a thicker piece of wood and use a router or send the wood through a machine called a shaper that will cut a decorative edge.
I want you to round the edge of the two oval table tops you've just cut out. Can you see how I've sanded the top edge off and left the bottom untouched. Try not to change the shape while sanding.

Center the smaller oval onto the larger one and glue them together.

Now, we are going to glue the card stock veneer onto the apron.
Measure the thickness of the apron.

Cut a piece of card stock that width.

Apply the wood glue to the sides of the apron between the legs and glue the card stock to the apron. Trim off the card stock between the legs.

Go around the apron gluing on 3 more strips of card stock covering the layers of mat board.
And boy, did I need to do that!!

Apply the wood glue to the top of the apron, SMEAR the glue out and around the top.
Turn the table top over, largest side up, (NOT like I have it in the picture) turn your table up side down and center the apron onto the top and press to glue. Check all around to make sure you have the top centered.

I'll post a picture when I get my table done.
A NOTE TO THOSE WITH A SCROLL SAW: This table has been made just as you would a wooden table. All that changes is that you would use the right thickness for the legs and apron and not do the stacking and gluing.
I am surprised myself by the way this table feels in my hands, it has heft and doesn't feel any different than a wooden one. So, miniaturists make this table and finish it using your imagination! This table can go anywhere in just about any era.
Getting back to my point at the beginning of the blog . . . After I tell people what I do and that I make this all from paper, card stock and mat board they will ask, "Why go to all that trouble using mat board? Why don't you use wood, I would want my furniture from wood." If my friend Mary is with me she tells them, "You can't tell the difference!" She's a good friend. And I would add, not everybody has the tools and wood to work with. Wood and tools can be intimidating. This is just mat board, mistakes can be made without losing much. There is always time to go on to bigger things, but I don't know if they would be better things. When you can make things like this with little investment, why stop?
As always,
Have Fun, Make It Better, Expand On It . . . . .
JUST KEEP MAKING MINIS!!!!
Subscribe to:
Posts (Atom)