Wednesday, January 18, 2012

PART FOUR, KITCHEN CABINETS MADE FROM MAT BOARD


Cut a strip of mat board 7/8" wide and at least 9" long.
I know my sink is wide, but that's up to me.  You can design your cabinets the width you need and the sink you need.
Cut 2 pieces a little less that 2-1/2".  The opening is 2-1/2", we need room for gesso and paint.  Don't cut more than a 1/16" less.  The sides are 1-7/16".  Glue the sides inside the back and front.


Cut a bottom to fit inside your sink.

Cut a hole for the drain.  Mine's 1/4".


Set your sink into the cabinet base.  If you need to trim the front edges of the cabinet on either side of the sink, try sanding the sink first to see if that will help.  If it doesn't carefully trim the sides of the cabinet where the sink will go.
If you've made the sink too small  you can "shim" out the front opening with narrow strips of card stock until the opening is right.  This shimming is perfectly acceptable it's done all of the time is full-size.
The sink should be level with the top edge of the cabinet.  If it's not you can add a shim to the shelf to level the sink.


Sand the top edges of the sink round, all the way round, taking off the two square edges.  Sand the front corners round.  I also sanded the bottom front edge a little.

Paint a layer of acrylic varnish on to seal.  Let dry.


Now, to make this mat board box look like porcelain.
I've used gesso for years to shape wood into porcelain or porcelain covered cast iron.


I've used a piece of mat board to apply the first layer of gesso on the sink.  If you have a spatula, use it.


Use a soft brush dipped in water to smooth out the surface as much at you can.

Let this first coat dry over night.


It's morning and my first coat is dry and it's got some cracking.  That's all right, we will fill them in.
You can sand some of the rough spots off.  I found using the soft wet brush while the gesso is wet is the best way to go, though.  Not so much sanding after the gesso is dry.


I've applied another coat with a flat stiff brush to add more gesso and fill the cracks. I am going to use the wet brush to smooth it out.

I am adding gesso to the inside corners and the seam where the bottom meets the sides.
Set this aside to dry.  You can add more gesso, smooth, let dry until you are satisfied with the surface.


While the sink is drying we will move onto the counter top.
I've got a 1/16" lip over the front, that's past the edge of the posts, so I am going to have a 1/16" past the sides.  I'm going to cut the bottom layer of mat board 6-1/8" x 2".  I want to make an ogee edge so I will cut the top layer 6" x 1-15/16".  Only need the ogee on the front edge.


Sand round 2 short ends and one long side, that's your front.  Glue the 2 pieces together keeping the un-sanded edges even and the small piece centered on the larger one.

*Note: I've been playing around with gluing mat board together and I think I've found something helpful.
When gluing two large pieces like the one we have here I used a DRY iron to set the glue.  Be sure your pieces are stuck together and all excess glue has been wiped away.  Set the iron to it's hottest setting and to dry, no steam, and press.  Don't slide the iron, that can shift the pieces.  I left the iron on for about 30 seconds, enough to get the heat through.  I took the iron off and then I pressed with a block of wood, I used my tailor's clapper, (I used to sew A LOT), until the mat board was cool, maybe a minute or so.  Seems to work well.


We need to cut out the hole for the sink.  Center the counter top on the cabinet base and mark where the hole is on the front of the counter top.


If you can put your sink into the base, set the counter top next to it and slide the sink out to match the front of the counter top.


Now, measure from the back of the cabinet base to the sink.
In this picture I've got my cabinet base on it's back to measure.  My back is slightly con-caved  and I want my cabinet to fit flat against the wall.

Looks like the sink is 3/8" from the back edge of the cabinet.


Draw your lines to cut on.


Cut out the hole.


Let's do a dry fit!


To fill gaps around the counter top glue on narrow strips of card stock.  Especially along the back where you can see the layers of mat board.  Paint will not cover that up.


*Note:  We've been layering mat board together to make ogee edges.  There's no reason not to try a couple of layers of card stock for a layer and make a different profile.  You can add different combinations of thicknesses to create new profiles.

PART FIVE, KITCHEN CABINETS MADE FROM MAT BOARD


I'm making a hole in the shelf to match the one in my sink.  We'll make a drain in the finishing part.


I've used Delta's PermEnamel Country Tomato for the base coat on the counter top.  I've sanded the first coat.
*Note: Be careful sanding.  Your counter top has a thin middle at the back where the sink goes in.  This is very easy to bend.
Apply another coat of base paint.  I sand with 400 grit paper.  I will apply at least 3 base coats.


I've got the last coat on the counter top.  I've buffed it with a wadded piece of brown paper.


I'm back at the sink.  This is my third application of gesso.  I will probably apply one more coat to smooth things out.

Lets review the sink and gesso.

The first coat I applied with a spatula or a strip of mat board, smoothed out with a wet brush, mine was a camel hair #4.  Let dry over night.
You can sand this coat if you want to when it's dry.
My next coat was applied with a stiff flat brush.  I pushed gesso into the cracks.  Again, I used a soft wet brush to smooth everything out.  I am painting the front, too.  Let dry.


The third coat I put the gesso on a plate and used the flat brush to bring water to the gesso, mix it a bit.  The consistency should be like thick paint.  Use the flat brush to paint and fill.  Use the soft wet brush to smooth.


 I am adding water to the gesso and I am painting the gesso on the sink, inside and on the front.  Paint the sides and a little of the bottom.

You can also mix your paint with the gesso and paint that on, it works well, too.

I should be finished with the fourth coat.  I'll let that dry over night.
I'll paint a couple of coats of Delta's Magnolia White, it's not white white, but not ivory.  I'll apply a couple of coats, sanding the front of the sink to make it very smooth.  To finish I'll use Delta's Perm-Enamel Clear Gloss Glaze.  I like it because it dries hard.  I apply a couple of coats, sanding the front smooth between coats.
With that, your sink should be finished.


I've placed a large box on my table, (where did she find the room in that mess?).
You will need a palette, toothbrush, and stick, maybe a popcicle stick and four colors of paint.  At least, I used four colors.  I used the Tomato Red, black, grey and mixed a not quite ivory.

You will want to practice on a scrap before you go to the counter top.  You can always re-paint the counter top if you don't like it.


Dip your tooth brush into the paint and draw the stick toward you to spatter the paint.

Play with it.


I've done my not quite ivory.


I've changed the position of the counter top and spattered my black and grey.
I've spattered the red, too.  That's to fill in where the other colors may be too much.


You can go back and add spots with a tooth pick or small brush.

Don't over work it, this supposed to be random.  Leaving it random works out much better most of the time.


Lookin' good.


Let the paint dry and then apply at least 2 coats of Perm-Enamel Clear Gloss Glaze.


After the clear coats are dry, sand using 400 grit paper.  I wrapped my sand paper around a wood block for flat sanding.
Be careful at the edges, if you do sand off your base coat, touch up, let dry and apply another couple of coats of the Perm-Enamel Clear Gloss Glaze.


We are applying a lot of coats of varnish because we want the top to be smooth.  When the paint was spattered on it left the surface pebbly. To smooth that out so it looks like granite we have to apply the varnish a couple of coats at a time and sand until the top is smooth.
When you are satisfied with the surface let the last coat dry.
When the last coat is dry use #0000 steel wool to buff the surface.  Use wadded brown paper after that.  That should give the surface the right patina for granite.

*Note: Watch out for the steel wool debris.  Mine fell to my table top and into the brush I subsequently used to put what I thought was going to be my final coat of varnish on my sink.  "Where did all those tiny bits of stuff some from?"  More painting.

PART SIX, KITCHEN CABINETS MADE FROM MAT BOARD


We are going to make the small crown moulding at the top of the upper cabinets.  I am showing one length being made.  You will need two.  Make the lengths at least 8" long.

Cut three strips of mat board 1" wide.

Glue two of the strips together.

Round off one long edge on each piece.


Cut the single layer 3/16" wide.  Set this aside.


Round off a long edge on the left over single piece.

Cut another strip that's 5/32" wide.

I am sorry about that measurement.  Keep your pencils and blades sharp.


Cut a strip of the doubled piece of mat board 1/8" wide.  That's on the right.

The pieces cut from the single piece are on the left.


 Glue the 5/32" piece onto the 3/16" piece.  Those are the two single layers.


Now, glue the 1/8" wide piece, that's the mat board that's been glued double, onto the 5/32" piece.
Keep the back flat, you should be able to see four layers on the back.  If you don't, reposition the pieces.
Can you see the shape?  See what you can do with mat board!!


Glue to strips of card stock together.

Cut a strip 1/4" wide.


Glue the card stock strip to the back of the assembly you have glued together.
Make another length.

Isn't this nice?  Think about it, you could make a bigger crown mould, you could make base board, too.  I'm not saying to do a whole doll house, but certainly room boxes or small projects.


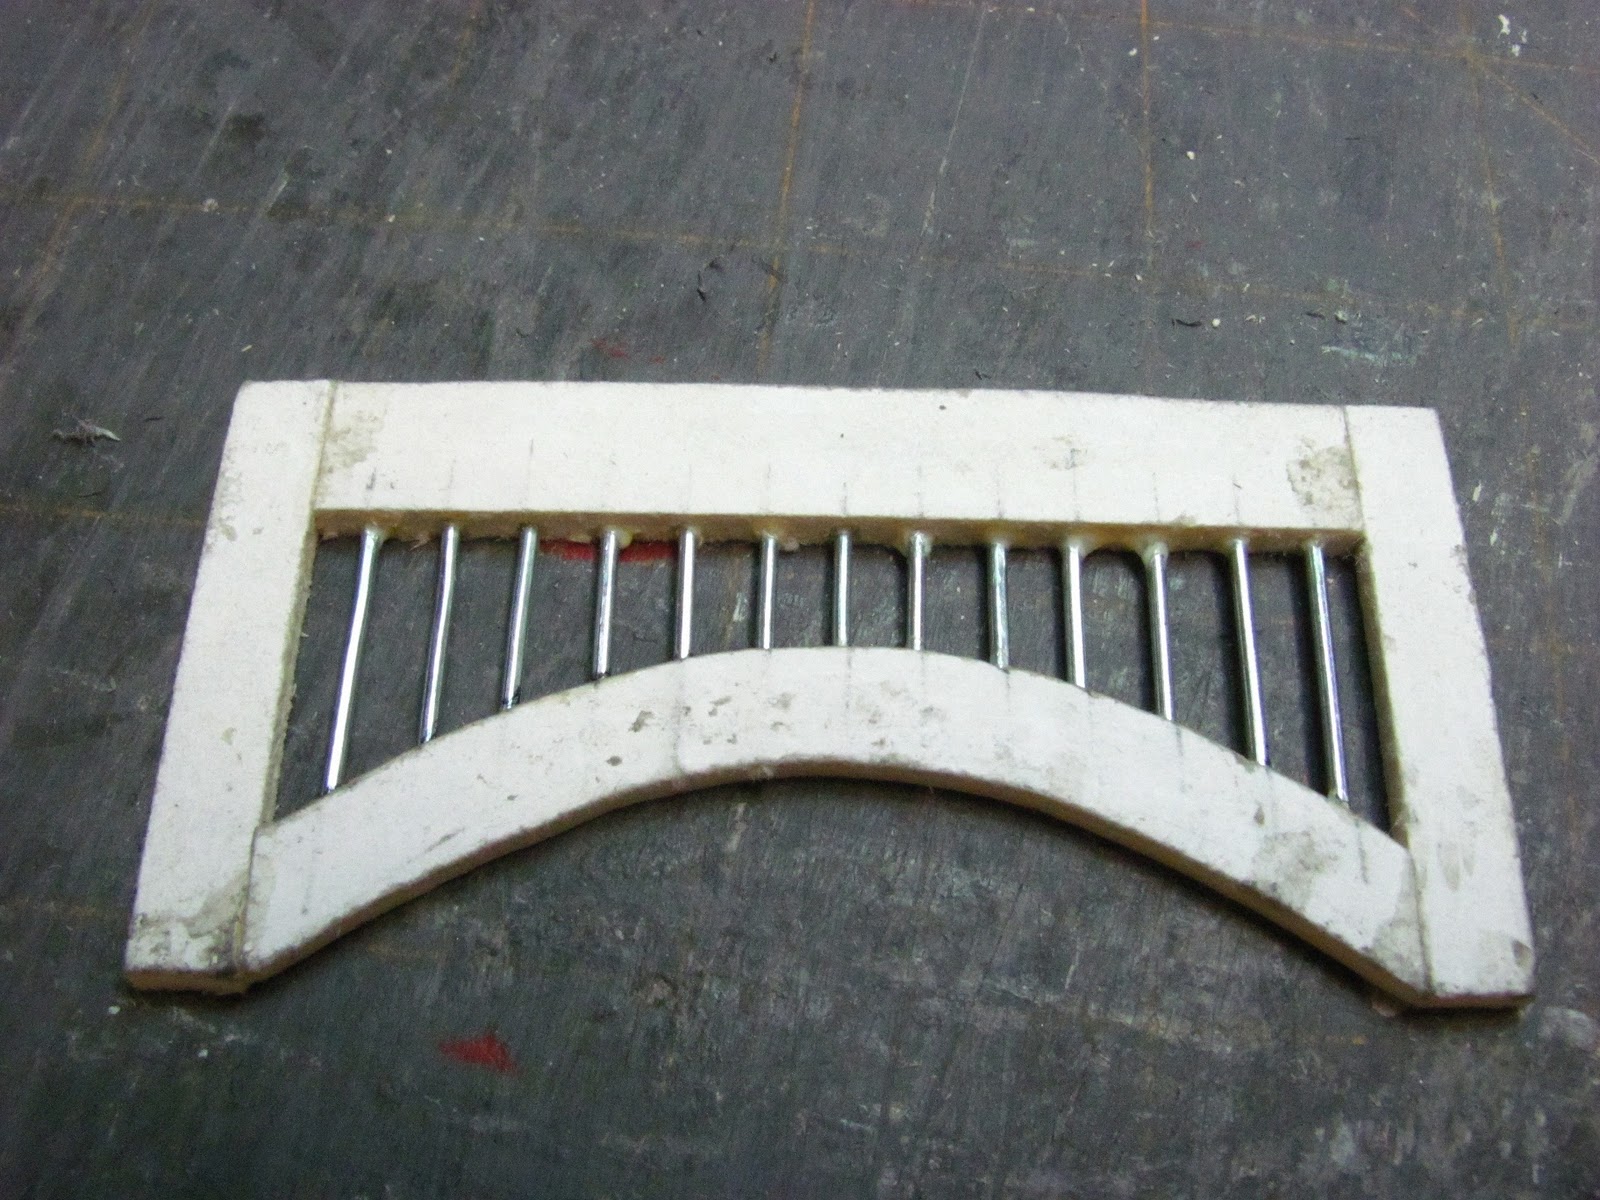
This is a picture I drew of the valance that goes over the sink.
The top is 3/8" wide and 2-1/2" long.  You draw this out, too, you are going to make a pattern.  The sides are 1/4" wide and 1-1/2" long.  Use a compass to draw the curve.  I've left 1/4" of space in the center at the top and 3/4" at the sides.


Cut from mat board 2 pieces 3/8" x 2-1/2", glue these together.  Cut 4 pieces 1/4" x 1-1/2", glue these together, 2 each.


Go back to your pattern and cut out the curve.


Use this pattern to trace onto mat board your curved piece.

Cut out 2 and glue them together.


Glue the top and sides together.

Mark the center and mark 3/16" on either side and continue marking 3/16" until you have 13 marks.


To transfer your marks slide the curved piece into the valance.  Use a square or ruler to transfer the marks.


Use a "T" to make holes in the center of the mat board.  This will make it easier to start your drill bit where it should be.  Do this for the top and the bottom curved piece.
For the spindles we are going to use 18 gauge bright florist's wire, that's the unwrapped silver colored kind.  I used tooth picks to try this out but they were too big and klunky looking.
It's easier to start with a small bit and work up to the size of bit diameter you need for the wire.  When you are drilling, squeeze the mat board together.


Cut the wire at about 1-1/4" and glue into the top piece.  I used wood glue for this.  Once the bottom is glued in the pieces have no where to go.
Slip your bottom in, keep it even with the bottom of the sides.
Use a marker to trace where the top of the curve is.


Trim the wire leaving a little extra to go into the bottom piece.


You can dry fit and if all is well glue the wires and the sides together.

Your valance is done.


We are making 2 upper cabinets.

Cut 2 pieces of mat board 1-1/2" x 2-3/4".  These are the cabinet faces.

Measure and mark from the outside edges 1/2" down from the top, one short side and 1/4" from the other 3 sides.


Cut this center out.


The sides are 15/16" x 2-3/4", cut 4.

Glue the sides onto the fronts.


The sides are glued to the back of the fronts, see how the cut side of the front is showing.


The backs are 1-3/8" x 2-3/4".  Cut 2

Glue these between the sides.


Cut the bottoms and tops 7/8" x 1-3/8", cut 4.

Glue the tops and bottoms into the
 cabinets.

*Note: Upper cabinets are usually a foot deep, 1 inch to us.


The bottom layer of the doors are 1-1/4" x 2-1/4".  Cut 2.

The top layer of the doors are 1-1/8" x 2-1/8".  Cut 2.

Measure and mark 3/16" in from all four edges on the 4 pieces you just cut.


Use an oval template to mark a curve on the 1-1/8" x 2-1/8" pieces.

Round using sand paper all four of the edges on all four pieces.


Cut the center out of the layers.


Center and glue the smaller layer, the one with the curved top, onto the larger bottom layer.

These are your upper cabinet doors.  To finish these we will glue in some acrylic and then some pretty curtains.


Hey, guys, I'm worn out!  Next month I'll write about how I finished the cabinet.  I'll show you how I made the hardware, too.

Until next month,
HAVE FUN, EXPAND ON IT, MAKE BETTER . . . . . . JUST KEEP MAKING MINIS