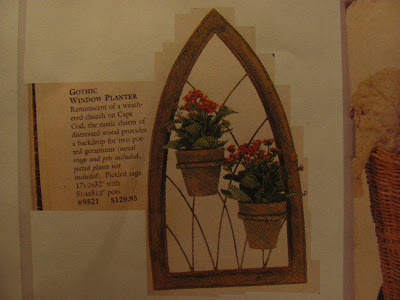
I saw this in a catalog and thought it would make a quick and easy tutorial for all of you.
I am using covered wire, 26 gauge. This is what I have on hand. I think you could probably use other size wire, what you have on hand. It doesn't have to be covered wire either.
Since I am using covered wire I am coating it with white glue to seal the fuzzy surface. Set that aside to dry.
For the rest of the tutorial I am using wood glue.
Use the instructions from the "Things to do, Things to see" list to resize the patterns that Nancy drew for us. Thank you, Nancy. Print the patterns onto card stock.
Cut out the two flower pots. Wrap the card stock around a pencil to make them easier to glue together.
Glue the pots together over lapping to the line.
Cut out 4 rims, 2 rims per pot.
Glue the first rim on, trim so that the edges meet.
Glue the second rim over the first. Trim the edges to that they meet, also.
Apply glue to the bottom of the pot and set it onto a scrap of card stock. Let dry.
When the bottom has dried trim off the extra card stock.
Cut out the out frame pattern and trace onto mat board. Transfer the lines, also.
Keep the card stock pattern for the outer frame. We will use that later.
Cut out the outer frame.
Cut out notches on the lines you transferred. These notches will hold the wire. Don't cut through the mat board. Just cut deep enough to hold the wire.
The notches are cut.
The notches at the bottom are wider. They will hold 2 wires.
Fitting the first wire and marking the length with a pencil.
Cut the wire to size.
The wire has been cut and glued into place.
I've marked and cut all the wires on the left side and have begun the first one on the right.
I'm using a piece of 1/2 inch dowel to make the holder for the flower pots. You may use anything that you have on your table that will make a circle that your flower pots will fit into.
Wrap the wire around the dowel once. Twist once and leave the wires like mine.
Showing you the twist.
The pot holder sits on the last wire going to the left. Fit and mark your wire. Cut the wire and glue it into the frame.
Mark the next wire. Cut the wire and glue it into the frame.
Wrap the last wire around your form. Measure and mark your wire.
Do you see where the pot holder is? It is between the third and fourth wires on the left.
Cut your wire and glue it in.
I'm painting the pots and the wire.
Get the card stock pattern we used earlier.
Glue the card stock pattern onto the mat board outer frame to cover the wire and notches.
Cut out the inner frame pattern and trace onto mat board.
Cut out the frame. Don't cut out the center, yet.
Use sandpaper, I used 180 grit, to sand the top edge round.
The top edge has been sanded round.
I've cut out the center.
Glue the inner frame onto the outer frame. Try to leave an equal amount showing all around.
I've left my planter pretty plain with only painting a couple of layers of acrylic craft paint.
You could seal this and apply a dirty wash to age the surface. You could also make the pots look mossy.
I have a tutorial for Geraniums. Look in the "Things to do, Things to see" list, Rusty Pan of Geraniums.
If you have any questions or pictures of finished tutorials please send them to:
camceiling@frontiernet.net
I haven't said this in a while, thank you all for following my blog. I really appreciate all of you.
Have Fun, Expand on it, Make it better . . .
Just Keep Making Minis
TTUL, Kris


