What's doors without windows?
Since I showed you how to make doors last time I thought I would show you how to make a simple window this time. Remember, once you know how to make the window you can change the measurements to suit your needs.
These are some windows I am making for a kitchen I am making.
A note to Chris . . . . I will make the wringer washer in the next tutorial. I had these planned for July. Chris of Chrispy Critter sent me a wonderful way to make an old wringer washer and I am going to share that with you next time.
This is the kitchen. I used 1/2" foam core for the walls. I used toothpicks to "dowel" the walls together and the walls to the floor.
My husband supplied the flooring for me.
I've been painting, sanding, painting, sanding, painting, sanding, . . . . .
I've slipped my finished windows in. I don't have the apron, (that's a piece of casing that is put under the sill) because these windows are over the kitchen counter.
There's a half round window that will be in the center.
On to our window.
I checked with the Hobby Builder's catalog and there were different sizes of window openings. I chose 2 15/16"" x 5 1/4". I rounded off the measurements.
I drew that on a piece of paper.
I know the picture says 2 7/8", it's wrong.
I have now drawn the frame, that's the 1/8" lines I added to the opening.
Notice that the sides go all the way to the top and the top fits between the sides.
I've added another line representing the sill at the bottom of the drawing.
I've added this picture of my little paper cutter. Paper cutters with a sliding cutter are available in larger models and I recommend the larger models if they have some kind of a "stop" or good markings to measure narrow strips. A "stop" would be good so that you could fix it to cut the same width over and over.
The cutter doesn't cut through but I can finish cutting through with my craft knife.
We are going to build the frame first.
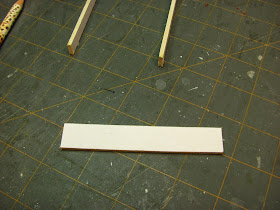
Cut strips of mat board 3/8" wide. I've cut 4 that are about 18" long.
I cut my strips with my little table saw from Micro Mark. You can use a larger paper cutter with a sliding cutter as I showed above or use a mat board cutting system. I have seen mat board cutting systems at art stores or arts and crafts stores like Micheal's.
Use yellow carpenter's glue to glue one piece onto the other. I had 4 pieces of mat board, now I have 2 pieces that are double thick.
I've measured and cut two pieces 5 1/4" long.
If you are doing multiple windows it's very important that they are all the same size. Make some sort of jig that allows you to make the same cut over and over again. Just measuring, marking and cutting over and over won't be good enough. There will be slight differences that will add up to different window sizes.
That sounds like another tutorial, doesn't it?
Cut the top 2 5/8" long.
Use yellow carpenter's glue to glue the top between the sides.
Showing a picture of the top between the sides.
I've added more to the drawing.
I've divided the frame in half between the top and the sill.
Centered a 3/16" wide piece on that center mark. Drew another 3/16" wide piece at the top and a 1/4" wide piece at the bottom. For the sides of the windows I drew more 3/16" wide pieces.
I also drew the sill and I will explain that now.
In the door tutorial I explain how to make simple casing, review that to make the casing for the window.
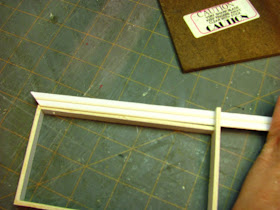
Set the casing onto the frame, set the edge on the second piece of mat board leaving a 1/16" showing, that's called the "reveal".
Measure from the inside of the frame to the outside edge of the casing, also add an 1/8" so the sill will extend an 1/8" beyond the edge of the casing. I couldn't show me measuring because I had to hold the camera.
My sill is going to be 5/8" wide. Cut 2 pieces of mat board that width and 4 1/2" to 5" long.
Glue those two pieces together.
I have the sill cut to length.
When I measured the width of the casing added onto the frame I added an 1/8" extra to extend beyond the casing.
I doubled that measurement, 2 sides, and added that to the width of the opening between the long sides of the frame, 2 5/8".
All that adds up to 3 13/16".
Do you remember how to find the center without dividing?
For this piece I measured from each side 2" toward the center and made a mark.
Now, you can divide that distance by eye or you can measure with your ruler to mark the center.
From the center measure toward the ends 1 5/16" (that's half of 2 5/8"), and mark.
Measure 3/8" from one long side, that's the depth of the frame. Do this at the 1 5/16" marks at each end.
That should leave you with a 1/4" to the other edge of the sill. Draw a line to the ends of the sill.
The "X's" are what you will cut out, that's waste.
I've got the sill cut out.
Glue the sill into the bottom of the frame, use the yellow carpenter's glue.
I'm using my Chopper again for the mitres.
I start by cutting a 45 degree angle on one end of my casing.
For the length I place the mitred end at the top, leaving a 1/16" on either side of the cut. Remember the "reveal"?
Now, mark the casing at the bottom on the top of the sill.
I cut another the same length.
This is where cutting multiples comes up again.
Figure the length you need, cut those strips and then just cut the mitres on one end one after the other, all the same size.
Showing what the casing looks like at the back.
Some days I'm a whiz at cutting this piece. You know, I had to cut this 7 times for the kitchen above and didn't have to redo one cut! For this tutorial I had to cut this piece 3 times.
Measure from the tips of the casing . .
Or
Turn the frame over and place a strip of casing that's all ready got one mitre cut and draw a line where the piece ends at the other side.
Cut on the line you made.
This is another note about cutting multiples. When you have the right measurement cut the strips, both ends will have straight cut, then you will cut the mitres on each end.
So, I've glued the third piece into place.
That's why when you make casing you make extras for the days you just aren't going to be a whiz at cutting mitres.
This is a piece of acrylic, it's a 1/16" thick. I buy poster frames from Wal-Mart for this stuff. I can score it with my craft knife and brake it apart on the line I scored. I cut the plastic covering to get it apart. Don't strip off the plastic covering. Acrylic is very unforgiving, leave it on for protection against marks, glue and paint.
Score the acrylic the width of the opening of your frame, 2 5/8".
I ran my craft knife over the line 4 or 5 times, then I bent the acrylic and it broke on the line. I set it back down to cut the plastic covering with my craft knife.
I measured my drawing for the height of the window.
We are going to build the window onto the acrylic.
Cut two pieces the same size.
Do a trial fit, trim if necessary. The acrylic should be snug.
I've cut strips of mat board 3/16" wide and 1/4" wide.
Cut enough for both sides of the window.
I am using tacky glue to glue the mat board onto the plastic covering.
Lay the 1/4" wide piece onto the bottom of one of the pieces of acrylic and mark.
Cut the mat board to that length.
I've got one side glued on and I have applied glue to the other side of the acrylic.
I know I am gluing to a plastic covering, not the acrylic. By the time you have all the mat board glued on, you have painted the window and you have glued the window into the frame those pieces of mat board aren't going anywhere.
Showing how the acrylic is sandwiched between the mat board.
I've glued on a 3/16" strip to the top of the acrylic and now I am marking for the sides. The sides will use the 3/16" strips, also.
When you apply the tacky glue make sure you apply the glue onto the edge of the previous strip so the pieces of mat board are glued together.
The bottom sash is done.
This is the only one that has the 1/4" strip of mat board at the bottom.
This is the top sash done, it uses only 3/16" strips all around.
Glue the top and bottom sashes together with yellow carpenter's glue. Overlap the top of the bottom sash onto the bottom of the top sash.
The bottom sash should be in front of the top sash.
Do a trial fit to see if it all fits as it should.
I paint my jamb separately from the sashes. I paint 2 coats and then sand using 220 grit sand paper, paint again, sand with 300 grit and paint a finish coat. Use your craft knife to cut at the sides of the mat board around the sashes. You will probably have to run the knife a couple of times, then carefully lift a corner of the protective plastic and peel it off. I then glue the sashes into the frame.
Measure the width of the window from the outside edge of the casing to the other outside edge of casing, on this window that's 3 9/16". Cut a piece of casing that length. After you have glued the window into your wall glue the strip of casing to the wall right under the sill, that's the apron.
I don't usually do houses so I don't have to worry about the other side of the window but it will be finished just like the inside for a frame house with wood siding. A brick house won't have the apron under the sill.
If you have any questions e-mail me at: camceiling@frontiernet.net
If you have pictures of your finished tutorials send them to the address above.
Have fun, Expand on it, Make it better . . . .
JUST KEEP MAKING MINIS
TTUL Kris


